


29
INDEXPreparations (Setup)Preparations (Setup)
Adjusting picture quality
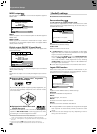
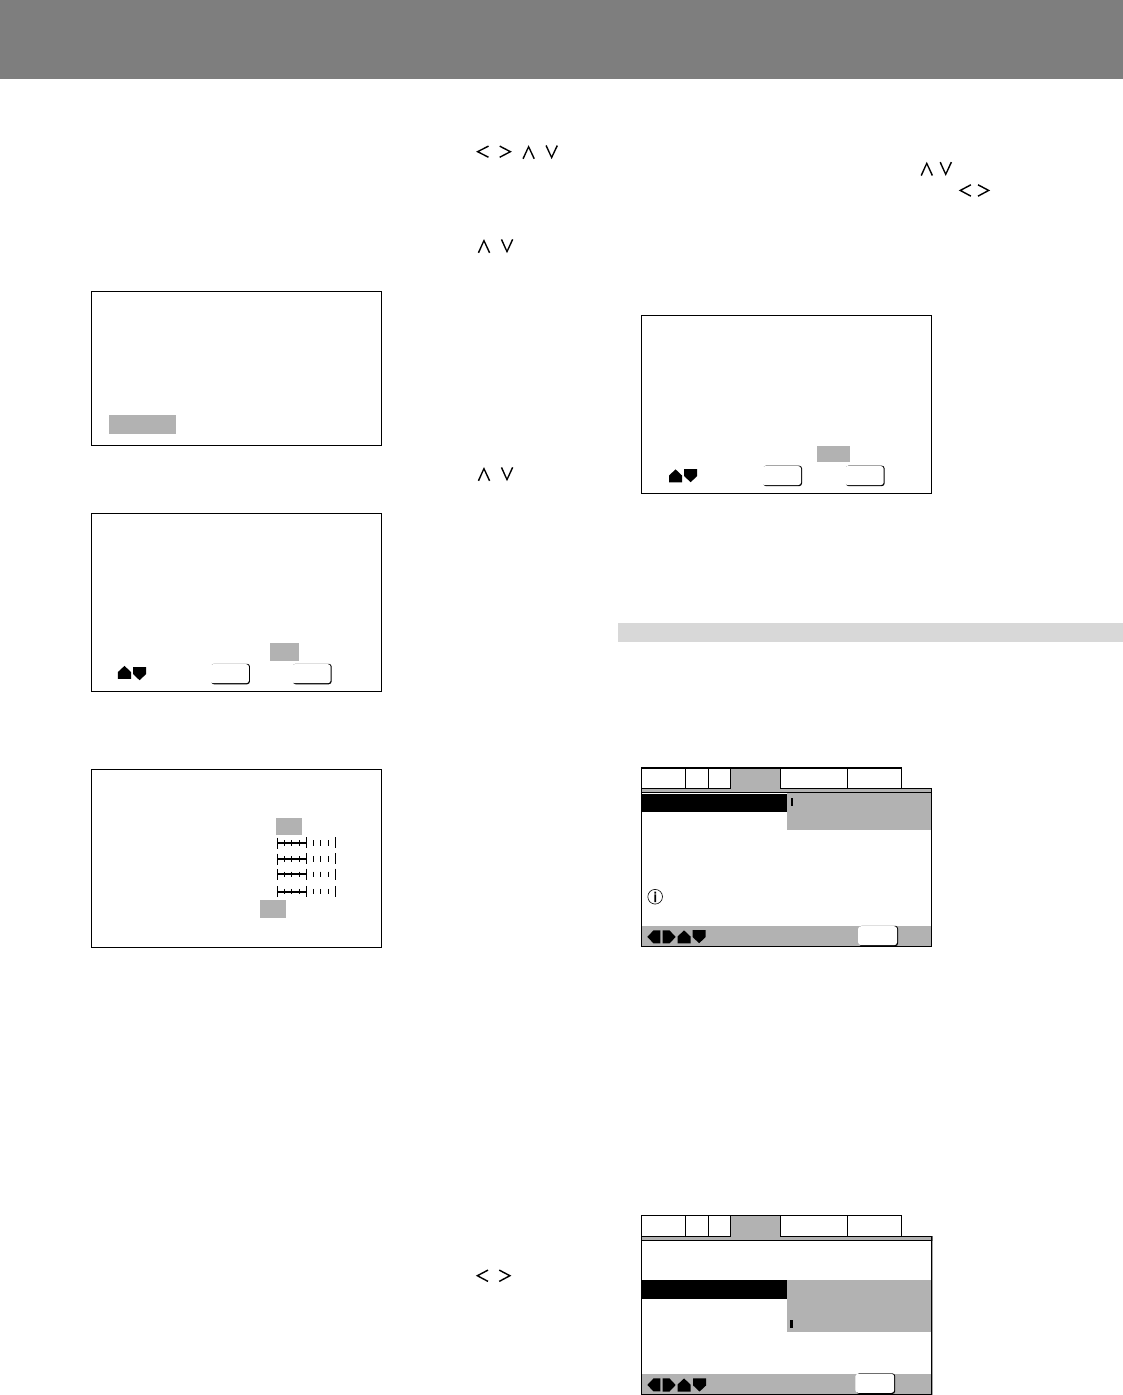
1. Use the four sides of the cursor button ( / / / )
to select [Video2] \ [Video Adjust] \ [Start],
then press the ENTER button.
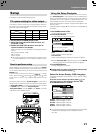
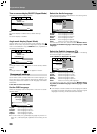
The Picture Quality Controls menu will appear.
2. Use the cursor button’s up/down sides ( / ) to
select [Video Setup] and press the ENTER button.
Video Memory Select
Video Setup
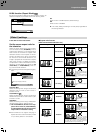
3. Use the cursor button’s up/down sides ( / ) to
select the item you wish to adjust.
DISPLAY
ENTER
Fine Focus On Off
Move
Select
Check
When the DISPLAY button is pressed, a submenu list of the
selected adjustment items will be displayed. Press the DIS-
PLAY button once again to return to the previous menu.
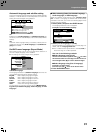
Memory
Fine Focus
Contrast
Sharpness
Chroma Level
Hue
On
Off
soft
fine
min
max
min
max
green red
Off 1 2 3
Fine Focus:
Set to [On] to reproduce high-resolution images.
Contrast:
Use to adjust the ratio between the brightest and darkest parts
of the image.
Sharpness:
Use to adjust the image brightness with respect to the middle
frequency range. This function is disabled when [Fine Focus] is
set to [On].
Chroma Level:
Use to adjust the depth of color. This function is particularly ef-
fective when watching heavily colored animations.
Hue:
Use to adjust the red-green balance.
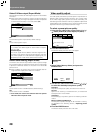
4. Use the cursor button’s left/right sides ( / ) to
adjust the selected item’s level.
When setting [Fine Focus], select between [On] or [Off].
5. Repeat steps 3 and 4 for all desired setting items.
If you wish to record the selected settings in memory, use
the cursor button’s up/down sides (
/ ) to select [Memory],
then use the cursor button’s left/right (
/ ) sides to select
[1], [2], or [3] to record the combination of settings in the cor-
responding memory space.
• If a combination of settings has previously been memo-
rized in the selected memory space, the previous settings
will be overwritten (erased) by the new settings.
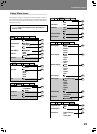
DISPLAY
ENTER
Memory
Move
Select
Off 1 2 3
Check
6. Press the ENTER button.
The Picture Quality Controls menu will close.
• The effect of picture quality control changes may not appear
as distinct with some DVDs and on some television sets.
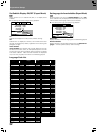
[Video2] settings
¶ See P.24 for menu instructions.
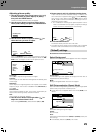
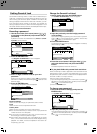
Select Background
Select the kind of background that appears when disc is stopped.
—
SETUP
Video2
A2
Language
General
Audio1
V1
Exit
Move
Background
Video Adjust
Pioneer Logo
Black
Put Background Selections
Pioneer Logo:
The Pioneer Logo mark appears as background when disc is
stopped (factory default setting).
Black:
Background appears black when disc is stopped.
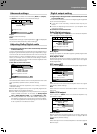
Still Picture selection (Expert Mode)
Use to eliminate image shaking when viewing still images (DVD
pause mode), and produce a clearer picture.
¶ Some discs may not appear clearer even when [Field] is se-
lected.
—
—
Video2
A2
Language
General
Audio1
V1
Exit
Move
Background
Video Adjust
Still Picture
On Screen Display
Angle Indicator
Pioneer Logo
Field
Frame
Auto
SETUP
Field:
Eliminates shaking during still images.
Frame:
Normal mode.
Auto:
Switches automatically between [Field] and [Frame] (factory de-
fault setting).
¶ Automatically defaults to [Auto] in DJ mode.