25
Preparations (Setup)Preparations (Setup)
Advanced settings
The Setup Menu includes two mode levels, [Basic] and [Expert];
the [Expert] mode allows more advanced settings.
—
—
General
A2
V2
Language
Audio1
Video1
Setup Menu Mode
Setup Navigator
Parental Lock
Expert
Basic
Off (us)
Change menu mode
SETUP
Exit
Move
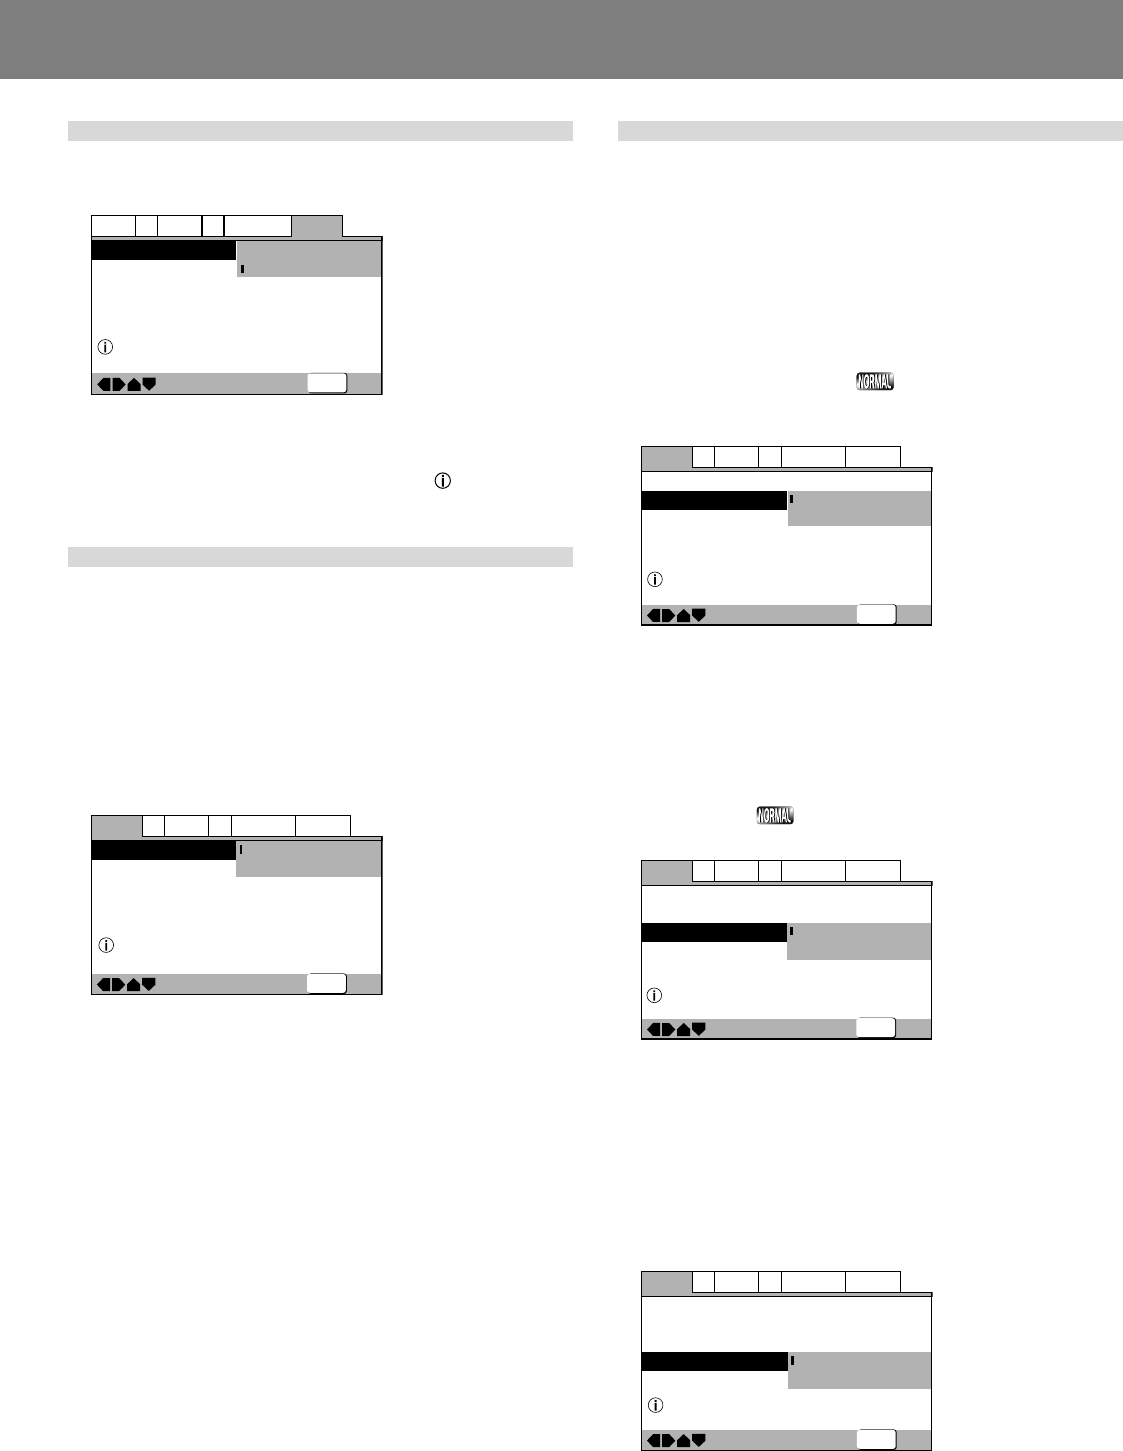
Expert:
Displays advanced settings.
Basic:
Displays basic settings; simple explanations (
) are displayed
for the items selected (factory default settings).
Adjusting Dolby Digital audio
★ Digital output during DJ mode is automatically converted
to linear PCM only.
This item allows adjustment of the dynamic range of digital sound.
By adjusting the audio DRC (dynamic range compression), large-
volume sounds can be attenuated and low-volume sounds can
be enhanced for a variety of playback effects. This setting is ef-
fective, for example, when it is difficult to hear dialog on a televi-
sion program, or when you do not wish to disturb neighbors while
watching movies late at night.
¶ See P.24 for menu instructions.
—
—
— 96kHz 3 48kHz
— MPEG 3 PCM
V2Video1
General
A2
Language
Exit
Move
Audio DRC
Dolby Digital Out
DTS Out
96kHz PCM Out
MPEG Out
Audio1
Off
On
Off
Dynamic playback at low volume
SETUP
Off:
Cancels Audio DRC. Allows maximum audio presence when used
with high-fidelity speakers (factory default setting).
On:
Suppresses loud sounds (explosions, etc.) making it easier to
understand dialog.
¶ Audio DRC is supported only when using Dolby Digital audio.
¶ Some discs may produce less effect.
¶ Audio DRC is also applied to audio produced from the digital
output (coaxial) connectors. In this case, set [Dolby Digital
Out] to [Dolby Digital 3 PCM], and set [Digital Out] to [On].
¶ The effect produced with Audio DRC differs depending on
the speakers used and the volume setting of the AV amplifier.
Turn the setting ON/OFF while adjusting your sound volume
so as to produce most effective results.
Digital output setting
★ Digital output during DJ mode is automatically converted
to linear PCM only.
This item allows selection of the kind of digital signals supported
by the connected amplifier.
¶ If this item is set incorrectly, unwanted noise may be pro-
duced.
¶ Consult the Operating Instructions for your amplifier when
making this setting.
¶ See P.24 for menu instructions.
Dolby Digital output
Set to [Dolby Digital 3 PCM] when the connected amplifier
does not supports Dolby Digital audio.
—
—
—
—
V2Video1
General
A2
Language
Exit
Move
Audio DRC
Dolby Digital Out
DTS Out
96kHz PCM Out
MPEG Out
Audio1
Off
Dolby Digital
Dolby Digital 3 PCM
96kHz 3 48kHz
MPEG 3 PCM
Change Dolby Digital output mode
SETUP
Dolby Digital:
Setting for amplifier or decoders supporting Dolby Digital audio
(factory default setting).
Dolby Digital 3 PCM:
Dolby Digital signals are converted to linear PCM for output. Se-
lect this setting when the connected amplifier does not support
Dolby Digital audio.
DTS output
Set this item to [DTS] when the connected amplifier supports DTS.
—
—
—
—
V2Video1
General
A2
Language
Exit
Move
Audio DRC
Dolby Digital Out
DTS Out
96kHz PCM Out
MPEG Out
Audio1
Off
Dolby Digital
Off
DTS
MPEG 3 PCM
Change DTS output mode
SETUP
Off:
Select this item when the connected amplifier does not support
DTS (factory default setting).
DTS:
Select this item when the connected amplifier or decoder sup-
ports DTS.
96kHz PCM output
Set this option to [96kHz] when the connected amplifier sup-
ports 96 kHz output.
—
—
—
—
SETUP
V2Video1
General
A2
Language
Exit
Move
Audio DRC
Dolby Digital Out
DTS Out
96kHz PCM Out
MPEG Out
Audio1
Off
Dolby Digital
Off
96kHz 3 48kHz
96kHz
Change 96kHz output mode
96kHz 3 48kHz:
96 kHz signals are converted to 48 kHz for output. Select this
option when the connected amplifier does not support 96 kHz
signals (factory default setting).
96kHz:
Select this option if the connected amplifier or decoder supports
96 kHz output.


