


13
13
RQT8164
ENGLISH
12
RQT8164
Using the transmitter and headphones
12
Before using the transmitter, read [Connections]( pages 9-11) and ensure that it is connected
correctly.
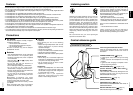
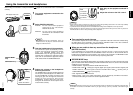
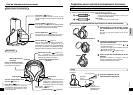
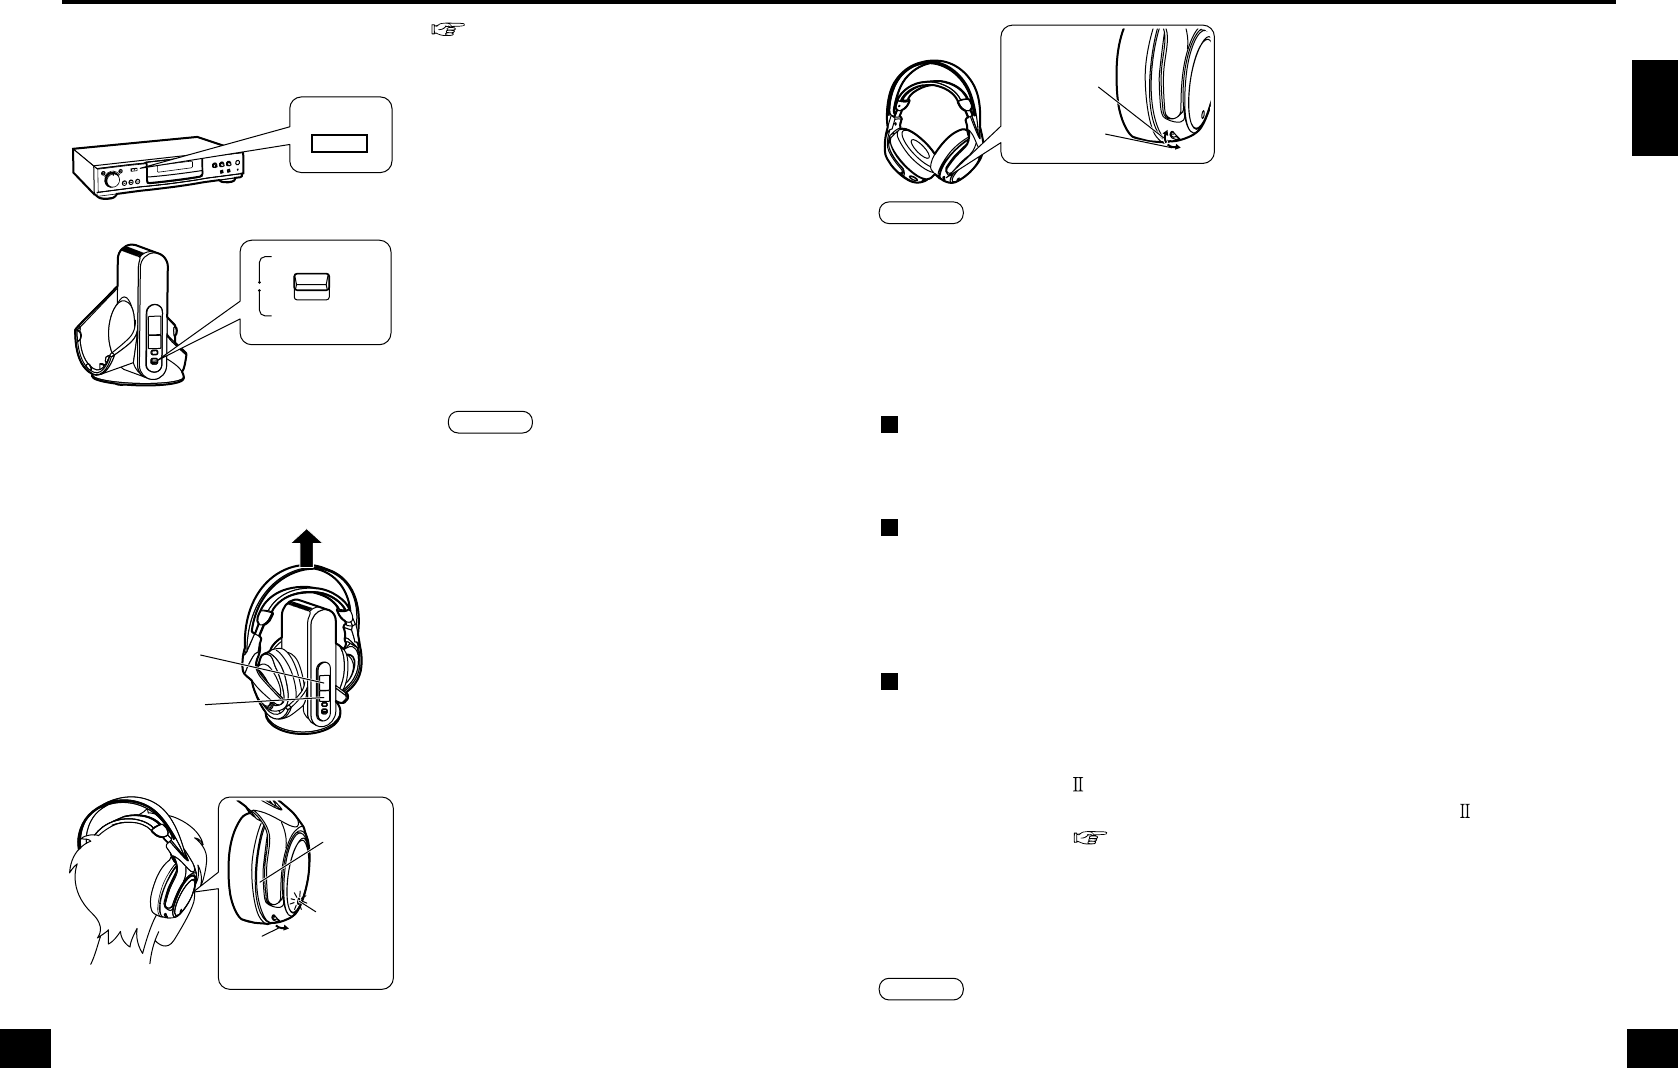
1
Turn on the equipment connected to the
transmitter.
3
Take the headphones off the transmitter.
The transmitter’s power automatically turns on
and the infra-red signal transmission window
lights. The DECODE MODE lamp and
SURROUND lamp will light approximately 5
seconds later to indicate the audio signal being
input from the connected AV equipment and the
mode selected with the SURROUND button.
4
Reduce the volume on the headphones
and then put them on.
The POWER lamp on the right housing glows red
and the power automatically turns on. Make sure
that the headphones are facing so that the right
housing (R) goes over the right ear and the left
housing (L) over the left ear. Then put the
headphones straight down onto your head.
Doing this will ensure that the auto power on/off
function works correctly.
POWER
2
Select [DIGITAL/ANALOG].
DIGITAL :To hear sound from equipment
connected to the transmitter’s
DIGITAL IN terminal.
ANALOG :To hear sound from equipment
connected to the transmitter’s LINE
IN terminal.
DIGITAL
ANALOG
• With dual sound sources (MAIN/SUB), select the
desired sound on the player or television connected
through the LINE IN terminal.
NOTE
5
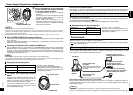
Start play on the equipment selected in
step 2.
6
Adjust the volume on the VOL control.
• When watching movies, be careful not to turn up the volume too high during quiet scenes. The movie may suddenly
switch to a very noisy scene and you could damage your ears.
• If you disconnect the AC adapter from the transmitter before taking off the headphones, there may be static.
• When adjusting the volume be careful not to cover the infra-red signal sensor with your hand. This may cause the
MUTING function to come on thus preventing volume adjustment.
• When any function other than [PLAY] -such as fast-forward or rewind -is selected on the equipment connected using
the DIGITAL IN terminal, the DECODE LAMP may not light correctly. If [PLAY] is selected, it will however light
correctly.
Time required for mode changes
The actual time required for the unit to change to a particular mode after it has been selected using
the slide switch on the transmitter, may vary between individual modes. This is due to different
internal systems being used to change to different modes.
When you are unable to hear any sound from the headphones
(MUTING function)
If the headphones are used outside the range of the infra-red rays, or the infra-red rays are
obstructed, reception will decline and the MUTING function will come on. No sound will then be
heard from the headphones. If this happens, move nearer to the transmitter. The MUTING function
will automatically switch off when the infra-red rays stop being obstructed.
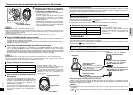
DECODE MODE lamp
The transmitter automatically distinguishes the recording method of the input signal and this lamp
lights as shown below. When switching to DOLBY DIGITAL/DTS and so on, do so on the connected
equipment e.g. the DVD player.
• DOLBY DIGITAL : Signals recorded in DOLBY DIGITAL format.
• DOLBY PRO LOGIC : Analog input signals, digital input signals (PCM 2-channel signals) and
DOLBY DIGITAL 2-channel signals treated as DOLBY PRO LOGIC . (Select [OFF] in
SURROUND MODE ( page 15) to stop this).
• DTS : Signals recorded in DTS format.
• MPEG-2 AAC : One of the audio compression formats defined by the MPEG-2 standard.
Advanced audio coding is used for the sound in digital televisions.
NOTE
NOTE
DVD player and so on
DECODE MODE
lamp
SURROUND lamp
Right
housing
POWER
lamp
VOL
reduce the volume
VOL
to increase
the volume
to decrease
the volume