


4-38 ChartView Software Reference ChartScan User’s Manual
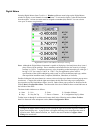
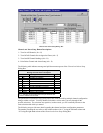
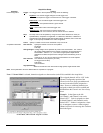
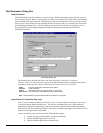
Acquisition Setup
Parameter Options
Event Configuration
Trigger: Set a trigger scan in the Acquisition by using one of the following:
Keyboard - Use Console Trigger dialog box to start trigger scan.
Note: If the Keyboard Trigger is selected the use of Pre-trigger is disabled.
External TTL - Use an external signal to start the trigger scan.
Channel Value - Use specified value of a given channel.
Alarm - Use an Alarm value to start the trigger scan.
Absolute Time - Use a time of day to start the trigger scan.
Note: If Absolute Time is selected, the use of Auto Re-arm is disabled.
Stop: Set a stop scan in the Acquisition by using one of the above selections or Count (as
specified below). Keyboard isn’t applicable. If a MultiScan, ChartScan, or NetScan is
connected and High-Speed Single-Channel (Burst Mode) is selected, then “Count from
trigger” is the only Stop available for the event configuration.
Count: Specify a number of scans to be read before a stop scan is set.
Acquisition Parameters
Scan Counts: Specify the number of scans in an acquisition
Pre-trigger
Post Stop
Average weight: Average weight can be specified only when in the Normal Mode. The value for
the average weight determines the number of samples to be averaged when in
Normal Mode. Values of 1, 2, 4, and 8 are for high-speed multiple channel
applications for thermocouples and DC voltages where noise filtering is not an
issue.
Values of 16, 32, 64, 128, and 256 are recommended for AC noise rejection.
Scan Intervals: Time between scans (frequency of scans)
Pre-trigger and Post Stop
Post-trigger
Use one Interval
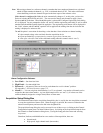
High Speed Setup:
Allows for channel and scan rate entries for high-speed, single channel mode.
Note: These parameters cannot be altered while an acquisition is in progress.
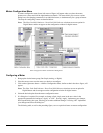
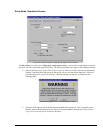
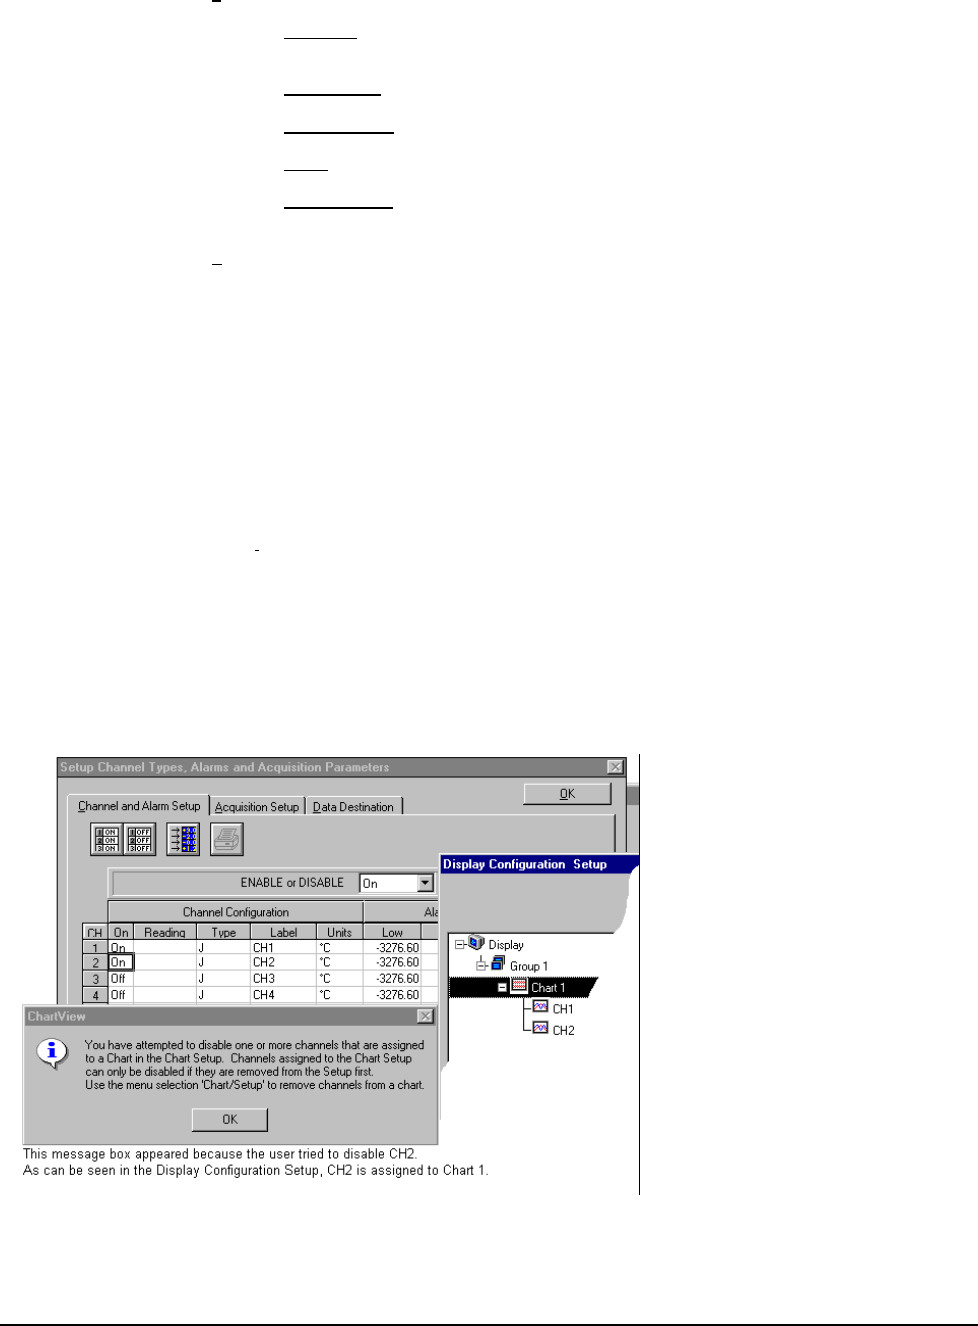
Note: If Normal Mode is selected, channels assigned to a chart must be (and will be) enabled in the Acquisition.
The assigned channels will be “ON” in the
Channel Configuration portion of the
Channel and Alarm Setup spreadsheet and
can not be turned off while assigned to a
chart. However; additional channels (not
assigned to charts) can still be enabled and
disabled from the Channel and Alarm Setup
sheet.
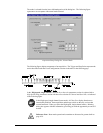
Example. In the figure to the left:
(a) Channel 1 and Channel 2 can not be
turned “OFF.” Each is assigned to a chart.
(b) Both Channel 3 and Channel 4 can be
turned “OFF.” Neither is assigned to a chart.
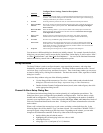
(c) An attempt to remove a chart-assigned
channel will result in a message box similar to
that in the figure.
Normal Mode, CH1 and CH2 Assigned to a Chart