


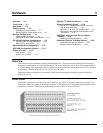

3-4 ChartScan User’s Manual
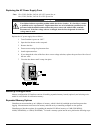
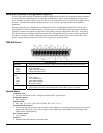
Replacing the AC Power Supply Fuse
Fuse: 1/2A, 250V, Slo Blo, 3AG for 105-125V power line, or
1/4A, 250V, Slo Blo, 3AG for 210-250V power line
CAUTION
CAUTIONCAUTION
CAUTION
Fuse failure indicates a possible problem within the device circuitry. If a fuse blows, contact
a qualified service representative. Replacement fuses are to be installed by qualified service
personnel with the unit disconnected from the power source and with all other terminals
disconnected. If the line voltage selector is changed, then the fuse designated for that line
voltage must be used.
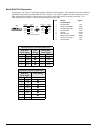
Replace the AC power supply fuse as follows:
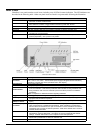
1. Turn ChartScan’s power to “OFF.”
2. Open the fuse drawer on the rear panel.
3.
Remove the fuse.
4.
Ensure correct rating of replacement fuse.
5. Install replacement fuse.
6. If you changed the value of the fuse due to a new voltage selection, replace the spare fuse with a fuse of
the new value.
7.
Close the fuse drawer until it snaps into place.
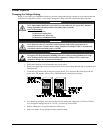
Memory Configuration
Memory configuration of ChartScan consists of installing expanded memory boards (optional), and selecting write-
enable or write-disable for calibration memory.
Expanded Memory Options
ChartScan can accommodate up to 8 MBytes of memory, which is ideal for both high-speed and long-term data
logging. Measurements can be stored in memory and read out by a controlling computer as time permits.
ChartScan provides three options for expanding the standard 256 KB of memory to 1 MB (CSN/MEM1),
4 MB (CSN/MEM4), or 8 MB (CSN/MEM8). To install a memory option into the unit, perform the following steps: