20
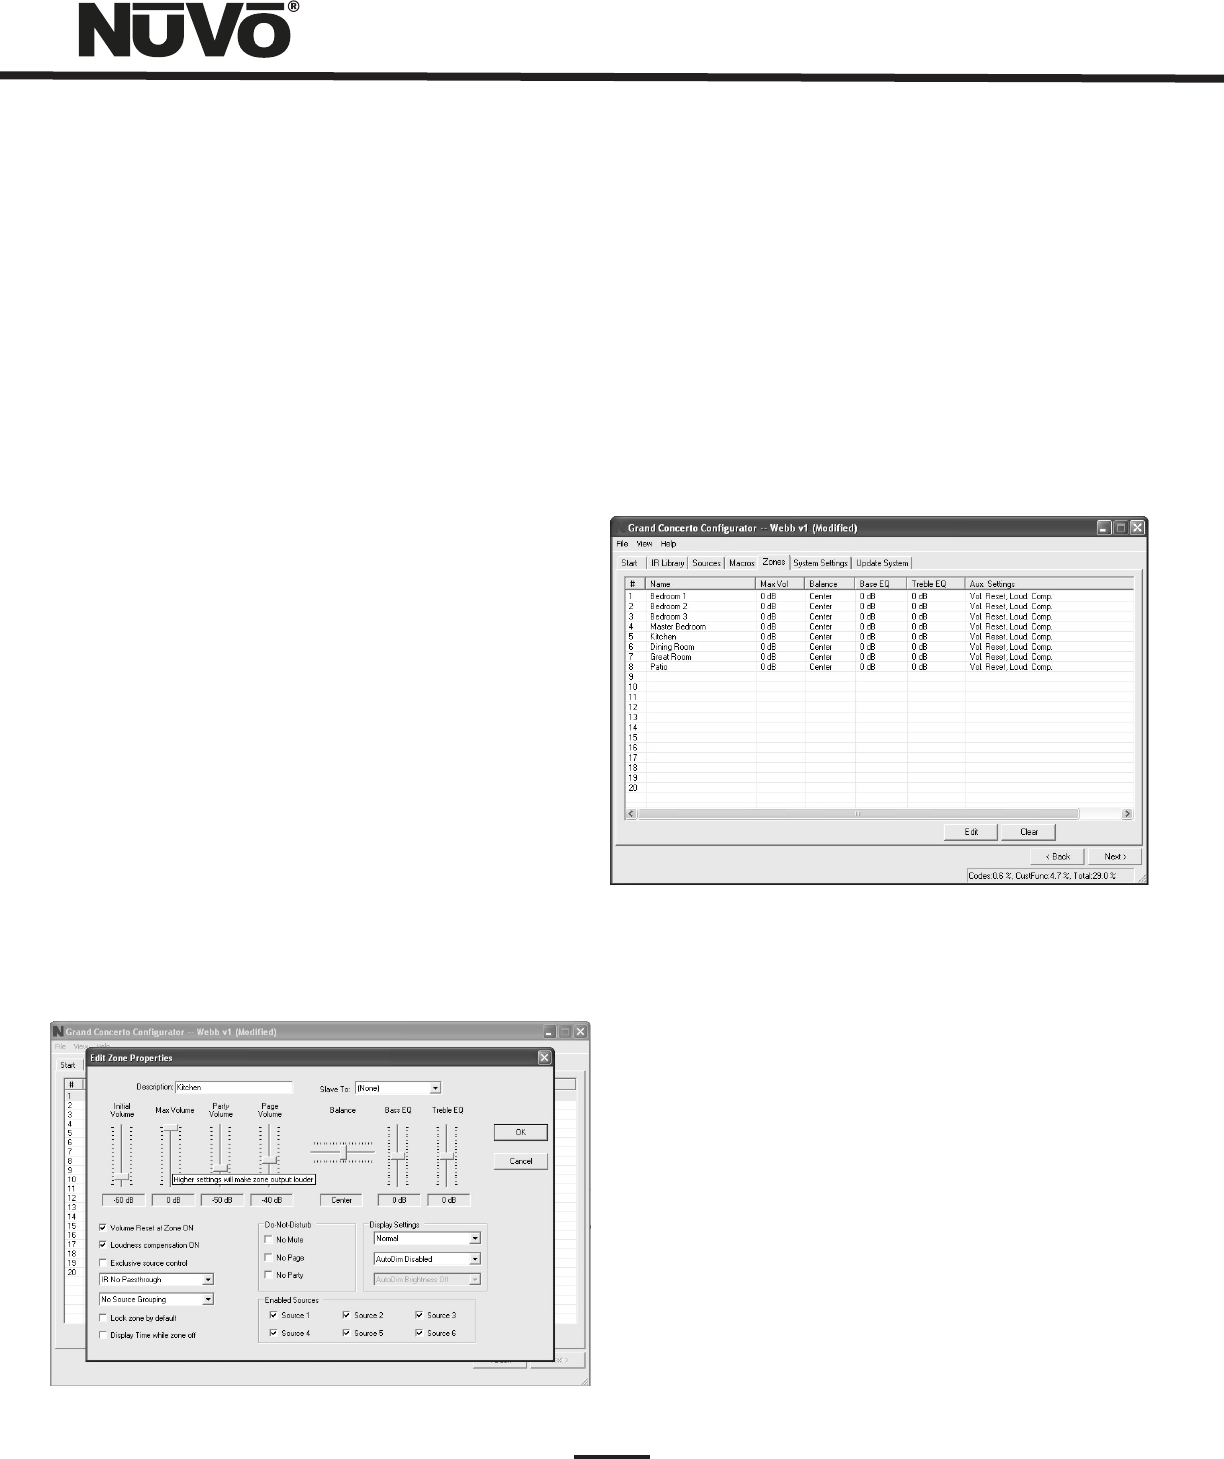
Enabled Zone Sources: These allow individual sources to be
turned off for specific zones. A source that is turned off will
not display in that zone. This is particularly useful in
preventing child access to a source dedicated to adult
listening.
Display Settings: The overall brightness and AutoDim
feature for each Control Pad are set using these drop-down
menus. The first menu is the display brightness. The choices
are Dimmest, Dim, Not So Bright, Normal, Bright, Brighter,
Brightest. The second menu sets the duration for the
AutoDim feature. These range from AutoDim Disabled, 15 Sec
up to 1 Hour. The next menu sets a specific AutoDim level.
AutoDim Brightness Off removes all display and backlighting.
Using AutoDim Brightness Low, AutoDim Brightness Medium,
or AutoDim Brightness High reduces the level of brightness,
but does not make the Control Pad completely dark.
Slave To: This drop-down menu is used to assign additional
slave Control Pads to a zone. Up to 20 Control Pads can be
used in an installation. The EZ Port hub is equipped with 20
RJ45 ports to accommodate all the system’s Control Pads.
This is a useful feature for large rooms where more than one
Control Pad is desired. If slave Control Pads are used, we
suggest that you disable the IR pass-through on those to
prevent cross-communication. The Slave To function can
also be used to tie two or more zones together under the
control of a single Control Pad.
Fig. 26
6. System Settings
This tab is used to define the way in which the External Mute
input functions, for setting the zone lockout security code,
set the clock for 24 hour display and if necessary to set a
serial communication display.
6.1 External Mute: System Mute Trigger (Fig. 27)
The Grand Concerto System has an accessory, the NV-MI1
Mute Interface, which is designed to mute any music playing
through the system when a doorbell or phone rings, see MI1
Mute Interface. When setting the System Mute Trigger, set
the mute input to respond to the contact closure provided by
the MI1.
Fig. 25
5.2 Zones (updated) (Fig. 26)
When the desired properties for each zone are set, click on
OK. This will return you to the Zones tab. There you will see
an updated list of the zones by the number they are
assigned, as well as the specific parameters defined in the
Zone Edit window.
Double-clicking on the zones will reopen the edit window,
where any of the definition properties can be modified.


