


39
ing differences in level between various sources (some of which may seem
“louder” than others without such a correction).
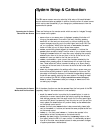
Output Level Calibration The PAV also incorporates level controls for each output. These allow you to
compensate for differences in amplifier and speaker sensitivities and for place-
ment variations in different rooms. These adjustments are essential for re-
producing proper soundstaging and image localization. Fortunately, they
are normally a one-time adjustment during setup, and only need to be revisited
if amplifiers or speakers change.
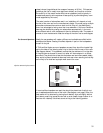
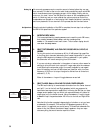
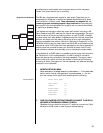
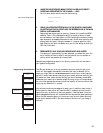
SET LEVELS
INTERNAL
LEFT FRONT
CENTER
RIGHT
FRONT
RIGHT REAR
LEFT REAR
SUBWOOFER
EXTERNAL
The simplest and best way to adjust the output level controls is by using a dB
Sound Pressure Level (SPL) meter and the internal test tone generator. The goal is
to set the volume at the primary listening position to read 75 dB SPL (C-weight-
ing, slow mode) from each speaker in sequence, using the individual output level
controls. You should point the meter at the ceiling so as to avoid inadvertently
favoring one speaker over another. (Note that if the tones in Chapters 8-11 of the
WOW! test disc are used, the meter should read 85 dB SPL, since these tones are
recorded at a level 10 dB higher than those generated by the internal generator. If
external tones such as these are used, you must also be certain that the input
level calibration has been done accurately prior to calibrating the output levels.)
In the absence of a dB SPL meter, it is possible to set the output level controls by
ear. Use the built-in pink noise generator in the PAV to adjust all volumes to
sound the same as they cycle around the various speakers. (This signal is band-
width-limited pink noise to minimize the problem of timbre shifts influencing
the setting of levels.) The system will then be reasonably well balanced, although
of course it is not “calibrated.”
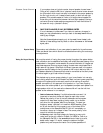
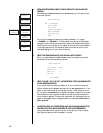
1 ENTER THE SET LEVELS MENU
Select set levels in the setup menu and press volume +/–. Then select inter-
nal
(to use the internal noise generator) and press volume +/–. You will
then see a screen which should look something like the following:
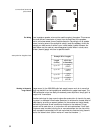
set levels menu
NOISE SETUP MODE
LEFT FRONT 83
CENTER 83
RIGHT FRONT 83
RIGHT REAR 83
LEFT REAR 83
SUBWOOFER 83
2 RAISE OR LOWER THE LEFT FRONT SPEAKER’S VOLUME TO 75 DB SPL AS
MEASURED AT THE PRIMARY LISTENING POSITION
Remember that you should be using the “C” weighting curve and the “Slow”
ballistics of the SPL meter in order to get an accurate reading.