


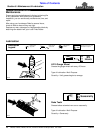
9
Section 2: Optional Equipment Set-up
11/01/12
LR0548, LR0560, LR1560, LR1572, LR1584 & LR1596 Landscape Rakes 302-185M
Table of Contents
Dual Gauge Wheel Installation (LR15)
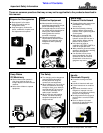
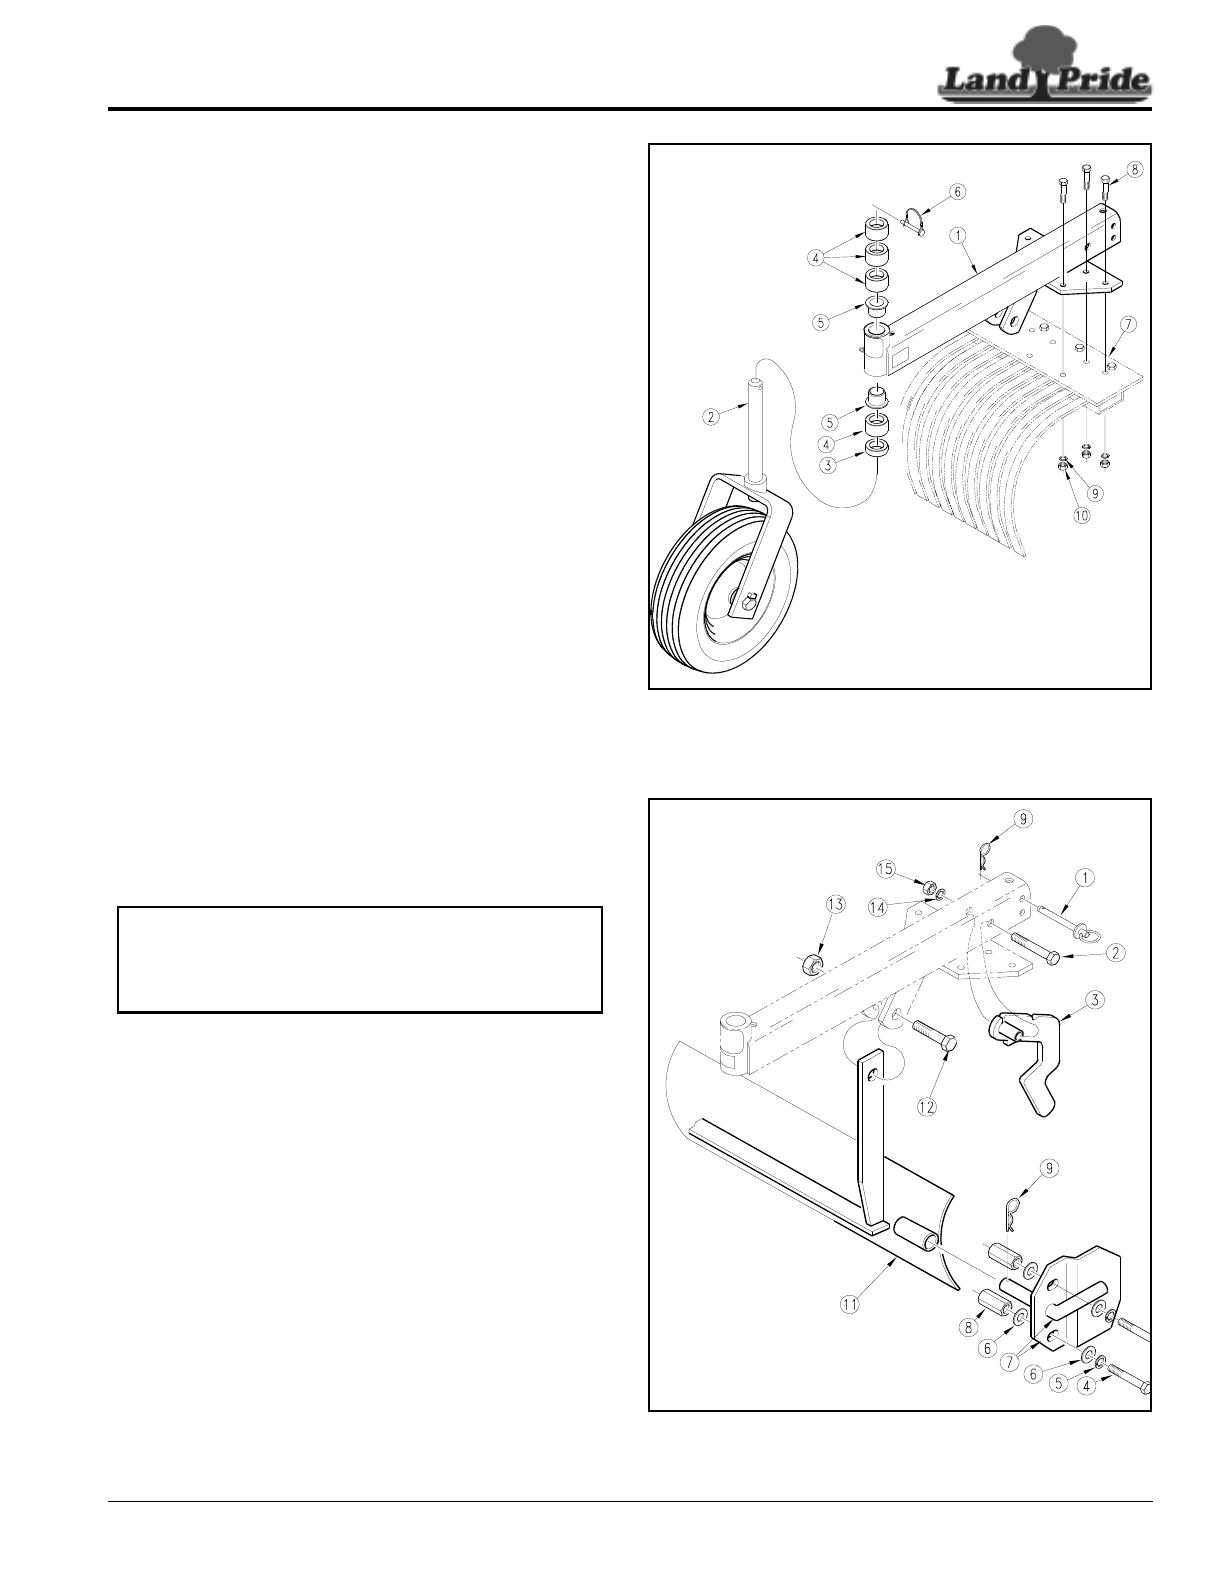
Refer to Figure 2-3:
Gauge Wheel Assembly
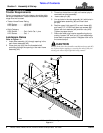
1. Attach gauge wheel arm (#1) to the right-hand side
of rake mount (#7) with six 3/8" x 2 3/4" hex head
bolts (#8), 3/8" lockwashers (#9), and 3/8" hex nuts
(#10) as shown. Tighten to proper torque.
2. Insert two bushings (#5) into gauge wheel arm (#1)
as shown.
3. Insert yoke with tire assembly (#2) through 1/2"
spacer (#3), 1" spacer #4, spindles (#5), and three 1"
Spacers (#4) as shown. Secure with wire retaining
pin (#6).
4. Repeat steps 1 - 3 to assemble gauge wheel on the
left-hand side of the rake.
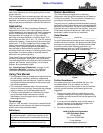
Grader Blade Installation (LR15)
Grader Blade with Gauge Wheels
Refer to Figure 2-4:
1. Refer to “Dual Gauge Wheel Installation (LR15)”
steps 1 - 4 on this page to assemble dual gauge
wheels.
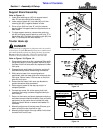
2. Attach blade lock handle (#3) to the right and left-
hand Gauge Wheel Arms with 1/2" x 3" GR5 hex
bolts (#2), lock washers (#14), and hex nuts (#15) as
shown. Tighten to proper torque.
3. Insert pin (#1) through top hole of both gauge wheel
arms. Secure with attached hair pin (#9) as shown.
4. Attach both the right end and left end of the grader
blade (#11) to gauge wheel arms with 3/4" x 2 3/4"
GR5 hex bolts (#12) and locknuts (#13) as shown.
Do not torque locknut (#13).
5. Refer to “Grader Blade Side Plate Assembly” on
page 10 for attaching side plates to both ends of the
grader blade.
NOTE: The grader blade can be supported from the
dual gauge wheel support arms as shown in
Figure 2-4. See Figure 2-5 on page 10 when
mounting grader blade without gauge wheels.
Gauge Wheel Assembly
Right-Hand Assembly Shown
Figure 2-3
Grader Blade Assembly with Gauge Wheel
Right-Hand Side Shown
Figure 2-4
20979
20980