


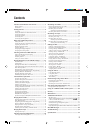


10
English
Basic and Common Operations
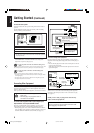
Setting the Clock
Before operating the unit any further, first set the built-in clock.
When you plug in the power cord, “0:00” starts flashing on the
display.
You can set the clock when the unit is either turned on or on standby
(off). You cannot set the clock if the unit is on Power Save mode
(see the right column).
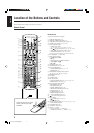
On the remote control ONLY:
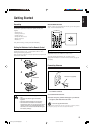
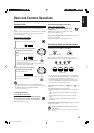
1
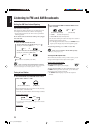
Press CLOCK/TIMER.
The hour digit starts flashing on the display.
2
Press cursor 3 or 2 repeatedly
to adjust the hour, then press
SET.
The minute digits start flashing on the
display.
• Each time you press 3 or 2, the hour digit(s)
change(s) continuously.
• If you want to correct the hour again, press CANCEL. The
hour digit(s) start(s) flashing again.
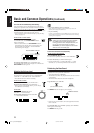
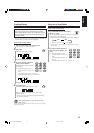
3
Press cursor 3 or 2 to adjust
the minute, then press SET.
The built-in clock starts.
• Each time you press cursor 3 or 2, the minute
digits change continuously.
• When you unplug the power cord or if a power failure occurs
The clock is reset to “0:00” right away. If this happens, set the clock again.
• The clock may gain or lose 1 to 2 minutes per month
If this happens, reset the clock.
To change the clock again
On the remote control ONLY:
Press CLOCK/TIMER repeatedly until the
clock setting screen appears on the display.
The hour digit starts flashing. Then, perform steps
2
and
3
in “Setting the Clock” again.
To turn off the clock indication (Power Save)
On the remote control ONLY:
Press DISP/CHARA while the unit is on
standby (off).
“DISPLAY OFF” appears on the display for a while,
then the clock indication goes off.
To turn on the clock indication, press DISP/CHARA again while
the unit is on standby (off).
“DISPLAY ON” appears on the display for a while.
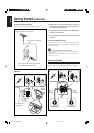
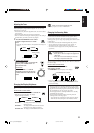
Turning On the Power and Starting Playback
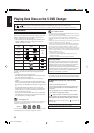
To turn on the unit, press AUDIO or on the unit.
The STANDBY/ON lamp on the unit lights green.
When you press one of the source selection buttons, the unit
automatically turns on (and starts playback if the source is ready).
• Pressing one of the disc eject buttons on the unit—DISC10 to
DISC50, 0 (MD eject) and 0 (TAPE eject)—also turns on the
unit if the disc trays, MD, and cassette are unlocked.
• Press FM/AM/AUX repeatedly (or AUX on the unit) to select
“AUX” or “AUX-DIGITAL” to operate the external equipment,
see page 44 and the manuals supplied with it.
To turn off the unit (on standby), press AUDIO or on the
unit again.
The STANDBY/ON lamp on the unit lights red.
• The clock time appears on the display if you have set the built-in
clock.
“0:00” will flash on the display if you have not set the built-in
clock.
To set the built-in clock, see “Setting the Clock” on the left
column.
• A little power is always consumed even while the unit is on
standby (off).
To switch off the power supply completely, unplug the AC power
cord from the AC outlet.
When you unplug the AC power cord or if a power
failure occurs
The clock is reset to “0:00” right away, while the tuner preset stations will be
erased in a few days.
DISC
SELECT
AUX
FM/AM
DVD
MD
TAPE
00
‹
/
8‹
/
8
¤‹
(On the remote control) (On the unit)
STANDBY/ON
(On the remote control)
(On the unit)
EN10-12_UX-J99DVD[UB]5.p65 03.12.12, 11:02 PM10