


42
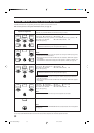
DSP MODE
Before you start, remember...
• Make sure that you have set the speaker information correctly
(see page 29).
• When the SUB ROOM and SPEAKERS SUB ROOM indicators
are lit on the display, you can only use 3D-PHONIC modes for the
main room source.
• There is a time limit in doing the following steps. If the setting is
canceled before you finish, start from step 2 again.
• You cannot adjust the center speaker output level when you have
set “CTR SPK” to “NONE” (see page 29).
• You cannot adjust the rear speaker output level when you have set
“REAR SPK” to “NONE” (see page 29).
• To adjust the front speaker output balance and subwoofer output
level, see pages 27 and 28.
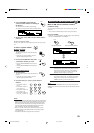
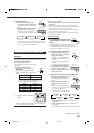
On the front panel:
1. Press DSP MODE repeatedly until
the DAP mode you want to adjust
— THEATER 1, THEATER 2,
HALL 1, HALL 2, LIVE CLUB,
DANCE CLUB, or PAVILION — appears on the
display.
The DSP MODE lamp on the front panel button lights up, and
the DSP indicator also lights up on the display.
• When you have set “REAR SPK” to “NONE,” the 3D-
PHONIC indicator also lights up.
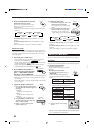
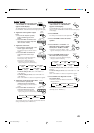
2. Adjust the speaker output levels.
1) Press LEVEL ADJUST repeatedly until
one of the following indications appears on
the display.
“CENTER”:
To adjust the center speaker level.
“REAR L”:
To adjust the left rear speaker level.
“REAR R”:
To adjust the right rear speaker level.
2) Press CONTROL UP 5/DOWN ∞ to
adjust the selected speaker output
level (from –10 dB to +10 dB).
3) Repeat 1) and 2) to adjust the other
speaker output levels.
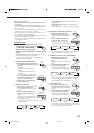
3. Adjust the center tone.
1) Press EFFECT repeatedly until “CTR
TONE” appears on the display.
The display changes to show the current
setting.
2) Press CONTROL UP 5/DOWN ∞
to select the center tone level you
want.
The center tone adjustment affects the
mid-frequency range, which the human
voice is mostly made up of.
• Each time you press the button, the display changes to
show the following:
To make the dialogue softer, select “CTR TONE 1” or
“CTR TONE 2.”
To make the dialogue clearer, select “CTR TONE 4” or
“CTR TONE 5.”
When “CTR TONE 3” is selected, no adjustment is applied.
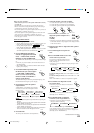
4. Adjust the overall levels of the effect.
1) Press EFFECT repeatedly until
“EFFECT” appears on the display.
The display changes to show the current
setting.
2) Press CONTROL UP 5/DOWN ∞
to select the effect level you want.
• Each time you press the button, the
display changes to show the following:
As the number increases, the selected DAP effect becomes
stronger. (Normally set it to “EFFECT 3.”)
5. Adjust the room size (sense of spaciousness).
1) Press EFFECT repeatedly until
“ROOM SIZE” appears on the
display.
The display changes to show the current
setting.
2) Press CONTROL UP 5/DOWN ∞ to
select the room size you want.
• Each time you press the button, the
display changes to show the following:
As the number increases, the interval between reflections
increases so that you will feel as if you were in a larger
room. (Normally set it to “ROOMSIZE 3.”)
6. Adjust the liveness.
1) Press EFFECT repeatedly until
“LIVENESS” appears on the display.
The display changes to show the current
setting.
2) Press CONTROL UP 5/DOWN ∞ to
select the liveness level you want.
• Each time you press the button, the
display changes to show the following:
As the number increases, the attenuation level of reflections
over time decreases so that acoustics change from “Dead” to
“Live.” (Normally set it to “LIVENESS 3.”)
ROOMSIZE 1
ROOMSIZE 5 ROOMSIZE 4
ROOMSIZE 2 ROOMSIZE 3
EFFECT
CONTROL
DOWN UP
EFFECT
CONTROL
DOWN UP
LIVENESS 1
LIVENESS 5 LIVENESS 4
LIVENESS 2 LIVENESS 3
CONTROL
DOWN UP
EFFECT
EFFECT 1 EFFECT 2 EFFECT 3
EFFECT 4EFFECT 5
LEVEL
ADJUST
CONTROL
DOWN UP
CONTROL
DOWN UP
CTR TONE 1
CTR TONE 2
CTR TONE 3
CTR TONE 4
CTR TONE 5
(Softer)
(Soft) (Flat)
(Sharper)
(Sharp)
EFFECT
EN37-49.RX-9010VBK[J]f 01.2.15, 0:15 PM42