


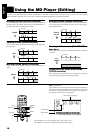

17
English
• You can also start recording by pressing the MD REC but-
ton and then the MD
#¥8
button.
■ When you record a signal from a DAT through the AUX2 ter-
minal, two track numbers (track marks) are added for one track.
This is not fault. Join both tracks using the Join function. (See
page 20.)
■
5. Press the
7
button to stop recording.
“UTOCwriting” appears on the display, indicating that the re-
cording is successfully completed. Then, the MD stops.
• If the MD becomes full before pressing the
7 button, the
recording will be terminated after indicating “UTOCwriting”.
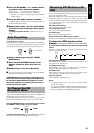
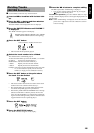
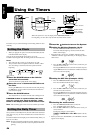
Checking the Remaining Time of
the MD ———————————————
You can see the recordable remaining time of the MD in Stop or Re-
cording mode.
Press the DISPLAY button on the Remote Control repeat-
edly.
The remaining time appears on the display as follows.
In Recording mode:
Normal display
= Remaining time (recordable capacity) of MD
(e.g. FM (current source) > 72:00)
= Clock = (back to the begin-
ning)
In Stop mode:
Normal display
= Remaining time (recordable capacity) of MD
(e.g. REM. 72:00)
= Clock = (back to the beginning)
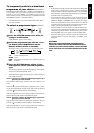
Track marking ———————————
• Whenever playback advances from one track to another during
digital recording, the track number at the MD side is automati-
cally incremented by 1.
• Whenever no sound at the playback side continues for 3 or
more seconds during analog recording, the track number at the
MD side is automatically incremented by 1.
• The track number at the MD side is automatically incremented
by 1 by pressing the SET button on the Remote Control at the
desirable location during analog recording. (Tuner or the
equipment connected to the AUX-1)
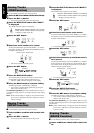
Everything on the CD goes onto the MD in the order it is on the CD,
or according to the order you have set in the program. (See page 13
for programming the CD tracks.)
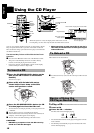
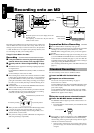
■
1. Insert an MD with its label side up.
■
2. Insert a CD. (See page 12.)
■
3. Press the CD
#¥8
button and then press the
7
button to stop the CD.
■
4. Press the MD REC button on the Unit.
Digital recording from the CD to the MD starts. Then, the tracks
on the music calendar change from the CD’s ones to MD’s one.
• The track number is incremented by one and it blinks on the
music calendar.
• The track number for the MD increases synchronous with the
track on the CD.
• After the CD Player has played the entire CD or all the pro-
grammed tracks, “UTOCwriting” appears on the display, indi-
cating that the recording is successfully completed. Then, the
MD and the CD stop.
• When the MD becomes full before the CD Player finishes play-
back, the MD stops after indicating “UTOCwriting”.
Note: While “UTOCwriting” is displayed, do not disconnect the
power cord or subject the Unit to the vibration to avoid in-
correct recording.
One Track Recording ————————
■
1. Insert an MD with its label side up.
■
2. Play the track on the CD you wish to
record.
■
3. Press the MD REC button on the Unit.
The CD Player returns to the beginning of that track and the
track is recorded on the MD. After recording, the CD Player and
MD Recorder automatically stops.
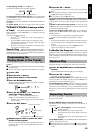
Display the Information ———————
During CD synchro recording, you can see various information us-
ing the DISPLAY button on the Remote Control.
Press the DISPLAY button on the Remote Control repeat-
edly.
The display changes as follows.
Remaining of the current track’s playback time and remaining time
(recordable capacity) of MD = Track numbers of CD and MD =
Track number of CD and playing time = Clock = (back to the be-
ginning)
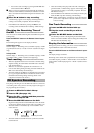
CD Synchro Recording
MD REC
Remaining time of MD
Remaining time
of the CD’s track