22
3
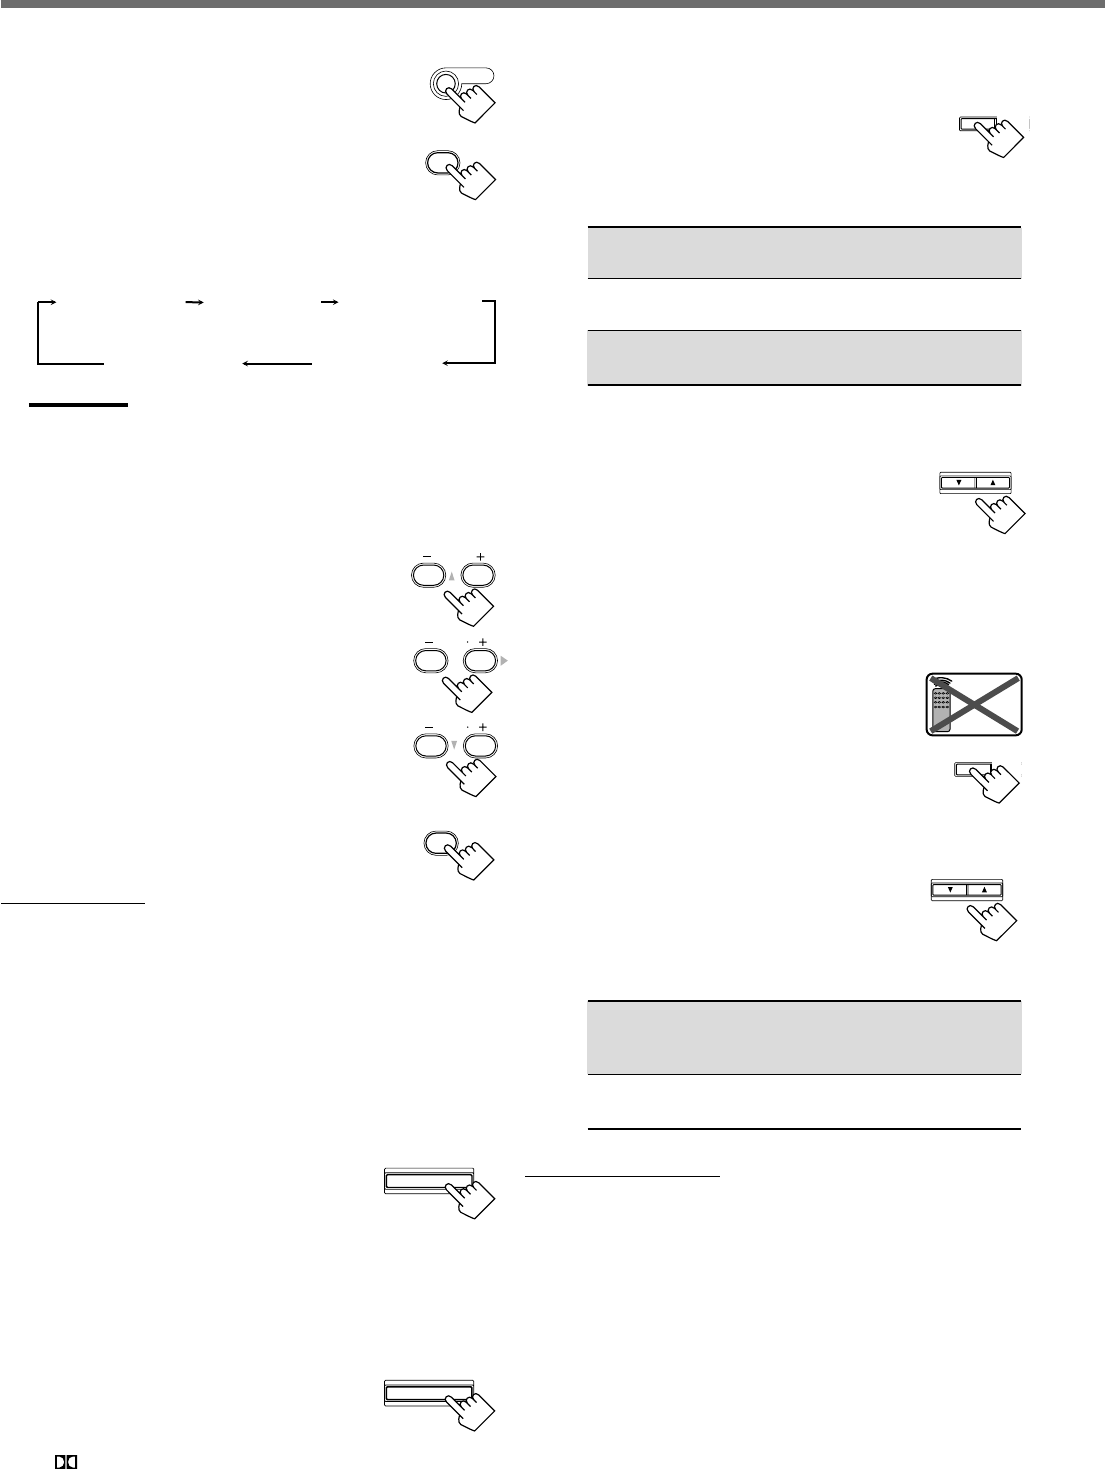
Press SOUND.
10 keys are activated for sound adjustments.
4
Press TEST to check if you can hear the
sounds through all the speakers at the
equal level.
“TEST TONE L” starts flashing on the
display, and a test tone comes out of the
speakers in the following order:
Notes:
• You can adjust the speaker output levels without outputting the
test tone.
• No test tone comes out of the center speaker when “CNTR SP”
is set to “NONE.”
• No test tone comes out of the rear speakers when “REAR SP”
is set to “NONE.”
5
Adjust the speaker output levels
(–10 to +10).
Adjust the center speakers and rear speakers levels
by comparing with the sound from the front
speakers.
• To adjust the center speaker level, press
CENTER +/–.
• To adjust the left rear speaker level, press
REAR•L +/–.
• To adjust the right rear speaker level, press
REAR•R +/–.
6
Press TEST again to stop the test
tone.
On the front panel:
You can also use the buttons on the front panel to adjust the
Surround modes. However, no test tone is available when using the
buttons on the front panel. So, make adjustments while listening to
the sound of the source played back.
1
Set the analog or digital input mode for the
source you like to listen and start playing.
When playing back software encoded with Dolby Digital and
DTS Digital Surround, select the digital input mode (see page
11).
2
Press SURROUND ON/OFF
repeatedly to activate Surround
mode.
Each time you press the button, Surround mode turns on and off
alternately.
• If you are playing back software encoded with Dolby Digital
multichannel, “DOLBY DIGITAL” is selected.
• If you are playing back software encoded with DTS Digital
Surround, “DTS SURROUND” is selected.
• If you are playing back any software other
than above, you can select “PL II MUSIC”
or “PL II MOVIE” according to the source
by pressing SURROUND MODE.
(
PRO LOGIC II indicator lights up on the display.)
If you like to adjust sound, go to step
3
.
3
Adjust the speaker output levels.
1)
Press ADJUST repeatedly until one
of the following indications (with the
current setting)* appears on the
display.
CENTER :To adjust the center speaker output level
(–10 to +10).
REAR L : To adjust the left rear speaker output level
(–10 to +10).
REAR R :To adjust the right rear speaker output level
(–10 to +10).
* “0” is the initial setting. If you have already changed the
setting, another number (level) will be shown.
2)
Press CONTROL UP 5/
DOWN ∞ to adjust the selected
speaker output levels.
3)
Repeat steps
1)
and
2)
to adjust the other
speaker levels.
When you select “PL II MUSIC,” you can go to the
following adjustment.
4
Turn on Panorama control on or off.
1)
Press ADJUST repeatedly until
“PANORAMA” (with the current
setting)* appears on the display.
* “OFF” is the initial setting. If you have
already changed the setting, “ON” will be shown.
2)
Press CONTROL UP 5/DOWN ∞
to select if you turn on or off
Panorama control.
• Each time you press the button, “ON” and
“OFF” change alternately.
ON : Select this when you like to enjoy
“wraparound” sound effect with side-wall
image.
OFF : Select this when you like to enjoy originally
recorded sounds.
To cancel Surround mode
Press SURROUND ON/OFF again so that “SURROUND OFF”
appears on the display.
• If Surround mode is canceled while playing back multichannel
digital software, all channel signals are mixed and output through
the front speakers (and subwoofer if you have connected a
subwoofer and set the subwoofer setting correctly—“YES”).
Creating Realistic Sound Fields
TEST
1
SOUND
TEST TONE L
(Left front speaker)
TEST TONE LS
(Left rear speaker)
TEST TONE RS
(Right rear speaker)
TEST TONE C
(Center speaker)
TEST TONE R
(Right front speaker)
SURROUND MODE
TEST
1
CENTER
2
3
REAR R
8
9
REAR L
56
ADJUST
CONTROL
DOWN UP
CONTROL
DOWN UP
ADJUST
Remote
NOT
SURROUND ON/OFF
EN18-23.RX-6020V/6022V[J]_f 3/4/02, 4:25 PM22


