29
Setting preferences
• You can change the language used in the setup menus.
See “Menu description” below.
NOTE
• You can use SET UP menu only when the source is USB
MEMORY.
Basic operation on the setup menus
7While stopped
1 Press SET UP.
2 Follow the instructions that
appear on the TV screen.
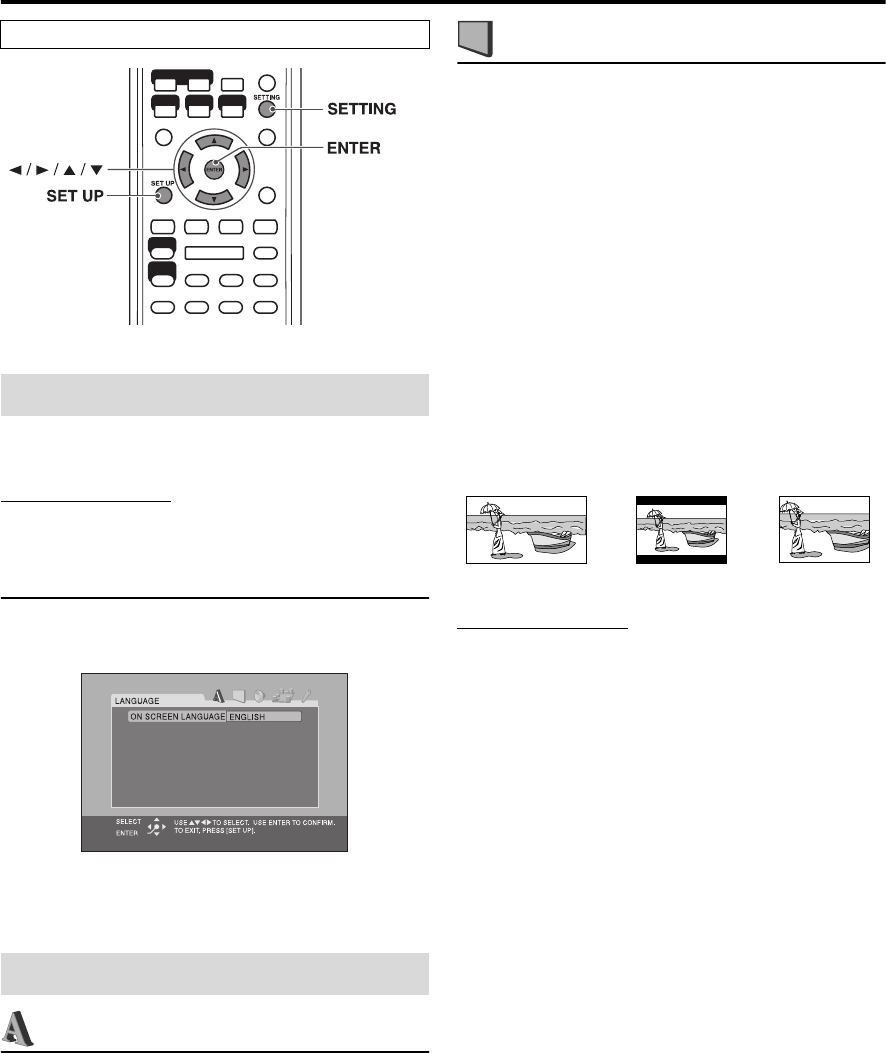
: Language menu (LANGUAGE)
7 ON SCREEN LANGUAGE
• Select the language shown on the TV screen when
operating this system.
: Picture menu (PICTURE)
7 MONITOR TYPE
You can select the monitor type to match your TV when
you play files recorded in the picture’s height/width ratio of
16:9.
• 16:9 NORMAL (Wide television screen)
Select this when the aspect ratio of your wide TV is fixed
to 16:9.
• 16:9 AUTO (Wide television conversion)
Select this when your TV is an ordinary wide TV.
• 4:3 LB (Letter Box conversion)
Select this when the aspect ratio of your TV is 4:3
(conventional TV). While viewing a wide screen picture,
the black bars appear on the top and the bottom of the
screen.
• 4:3 PS (Pan Scan conversion)
Select this when the aspect ratio of your TV is 4:3
(conventional TV). While viewing a wide screen picture,
the black bars do not appear, however, the left and right
edges of the pictures will not be shown on the screen.
NOTE
• Even if “4:3 PS” is selected, the screen size may become “4:3
LB” with some files. This depends on how files are recorded.
7 PICTURE SOURCE
You can obtain optimal picture quality by selecting whether
the content of the file is processed by field (video source) or
by frame (film source).
Normally set to “AUTO”.
•AUTO
Used to play a file containing both video and film source
materials.
This system recognizes the source type (video or film) of
the current file according to the file information.
–If the playback picture is unclear or noisy, or the oblique
lines of the picture are rough, try to change to fixed
modes.
•FILM
Suitable for playing back a film source file.
•VIDEO
Suitable for playing back a video source file.
7 SCREEN SAVER (See page 22.)
You can activate or deactivate screen saver function.
The buttons described below are used on page 29 to 31.
Using the setup menus
Menu description
Ex.: 16:9 Ex.: 4:3 LB Ex.: 4:3 PS
TH-L1[JC].book Page 29 Friday, March 16, 2007 10:22 AM


