


37
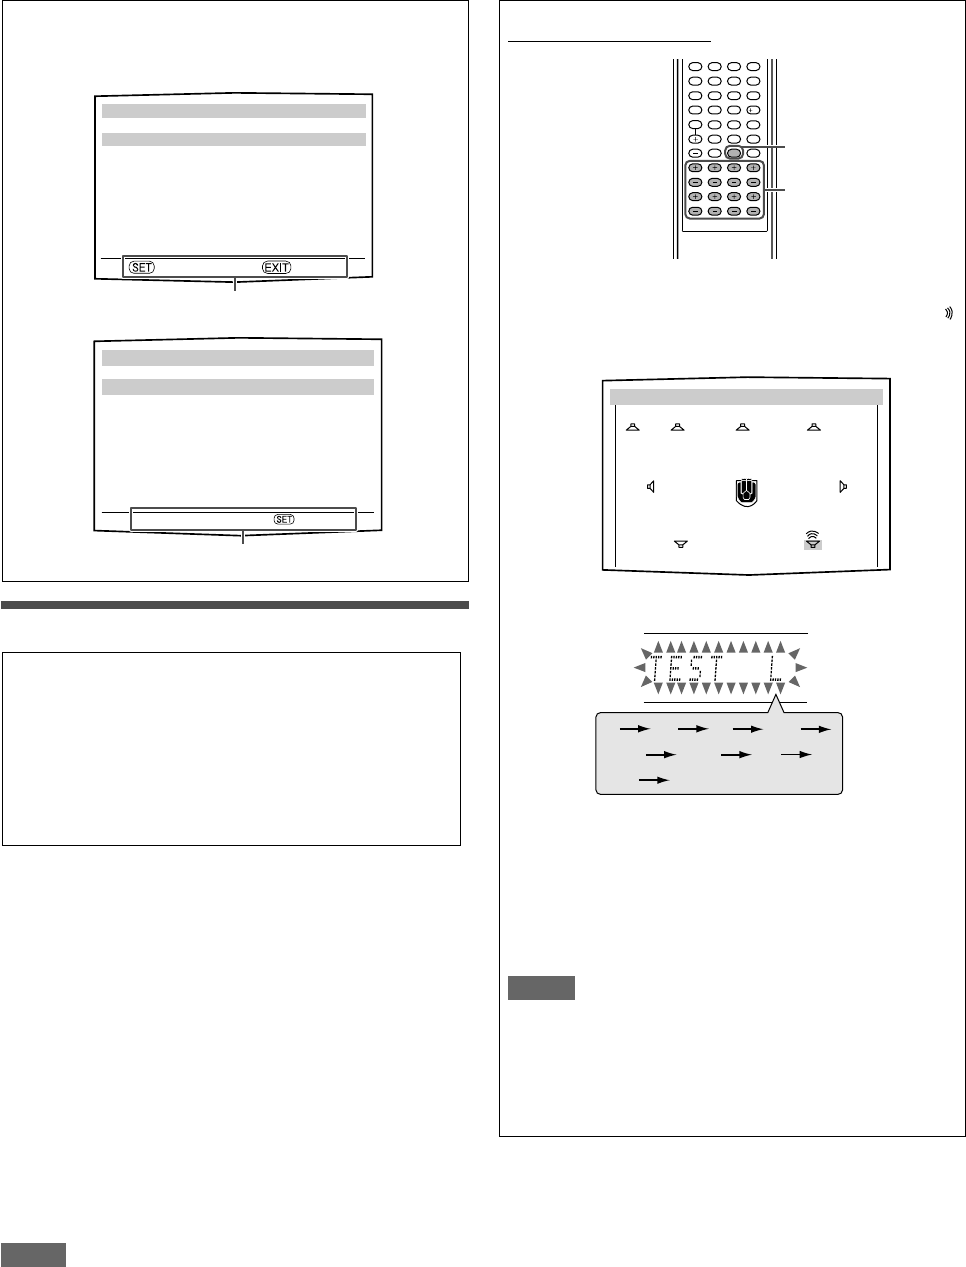
From the remote control:
1
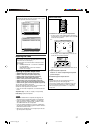
Press TEST to check the speakers’ output balance.
• On the TV screen, “TEST TONE” appears. The indicator
corresponding to the speaker appears while a test tone
comes out of the speakers.
EX.:
• On the display, “TEST L” starts flashing, and a test tone
comes out of the speakers clockwise.
•You can adjust the speaker output levels without the test
tone.
2
Adjust the speaker output levels.
Press the + or – button corresponding to the speaker
you want to adjust.
3
Press TEST again to stop the test tone.
NOTES
• No test tone comes out of the speakers for which the
speaker setting is set to “NO” (see page 28).
• No test tone is available when the headphones are in use.
• If you have selected “S BACK OUT: 1SPK” for “S BACK
OUT” (see page 29), press S. BACK L +/– to adjust the
output level.
Button indications on the screen
The buttons for operating the menu are shown on the TV screen.
You can operate the menu with these buttons.
Usable buttons and their functions
Usable buttons and their functions
Adjusting the items
When performing the basic settings viewing the indications
on the display, the indications are slightly different from what
is shown on the on-screen display.
This is because of the limited number of characters shown
on the display.
Ex.: • “SUBWOOFER LEVEL: +10” is shown as “SUBWFR
+10” on the display.
• “BASS BOOST: OFF” is shown as “B BOOST
<OFF>” on the display.
Adjusting the speaker output levels
• SUBWOOFER LEVEL (subwoofer output level),
•FRONT L LEVEL (left front speaker output level),
•FRONT R LEVEL (right front speaker output level),
• CENTER LEVEL (center speaker output level),
• SURR L LEVEL (left surround speaker output level),
• SURR R LEVEL (right surround speaker output level),
•
S BACK L LEVEL
(left surround back speaker output level),
•
S BACK R LEVEL
(right surround back speaker output level)
You can adjust the speaker output levels.
Adjust all the speakers’ output levels so that you can listen to the
sounds from all the speakers at the same level.
• Once you have made an adjustment, it is memorized for each
source.
Adjustable range: –10 (dB) to +10 (dB) (in 1 step intervals)
Initial setting: 0 (dB) for all speakers
NOTES
• If you have selected “NO” for a speaker (see page 28), the
output level for the corresponding speaker is not adjustable.
• If you have selected “HDMI” or “A MULTI” in the audio input
setting (see page 20), “S BACK LEVEL,” “S BACK L LEVEL,”
and “S BACK R LEVEL” are not adjustable.
• If you have selected “S BACK OUT: 1SPK” for “S BACK OUT”
(see page 29), “S BACK LEVEL” appears instead of “S BACK L
LEVEL” and “S BACK R LEVEL.”
• While using the headphones, you can adjust only the left and
right front speakers’ output level.
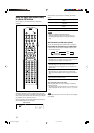
123
456
789
10
0
10
2
1,3
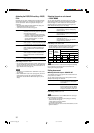
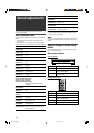
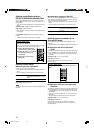
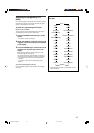
ADJUST MENU (1)
5
SUBWOOFER LEVEL : 0
FRONT L LEVEL : 0
FRONT R LEVEL : 0
CENTER LEVEL : 0
SURR L LEVEL : 0
SURR R LEVEL : 0
S BACK L LEVEL : 0
S BACK R LEVEL : 0
∞
:ENTER :EXIT
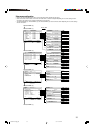
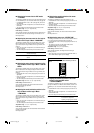
SUBWOOFER LEVEL
SUBWOOFER LEVEL :2 03
23:OPERATE :BACK
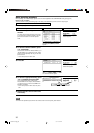
LCR
(Back to the beginning)
SR
SBR SBL SL
SW
TEST TONE
SW FL C FR
+1 +5 0 -3
SL SR
+8 -6
+5 -5
SBL SBR
34-39RX-D701S[B]_f.p65 05.11.7, 2:54 PM37