


8
Step 2: Setting Up
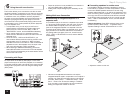
2.
After placing the microphone at the measurement
position, select "Do it Now" in the start screen and
press Enter.
3.
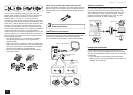
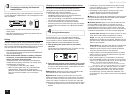
Connect the microphone to the Setup Mic jack of the
unit.
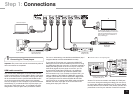
Setup Mic jack
Speaker setup
microphone
4. Follow the guidance displayed on the TV screen.
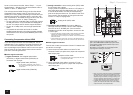
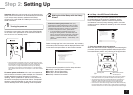
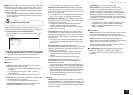
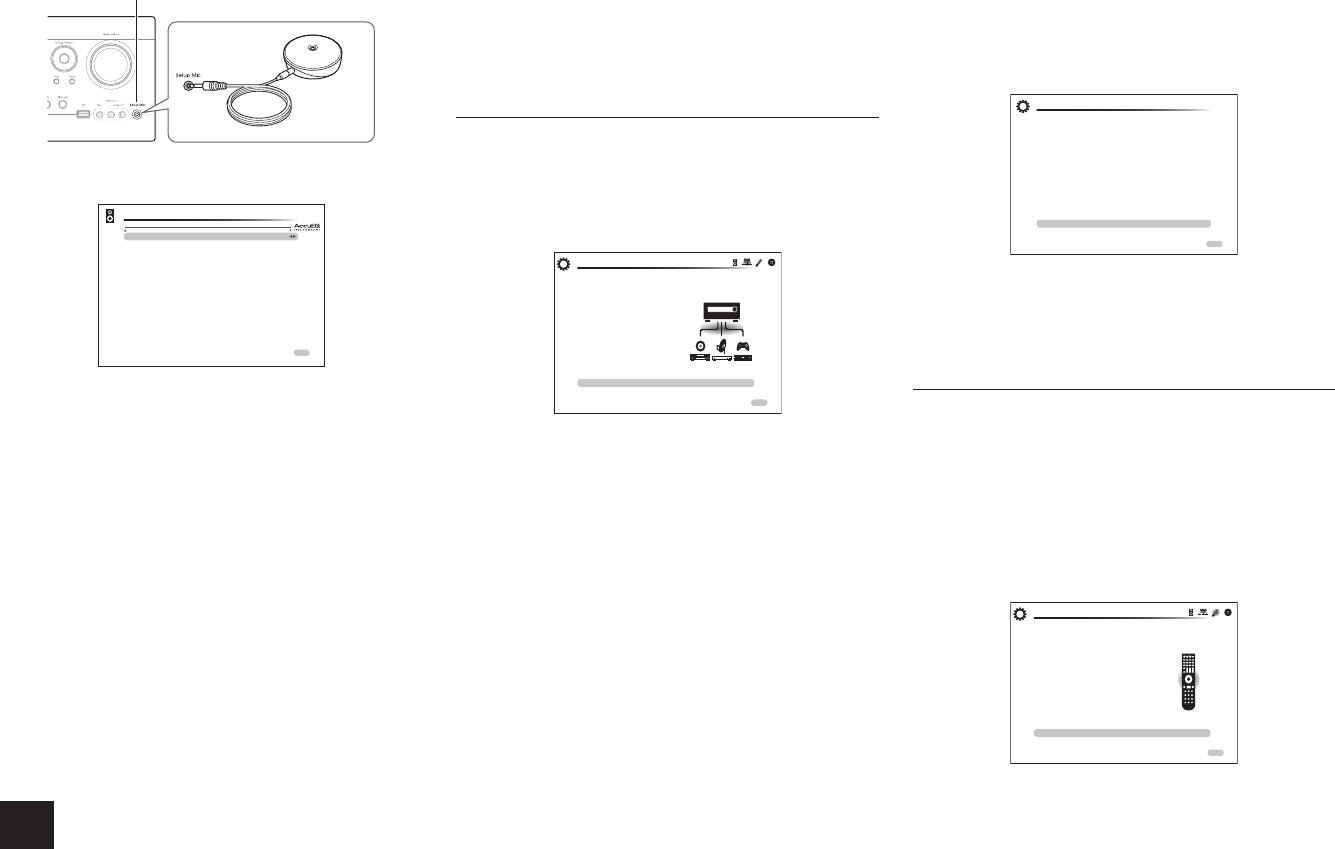
AccuEQ Room Calibration
Front Speakers Type
Powered Zone 2
Back/Height
Subwoofer
Normal
No
Back
Yes
Set bi-amp only if you use 2 channel amp for each front speaker.
ENTERNext
When the screen above is displayed, set the items with
the cursors on the remote controller. When the cursor
is on an item, the content of the item will be shown on
the lower left of the screen. After setting the items, press
Enter on the remote controller. Press Enter also in the
next screen,
5. The test tones sound from the connected speakers
and automatic speaker setting starts.
Measurement will be made twice for each speaker. It
takes several minutes to be completed. Keep the room
as quiet as possible during measurement. If any of
the speakers do not produce the test tone, check for
disconnection.
6. When the measurement is completed, the
measurement result is displayed.
Press
t
/
u
on the remote controller to check the
settings. Press Enter with "Save" selected. In the next
screen showing that "AccuEQ" is "On", press Enter on
the remote controller.
• If there is an error message, follow the on-screen
instruction to remove the error cause.
• Appropriate speaker distance or volume may not
be obtained for the subwoofer due to the non-
directional characteristics of its low frequencies or
other characteristics specific to the room. Adjust the
settings manually.
• Appropriate speaker distance or volume may not be
obtained due to characteristics specific to the room.
Adjust the settings manually.
7. When "Please unplug setup microphone." is
displayed, disconnect the microphone.
2nd Step : Source Connection
You can check whether or not each input source is
connected correctly.
1.
When the Source Connection start screen is
displayed, select "Yes, Continue" with the cursors
and press Enter.
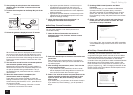
This step will start to check if the
connections were made correctly.
Would you like to continue?
Yes. Continue
No. Skip
Initial Setup
Source Connection
ExitHOME
2. Select the desired input to check the connection and
press Enter.
Start playback of the selected device. If connection is
correct, video/audio of the input source selected on the
unit will be played.
3. After checking the connection, select "Yes" with the
cursors and press Enter.
• If you select "No" and press Enter, the error cause
will be displayed. Follow the guidance to remove the
error cause and check the connection again.
4. Select "Yes" with the cursors and press Enter on the
remote controller to check the connection of other
inputs or select "No, Done Checking" and press
Enter to skip.
If you select "Yes", you will return to the screen of step 2.
If you select "No, Done Checking", you will proceed to
step 5.
5. Enabling HDMI Linked Operation and Other
Functions
In the next screen, you can enable the HDMI linked
operation with CEC compliant device, connection
with ARC compatible TV, and HDMI Through function.
Select "Yes" with the cursors to enable them or "No,
Done Checking" to skip, and press Enter on the remote
controller.
6. Select "Yes" with the cursors and press Enter to
enable the CEC link function or select "No" and
press Enter to keep it disabled.
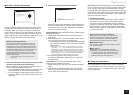
The following CEC-compatible devices are found;
Do you wish to turn on the CEC link?
Integra DHS-8.8
Yes
No
Source Connection
HOME Exit
If you select "Yes", the connection with ARC compatible
TV and HDMI Through function will be set to "Auto" and
enabled.
3rd Step : Remote Mode Setup
In this step, you can enable operation of the other
components using the remote controller of the unit. When
the Remote Mode Setup start screen is displayed, select
"Yes" with the cursors and press Enter on the remote
controller. Follow the guidance to select the desired Remote
Mode button and in the keyboard screen, enter the first
three characters of the brand name of the device you are
going to program (e.g., "INT" for Integra) and search for the
remote control code. The guidance will also explain how to
set the remote controller.
HOME Ex it
Initial Setup
Remote Mode Setup
Preprograming remote will give you control
of other devices from AV receiver remote
Would you like to setup your remote to
control your devices? This may take a while
depending on what and how many you have
connected. You can always come back to remote
setup from setup “8-2 Remote Mode Setup”.
Yes
No. Skip