


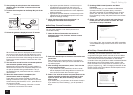
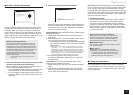
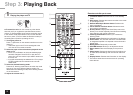
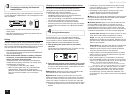
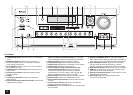

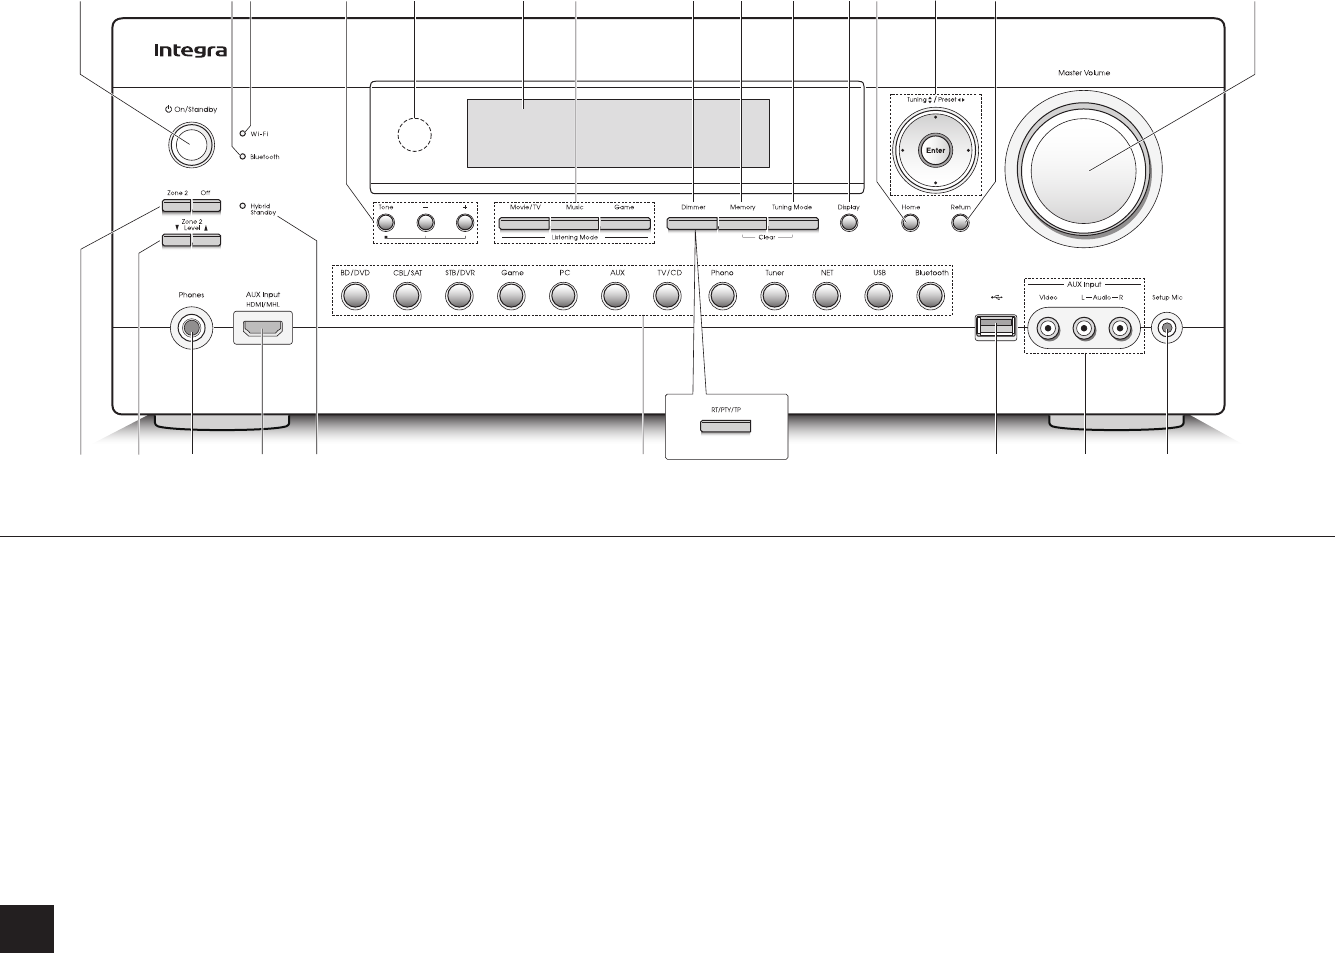
16
1 243
JK
576 8 9 F G
I
N
M
L
S TQO P
H
R
(Australian model)
Front Panel
1 zOn/Standby button: Turns the unit on or into standby
mode.
2 Bluetooth indicator: Flashes while pairing with a
Bluetooth-enabled device is in progress and stays lit
when pairing is completed.
3 Wi-Fi indicator: Stays lit while the unit is connected to
the wireless LAN router.
4 TONE and Tone Level buttons: Adjusts the high tone
and low tone.
5 Remote control sensor: Receives signals from the
remote controller.
6 Display
7
Listening mode buttons: Allows you to select the
listening mode.
8 Dimmer button (North American model): Switches the
brightness of the display.
RT/PTY/TP button (Australian model): Can be used
when receiving the station transmitting text information.
9 Memory button: Registers or deletes a station.
F Tuning Mode button: Switches the tuning mode.
G Display button: Switches the information on the display.
H Home button: Displays the Home menu.
I Cursor buttons, Tuning
j
l
button, Preset
d
c
button and Enter button: Moves the cursor and
confirms the selection. When listening to AM/FM
broadcasting, tune into the station with Tuning
j
l
or
select the registered station with Preset
d
c
.
J
Return button: Returns the display to the previous state.
K Master Volume: Allows you to adjust the volume.
L Zone 2 button and Off button: Controls the multi-zone
function.
M Zone 2 Level
button: Allows you to adjust the
speaker volume of a separate room.
N PHONES jack: Stereo headphones with a standard plug
are connected.
O
AUX Input HDMI/MHL jacks: An HD video camera or
MHL-enabled mobile device is connected. It is possible to
send video and audio of an MHL-enabled mobile device.
P Hybrid Standby indicator: Stays lit if the unit enters
standby mode when the HDMI Through, network
standby or Wakeup from Bluetooth function is enabled.
Q Input selector buttons: Switches the input to be played.
R USB port: A USB storage device is connected so that
music files stored in it can be played.
S AUX Input Video/Audio jacks: A video camera or such
other device is connected.
T SETUP MIC jack: The supplied speaker setup
microphone is connected.