


11
QUICKLY SELECTING TRACKS
When the CD changer is stopped or paused, press 4
1 or ¡ ¢ (or 4 or ¢ on the remote control)
until the CD changer displays the desired track’s number.
Or, enter the track number using the remote control’s
number buttons, then press TRACK SET within 5 seconds.
If you use this feature while a CD plays, the CD changer
stops playing the current track and skips to the next or
previous track.
SEARCHING FOR A SECTION OF A TRACK
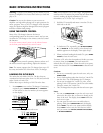
To rapidly search forward or backward for a track section
while a CD plays, hold down ¡ ¢ or 4 1 on
the front panel (¡ or 1 on the remote control). The
display shows the elapsed time to help you locate the
desired section, and the CD plays at a lower volume and
higher speed than normal. Release the button to resume
normal play.
You can also search a track when a CD is paused. The
searching speed is faster, the display shows only the
minutes, and you do not hear the CD play.
Note: You cannot search past the end (End appears on
the display) or the beginning of a CD.
SPECIAL FEATURES
ASSIGNING CDS TO A CUSTOM CD GROUP
You can assign any loaded CD into a custom CD group.
This lets you group your favorite CDs together for more
convenient playback.
Follow these steps to assign CDs to a group.
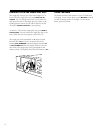
1. While the CD changer is stopped, repeatedly press
MODE until CUSTOM and the number of the desired
group light. (If any discs have been assigned to the
group, the lowest disc number appears on the display.
Press CLEAR to clear the group.)
2. Select a CD for storing into the group.
• If you use 2 DISC NUMBER 3, simply wait until
the display blinks. The disc number is
automatically stored in memory.
• If you use the remote control’s number buttons,
press DISC SET to store the disc number in
memory.
3. Repeat Step 2 to store all the CDs you want.
Notes:
• The custom group memory is kept even after you turn
off the CD changer.
• The changer keeps the CDs stored in custom group
memory for a few minutes in the event of a power loss.
Checking the Custom Group Contents
With the CD changer stopped, repeatedly press MODE so
CUSTOM and the number of the desired group light. Then
repeatedly press DISPLAY so C and the custom group
number appear on the display. Then repeatedly press DISC
NUMBER 3. The programmed disc numbers appear in
order as you press DISC NUMBER 3.
Notes:
To change the CDs assigned to a custom CD group, you
must clear all the entries and enter the desired CDs again.
Erasing All the CDs from a Custom Group
With the CD changer stopped, repeatedly press MODE so
CUSTOM and the number of the desired group light Then
press CLEAR. (You cannot partially erase a custom group
memory.)