


SETTING UP THE SYSTEM
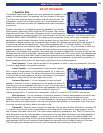
The setup of the preamplifier will require navigation through the menu system. The system menu will display
on the front panel as well as an On-Screen Menu format. The OSD menu is available on all three video
format types. B& K recommends that a video monitor, connected to a Zone A video output, be used in
conjunction with the SR10.1 remote to setup the system using the OSD menu. It is possible to set up your
preamplifier directly from the front panel. The descriptions below are general instructions for using and
navigating the menu system. A complete navigational menu system flow chart is located on page 58.
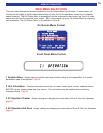
B& K supports setup software (BKcSuite) that can be used to assist in the setup of the preamplifier.
BKcSuite setup software is available on our website at www
.bkcomp.com. BKcSuite provides a fast and easy
way to configure the system parameters of the preamplifier using a personal computer or laptop
equipped with a serial port. You can save the configuration files for later use or as a backup.
Directions for installing the BKcSuite are available on page 54 or on our website. BKcSuite is compat-
ible with any B& K audio processor and can be used in conjunction with the SR10.1 Remote or CK1.2
Keypad programming software.
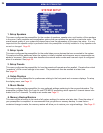
THE MENU SYSTEM
MENU Button - Pressing the MENU button either on the remote or on the front panel will activate the menu
system. Once you are in the menu system, the MENU button will step back to the next higher-level menu or,
if you are already at the highest level, it will exit from the menu system.
EXIT (remote only) - From the remote control you may instantly exit the menu system by pressing the EXIT
button. From the front panel press Menu repeatedly until you leave the menu system
UP/DOWN ARROWS - Once you are in the menu system, use the UP/DOWN ARROWS to move to the
desired menu selection. With the supplied SR10.1 remote, rocking the thumb pad forward and backwards act
as the up and down arrows.The current active menu line is highlighted in a contrasting color in the On-screen
display and also shown on the front panel display.
SELECT / ENTER - Some menu selections select another menu level to be activated. Use the UP/DOWN
ARROWS to move to the desired menu line. Pressing SEL or ENTER will activate the next menu. With the
supplied SR10.1 remote, pressing on the center of the thumb pad also acts as the ENTER key.
NUMERIC KEY DIRECT ENTRY (remote only) - From the remote control you may also go directly to a
menu line by typing the corresponding line number. If there is another menu level below that line it will be
activated immediately (no ENTER required).
LEFT / RIGHT ARROWS (remote) or Volume Knob (front panel) - To change menu parameters, press the
LEFT or RIGHT arrows to change the setting. There are no LEFT or RIGHT arrows on the front panel. The
volume knob acts as the LEFT or RIGHT arrows. With the supplied SR10.1 remote, rocking the thumb pad
left and right act as the left and right arrows.
TEXT EDITING - Some menu selections will allow you to edit text. Use the UP/DOWN ARROWS to change
the current (blinking) character. Use the LEFT/RIGHT ARROWS (or VOLUME KNOB) to move to another
character position. Additionally, while in the edit text mode, a successive press of a numeric key allows direct
recall of the alphanumeric character map. It will allow a step through selecting between numbers, letters
and/or symbols. The selection options for each of the numeric keys are as follows:
0 = [-, +, /, ?, space, 0] 4 = [J, K, L, j, k, l, 4] 8 = [V, W, X, v, w, x, 8]
1 = [A, B, C, a, b, c, 1] 5 = [M, N, O, m, n, o, 5] 9 = [Y, Z, y, z, 9]
2 = [D, E, F, d, e, f, 2] 6 = [P, Q, R, p, q, r, 6]
3 = [G, H, I, g, h, i, 3] 7 = [S, T, U, s, t, u, 7]
22
MENU SYSTEM SETUP