


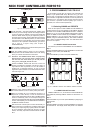
MIDI FOOT CONTROLLER FCB1010
8
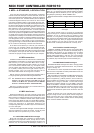
1 SWITCH 1
Determines if UP key toggles
SWITCH 1 relay while DIRECT
SELECT is enabled.
2 SWITCH 2
Determines if DOWN key toggles
SWITCH 2 relay while DIRECT
SELECT is enabled.
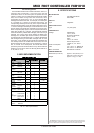
5
COPY
PRESET
Enables copying presets (see ch.
2.4.1).
6
SYSEX
SEND
Sends the entire memory as a sysex
dump.
7
SYSEX
RCV
When this switch is pressed, the
FCB1010 waits for the reception of
system-exclusive data. Switch LED
dies out when the data have been
received correctly.
8MERGE
Allows to merge MIDI IN data with
FCB1010-generated data. The
combined data stream is
subsequently output at the MIDI
OUT.
9
RUNNING
STATUS
Enables/disables running status
feature. Serves to make efficient use
of the MIDI transmission rate. The
MIDI status byte from the expression
pedals is sent only if it differs from
the preceding status byte.
Tab. 2.2: Assignment of footswitches in CONFIGURATION
setup menu
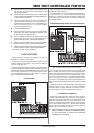
+ External equipment, for example guitar or bass
amps, can be controlled by using SWITCH 1 and 2
outputs of the FCB1010. If the FCB1010 triggers this
function, you should first check if the piece of
equipment you are trying to control reacts to
connection state (contact open or closed) or current
feed (contact closed as long as the switch is
depressed). BEHRINGER guitar and bass amps react
to current feeds. Therefore, when you wish to
remotely control channel change on a BEHRINGER
guitar amp not via MIDI but via switch outputs
(because you have no MIDI cable at your disposal),
you have to power off switch 1 & 2 LEDs in GLOBAL
CONFIGURATION menu under CONFIG. These LEDs
are on in the default setting and indicate that
programmed connection state is kept.
Basically, CONFIGURATION mode functions are active as long
as the corresponding footswitch LED is lit.
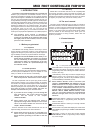
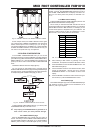
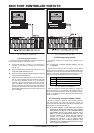
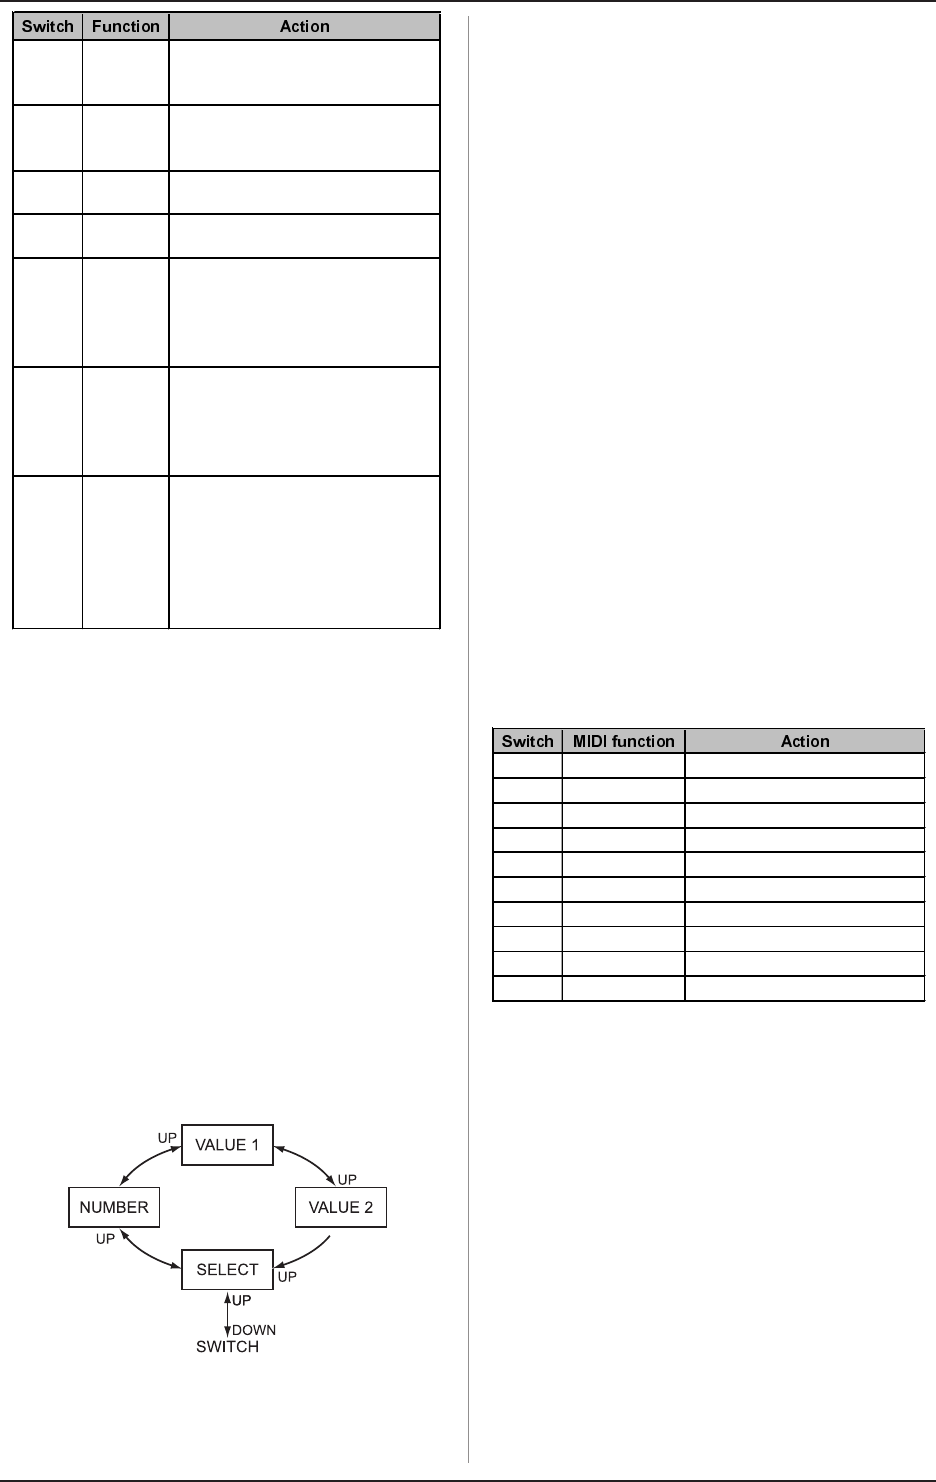
2.3 Quick start guide for PRESET programming
Fig. 2.4: PRESET programming
For each of the 100 PRESETS you can determine which MIDI
functions shall be transmitted as soon as you select the
respective PRESET. For instance, you can send five different
program change commands, two controller commands, two
different controller values (using the expression pedals) and a
Note On command to the connected equipment at the same time
(menu structure as in fig. 2.4). It is up to you to determine, which
commands are stored in a PRESET. Do as follows to program the
functions to be sent with each PRESET:
s Select the PRESET you wish to edit.
s Press DOWN for more than 2.5 sec to enter PRESET
programming mode. The number in the display disappears
while the green SWITCH 1/SWITCH2 LED in the display
starts flashing.
s Use footswitches 1 and 2 to edit the status of the
SWITCHES. The current status is indicated by the foot-
switch LED and the corresponding SWITCH LED in the
acrylic display. For further details see chapter 3.3
Connections (general).
+ Please note that the status of the SWITCHES can
also be toggled with UP (SWITCH 1) and DOWN
(SWITCH 2) if DIRECT SELECT is enabled. The only
prerequisite is that this function has been enabled
for both SWITCHES in the CONFIGURATION menu.
s Confirm with UP/ENTER. The SELECT LED in the display
lights up.
s Activate individual MIDI functions by keeping the respective
footswitch depressed for roughly 1.5 sec. Footswitch LEDs
indicate the activated footswitches of the respective MIDI
functions. As long as the display indicates SELECT, you
can activate MIDI functions and select them for editing by
briefly pressing the corresponding footswitch. The selected
footswitch LED and the display blink during selection and
activation. The NUMBER LED is also lit. The following MIDI
functions are available for selection:
1 PRG CHG 1 Program change command #1
2 PRG CHG 2 Program change command #2
3 PRG CHG 3 Program change command #3
4 PRG CHG 4 Program change command #4
5 PRG CHG 5 Program change command #5
6 CNT 1 Controller 1
7 CNT 2 Controller 2
8 EXP A Expression Pedal A
9 EXP B Expression Pedal B
10/0 NOTE Transmits a MIDI note
Tab. 2.3: Footswitch assignment in PRESET
programming mode
+ MIDI channel adjustment for the respective MIDI
functions is not done during preset programming;
it is done in GLOBAL CONFIGURATION on MIDI
FUNCTION page (see ch. 2.2.2).
s Confirm your selection with UP/ENTER, in order to start
programming the selected MIDI function, or cancel with
DOWN/ESCAPE. Use footswitches 1 through 10/0 or
EXPRESSION PEDAL A to enter the parameter values of
your choice.
s If you have selected PROGRAM CHANGE as the MIDI
function to be edited, you can now enter a program change
number from 1 through 128 and confirm your selection
with UP/ENTER.
s If you have selected CNT1 or CNT2, you can now enter
the number of the controller to be sent (0 through 127)
when you press the corresponding footswitch. After
confirming your selection with UP/ENTER you can select a
controller value (0 through 127). Confirm your selection
with UP/ENTER.
2. PROGRAMMING THE FCB1010