13
CONNECTIONS
PREPARATION
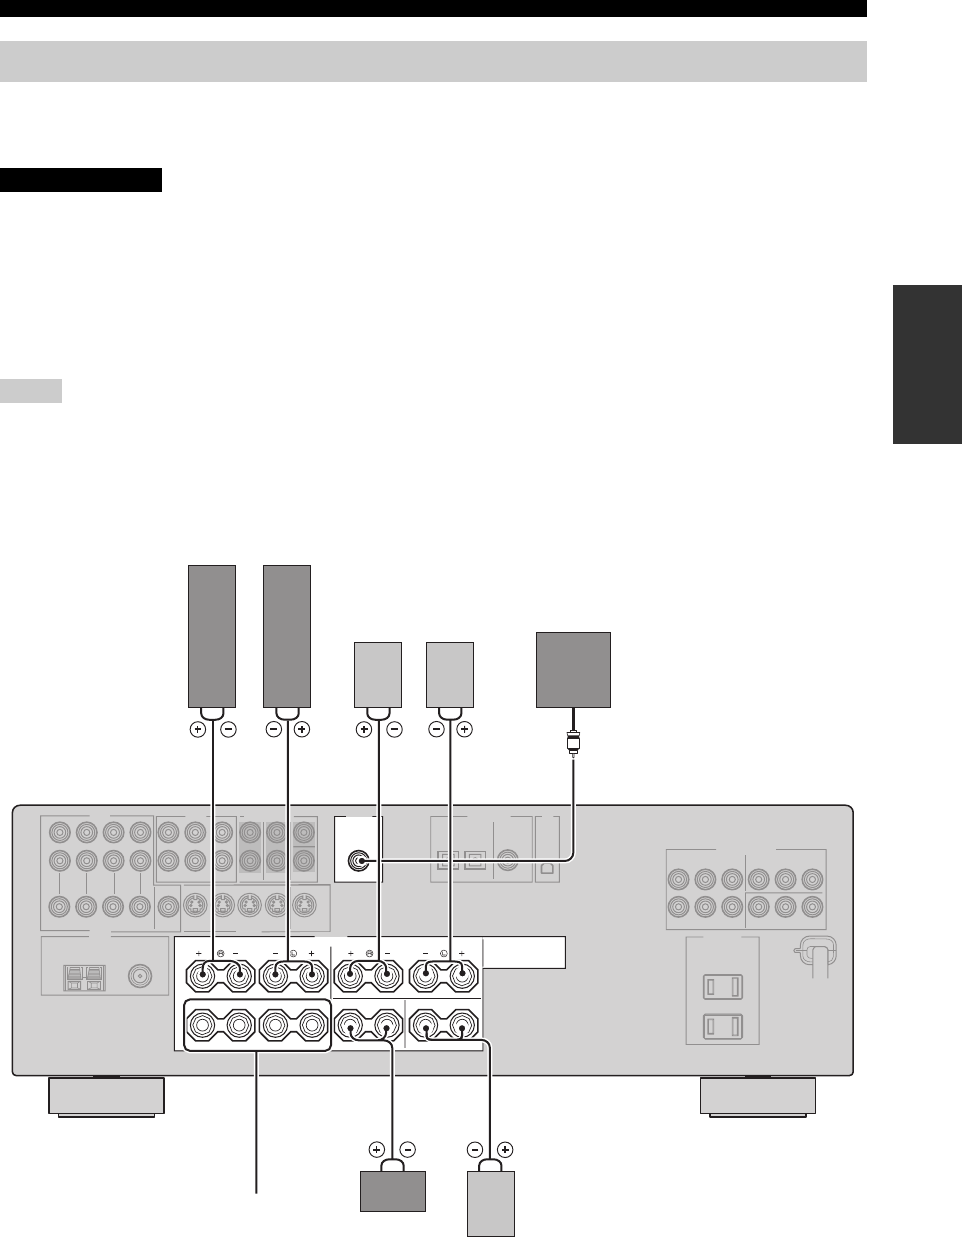
Be sure to connect the left channel (L), right channel (R), “+” (red) and “–” (black) properly. If the connections are faulty,
no sound will be heard from the speakers, and if the polarity of the speaker connections is incorrect, the sound will be
unnatural and lack bass.
• Before connecting the speakers, make sure that this unit is in the standby mode (see page 26).
• Do not let the bare speaker wires touch each other or do not let them touch any metal part of this
unit. This could damage this unit and/or speakers.
• Use magnetically shielded speakers. If this type of speakers still creates the interference with the
monitor, place the speakers away from the monitor.
• If you are to use 4 or 6 ohm speakers, be sure to set “SP IMP.” to “6ΩMIN” before using this unit
(see page 25).
• A speaker cord is actually a pair of insulated cables running side by side. Cables are colored or shaped differently, perhaps with a
stripe, groove or ridge. Connect the striped (grooved, etc.) cable to the “+” (red) terminals of this unit and your speaker. Connect the
plain cable to the “–” (black) terminals.
• The low-frequency signals of other speakers set to “SML” (or “SMALL”) or to “NONE” in “SPEAKER SET” (see pages 78 and 79)
are directed to the speakers selected in “BASS OUT” (see page 79).
Connecting speakers
Notes
CAUTION
OUTPUT
SUB
WOOFER
B
A
SURROUND
CENTERCLASS 2 WIRING SURROUND BACK
FRONT
SPEAKERS
7
6
54
3
21
Subwoofer
Center
speaker
Front speakers (A)
Surround back
speaker
Surround speakers
Front
speakers
(B)
(U.S.A. model)
Right
Right Left
Left


