


E-12
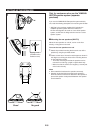
STANDBY mode
While the power is on, pressing the STANDBY/ON switch
(or the STANDBY/ON switch on the remote control
transmitter) switches this unit to the standby mode. (In this
mode, the display shows only the time.) In this mode, main
voltage is still present inside the unit. If you want to switch
off this unit completely, disconnect the AC power plug from
the AC outlet.
TURNING THIS UNIT ON OR INTO THE STANDBY MODE
If the AC supply lead is connected to the AC outlet, this unit
can be turned on and turned into the standby mode by
pressing the STANDBY/ON switch on the front panel of this
unit or the STANDBY/ON switch on the remote control
transmitter.
Automatic turning this unit into the standby mode
This unit will be automatically turned into the standby mode if
there is no operation on the control parts of this unit, no
illumination on the graphic equalizer level indicators and no
playback of CD for about 30 minutes.
* This function is not available unless time setting is made
on the built-in clock.
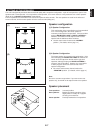
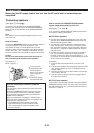
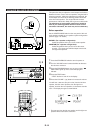
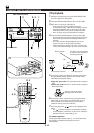
CONNECTIONS
Connecting external components
(See figure 8 on page 88.)
This unit can be connected with external audio and video
components. Make connections between this unit and other
components using RCA pin plug connector cables correctly,
that is to say L (left) to L and R (right) to R. Also, refer to the
owner’s manual for each component to be connected to this
unit.
*
: AC OUTLET (UNSWITCHED)
The power cord of any audio/video unit can be connected to
this outlet.
The power to this outlet is not controlled by this unit’s
STANDBY/ON switch . This outlet will supply power to the
connected unit even if this unit is in the standby mode.
The maximum power that can be connected to this outlet is
100 watts
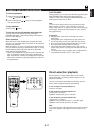
DISC SKIP
STOP
INPUT
PLAY
/
PAUSE
LEVEL
MUSIC
TEST FLAT
CENTER
/
REAR
/
DELAY
ECHO
PROGRAM
USER
DISPLAY
SLEEP
VOLUME
CD CHANGER RECEIVER EMX
–
100RDS
PHONES
DISC
123
PROGRAM
MUSIC
USER
MEMORY
INPUT SELECTOR
VCR/LD-TV/CD/TUNER/TAPE•MD/AUX
VOLUME
RANDOM
DISPLAY
MIC
MIN MAX
MIC MIXING
REPEAT TIME MEMORY AUTO/MAN'L
HOUR
PRESET/TUNING/BAND
A/B/C/D/E
MIN TIME ADJ TIMER
OPEN/
CLOSE
DISC
CHANGE
STANDBY/ON
MODE PTY SEEK STARTFREQ PS/PTY/RT/CT
PTY SELECT
PTY SELECT
STANDBY/ON
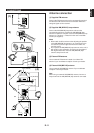
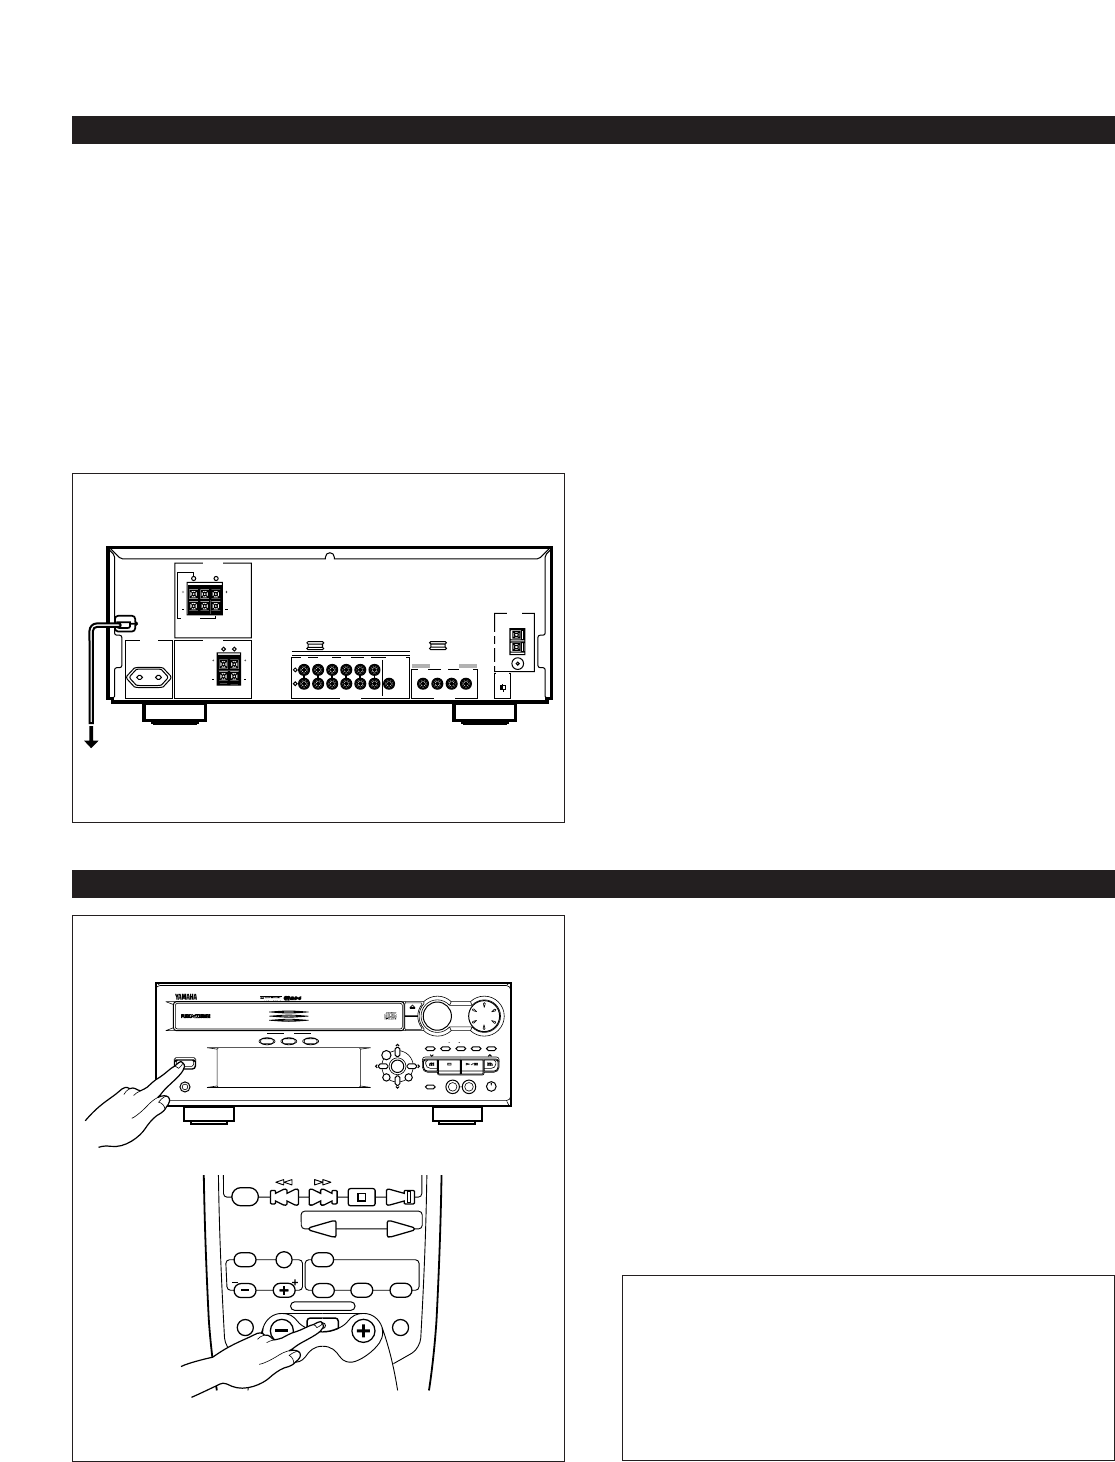
Connecting the AC supply lead
•
After completing all connections, plug the AC supply lead
into a convenient AC outlet.
•
Unplug the AC supply lead from the AC outlet if the unit is
not to be used for a long period of time.
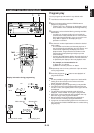
SPEAKERS
CENTER/REAR
SPEAKERS
FRONT
AC OUTLET
MAINS
R L
CENTERREAR REAR
REAR SINGLE
CENTER :8
Ω
MIN./SPEAKER
6
Ω
MIN./SPEAKER
SEE OWNER'S MANUAL FOR CONNECTION.
SEE OWNER'S MANUAL FOR CONNECTION.
REAR
:4
Ω
MIN./SPEAKER
REAR SINGLE
:8
Ω
MIN./SPEAKER
RL
L
UNSWITCHED
100W MAX.
AUDIO SIGNAL
AUX
TAPE
•
MD LD
•
TV
AUDIO SIGNAL
VCR SUBWOOFER
R
IN OUT IN OUT
OUT
VCR MONITOR
OUT
LD
•
TV
VIDEO SIGNAL
ANTENNA
AM
FM
GND
75
Ω
UNBAL.
NORMAL
PHANTOM
CENTER
MODE
IN OUT
VIDEO SIGNAL
To AC outlet