


E-10
SETTING THE CLOCK
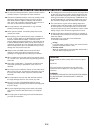
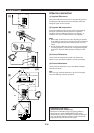
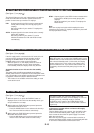
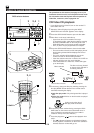
(See figure A on page 88.)
1 While the power is on, press the DISPLAY button to
display the time. If this unit is into the standby mode, you
can proceed to the next step.
2 While holding the TIME ADJ button pressed, press the
HOUR button and set the hour.
* Press the HOUR button once to advance the time by 1
hour. Press and hold to advance continuously.
3 While holding the TIME ADJ button pressed, press the
MIN button and set the minute.
* Press the MIN button once to advance the time by 1
minute. Press and hold to advance continuously.
Singapore model uses a 24-hour display. China and
General models use either a 24-hour display or a 12-hour
display [shown by “AM (PM) 12:00”] is selected
depending on the setting of the FREQUENCY STEP
switch on the rear panel, so you cannot select a desired
type freely.
In the event of a power failure or when the AC supply
lead is disconnected.
The time display will go out, however, the clock will function
for about 5 minutes without power supply. So you do not
have to reset the time if the AC power supply is resumed
within about 5 minutes.
When the AC power supply is resumed after more than 5
minutes pass without power supply, the time display will flash
on and off to indicate that the time must be reset.
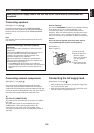
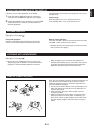
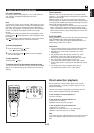
TURNING THE POWER TO THIS UNIT ON OR IN THE STANDBY MODE
(See figure 0 on page 88.)
If the AC supply lead is connected to the AC outlet, this unit
can be turned on and turned into the standby mode by
pressing the POWER switch on the front panel or the
POWER switch on the remote control transmitter.
•
While the power is on, the display shows the name of
currently selected input source or other information.
In the standby mode, the display shows only the time.
Automatic function to turn this unit into the standby
mode
The power of this unit will be automatically turned into the
standby mode if there is no operation on the control parts of this
unit, no illumination on the graphic equalizer level indicators and
no playback of Video CD (CD) for about 30 minutes.
* This function is not available unless time setting is made
on the built-in clock.
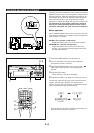
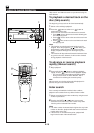
(See figure 9 on page 88.)
The Video CD player on this unit is designed for use with the
NTSC and PAL television formats. Set this switch to the
position for the format your monitor TV employs.
PAL: Outputs signals in the PAL format no matter which
format (PAL or NTSC) the currently playing disc
employs.
Set to this position if your monitor TV employs the
PAL format.
AUTO: Outputs signals in the same format as the currently
playing disc employs.
Set to this position if your monitor TV can be
switched in between the PAL and NTSC formats
automatically.
NTSC: Outputs signals in the NTSC format no matter which
format (PAL or NTSC) the currently playing disc
employs.
Set to this position if your monitor TV employs the
NTSC format.
Note
Make sure to play back a disc which employs the same
format that your monitor TV employs, otherwise a picture will
not be played back normally.
SETTING THE VIDEO OUTPUT FORMAT SELECTOR (TV MODE) SWITCH
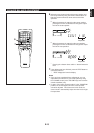
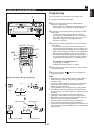
Standby mode
While the power is on, pressing the POWER switch (or the
POWER switch on the remote control transmitter) switches
this unit to the Standby mode. (In this mode, the display
shows only the time.) In this mode, main voltage is still
present inside this unit. If you want to switch off this unit
completely, disconnect the AC power plug from the AC
outlet.