


E-9
English
CONNECTIONS
Connecting speakers
(See figure 6 on page 66.)
Connect the front speakers to the FRONT SPEAKERS
terminals, the center speaker to the CENTER SPEAKERS
terminals and the rear speakers to the REAR SPEAKERS
terminals.
Note
Use speakers with the specified impedance shown on the
rear of this unit.
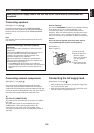
How to Connect:
Connect the SPEAKERS terminals to your speakers with wire
of the proper gauge, cut as short as possible. If the
connections are faulty, no sound will be heard from the
speakers. Make sure that the polarity of the speaker wires is
correct, that is the + and – markings are observed. If these
wires are reversed, the sound will be unnatural and lack bass.
Caution
Do not let the bare speaker wires touch each other as
this could damage the amplifier and/or speakers.
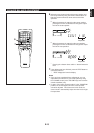
Red: positive (+)
Black: negative (–)
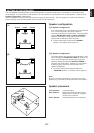
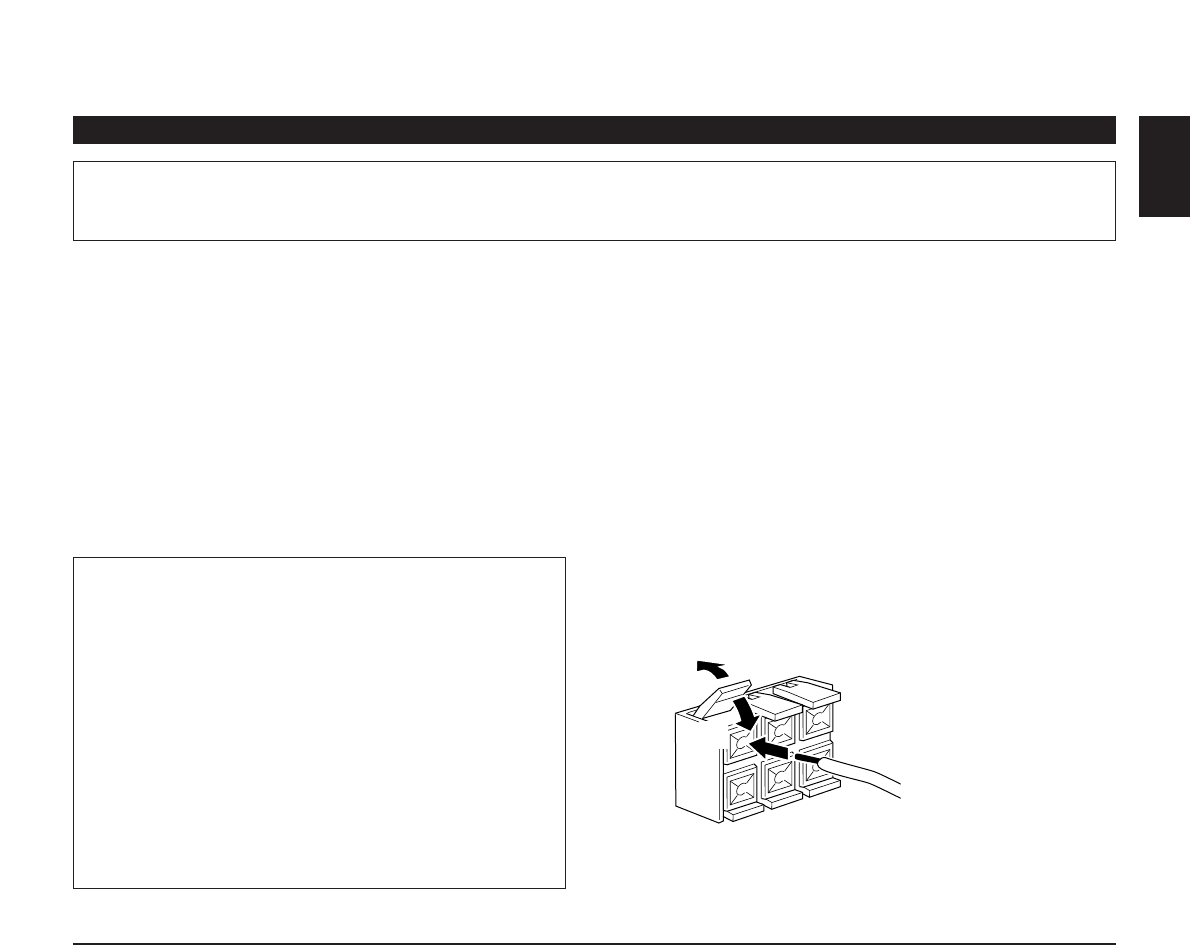
➀
Press up the tab.
➁
Insert the bare wire.
[Remove approx.
5mm (1/4”) insulation
from the speaker
wires.]
➂
Press down the tab
and secure the wire.
➀
➁
➂
Never plug the AC supply lead of this unit into the AC outlet until all connections are
completed.
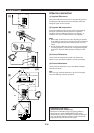
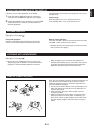
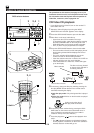
Note on connecting a subwoofer (separate
purchase)
You may wish to add a subwoofer to reinforce the bass
frequencies.
Connect the SUBWOOFER OUT terminal on the rear of
this unit to the INPUT terminal of the subwoofer
amplifier, and connect the speaker terminals of the
subwoofer amplifier to the subwoofer.
With some subwoofers, including the Yamaha Active
Servo Processing Subwoofer System, the amplifier and
subwoofer are in the same unit.
* The SUBWOOFER OUT terminal is for output to a
monaural amplifier driving a subwoofer. Only frequencies
below 200 Hz from the front and center channels are
output.
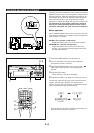
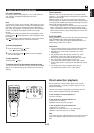
Connecting external components
(See figure 7 on page 77.)
This unit can be connected with external audio and video
components. Make connections between this unit and other
components using RCA pin plug connector cables correctly, that
is to say L (left) to L and R (right) to R. Also, refer to the owner’s
manual for each component to be connected to this unit.
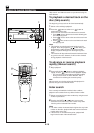
AC OUTLET (UNSWITCHED)
The power cord of any audio/video unit can be connected to
this outlet.
The power to this outlet is not controlled by this unit’s
POWER switch. This outlet will supply power to the
connected unit even if this unit is in the standby mode.
The maximum power that can be connected to this outlet is
100 watts.
Connecting the AC supply lead
(See figure 8 on page 88.)
•
After completing all connections, plug the AC supply lead
into a convenient AC outlet.
•
Unplug the AC supply lead from the AC outlet if the unit is
not to be used for a long period of time.
*