


19
English
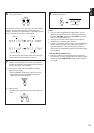
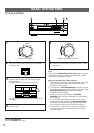
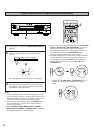
6 Turn up the volume.
You will hear a test tone (like pink noise) from the left main
speaker, then the center speaker, then the right main
speaker, and then the rear speakers, for about two seconds
each. The display changes as shown below.
* The test tone from the left rear speaker and the right
rear speaker will be heard at the same time.
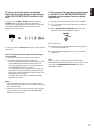
7 Adjust the sound output levels of the center speaker
and the rear speakers so that they become almost as
same as that of the main speakers.
a) Press once or more so that “CENTER” or “REAR”
appears on the display.
* Select “CENTER” to adjust the output level of the
center speaker, and select “REAR” to adjust the
output level of the rear speakers.
b) Adjust its level.
* Pressing the + side raises and the – side lowers the
level.
8 Cancel the test tone.
Notes
●
Once you have completed these adjustments, you can
adjust whole sound level on your audio system by using
this unit’s VOLUME control (or the VOLUME keys on the
remote control transmitter) only.
●
You may also use the volume controls on the external
amplifiers etc. to achieve proper balance.
●
In step 7, if the center channel mode is in the “PHANTOM”
position, the sound output level of the center speaker
cannot be adjusted. This is because in this mode, the
center sound is automatically output from the left and right
main speakers.
<U.K. and Europe models only>
●
If there is insufficient sound output from the center and
rear speakers, you may decrease the main speaker output
level by setting the MAIN LEVEL switch on the rear panel
to “–10 dB”.
VOLUME
Main (L)
Main (R)
Center
Rear (L and R)
TIME/
LEVEL
–+
DELAY/CENTER
/REAR/SWFR
Disappears.
TEST