


E-34
SPEAKER MODE SETTINGS
This unit has seven SPEAKER SET items in the SET MENU that you must set according to the number of speakers in your configuration
and their size. The following table summarizes these SPEAKER SET items, and shows the initial settings as well as other possible settings. If
the initial settings are not appropriate for your speaker configuration, change the settings in the SET MENU.
■ Summary of SPEAKER SET items 1A through 1G
Item
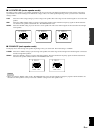
1A CENTER SP
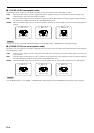
1B MAIN SP
1C REAR L/R SP
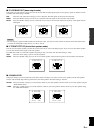
1D REAR CT SP
1E LFE/BASS OUT
1F FRONT EFCT SP
1G MAIN LEVEL
Cautions
• When you select 6CH INPUT as the input source, settings of “1 SPEAKER SET” on the SET MENU do not apply (except for “1G MAIN
LEVEL”).
• When the digital signals with over 96 kHz sampling frequency are input, only the “1G MAIN LEVEL” setting is effective.
Description
Selects the output mode according to whether or not a center speaker is being used and its
performance.
Selects the output mode according to the performance of the main speakers.
Selects the output mode according to whether or not rear L/R speakers are being used and
their performance.
Selects the output mode according to whether or not a rear center speaker is being used and its
performance.
Selects the speaker according to use for LFE signal output and low bass signal.
Selects the output mode according to whether or not front effect speakers are being used.
Selects the main speaker level.
Control value (default
setting indicated in bold)
LRG/SML/NONE
LARGE/SMALL
LRG/SML/NONE
LRG/SML/NONE
SW/MAIN/BOTH
YES/NONE
Normal/–10dB
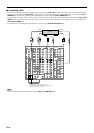
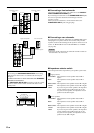
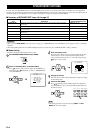
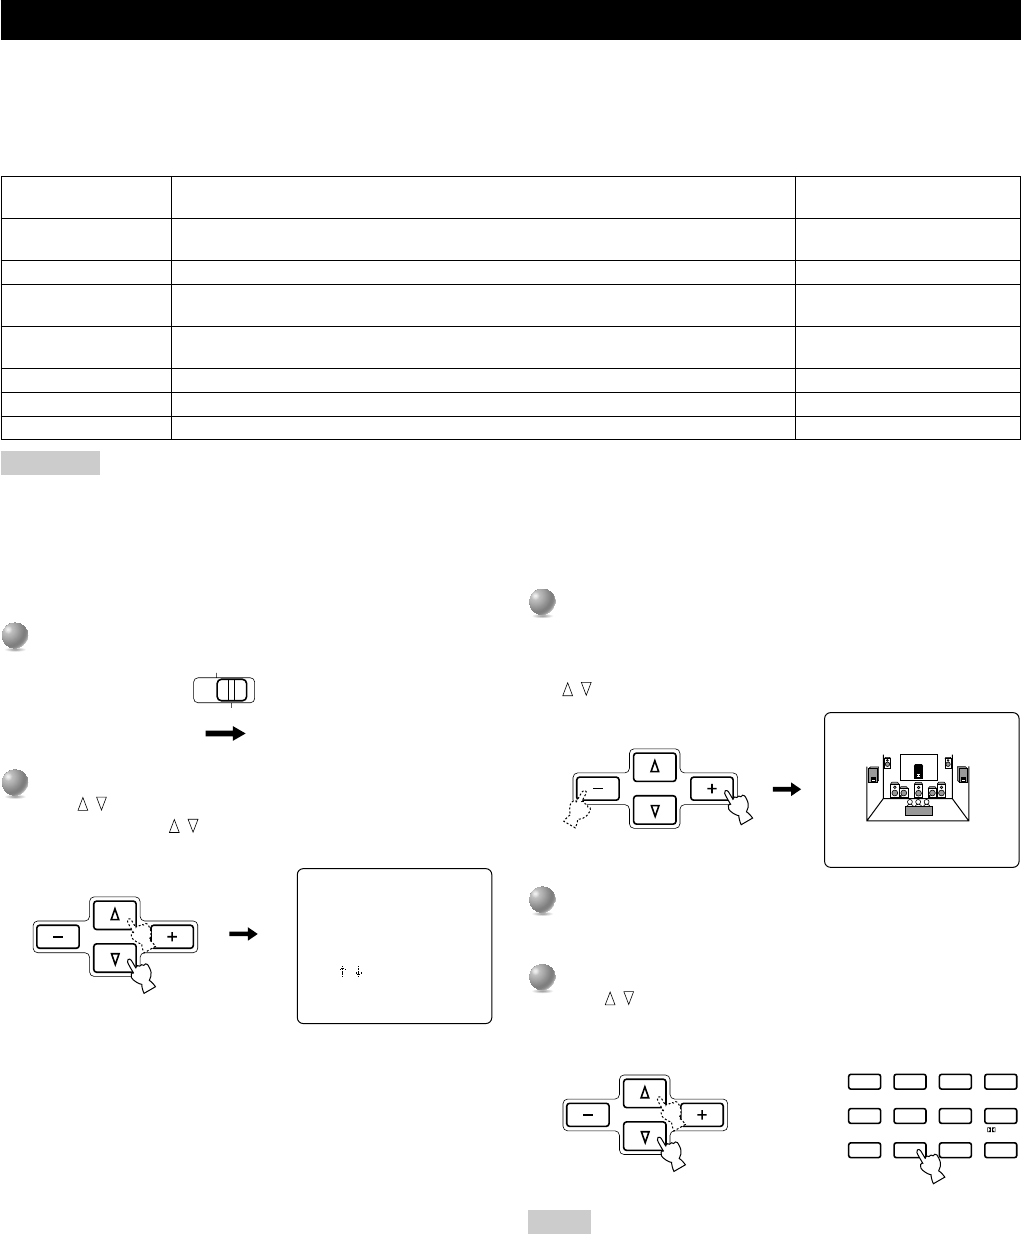
■ Mode setting
Adjustment should be made with the remote control.
1
1
Set PARAMETER/SET MENU to SET MENU.
2
2
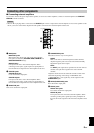
Select “1 SPEAKER SET” on the SET MENU.
Press
/ on the remote control to display the SET MENU on
the monitor. Press
/ repeatedly to select “1 SPEAKER SET”
on the SET MENU.
SET MENU
PARAMETER
≥ 1 SPEAKER SET
2 LOW FREQ.TEST
3 HP TONE CTRL
4 CENTER GEQ
/ : Up/Down
-/+ : Enter
SET MENU 1/5
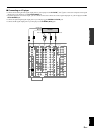
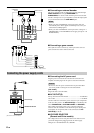
3
3
Enter the setting mode.
Press +/– on the remote control to enter the setting mode. The
current setting is shown on the front panel display and the
video monitor. Select the item (1A – 1G) to be set by pressing
/ on the remote control.
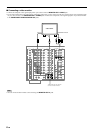
4
4
Change the setting.
Press +/– on the remote control repeatedly to change the setting
for the selected item.
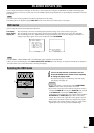
5
5
Close the SET MENU.
Press
/ repeatedly until the DSP program name appears to
close SET MENU or press one of the DSP program buttons on
the remote control.
Note
• This setting operation can be done by using NEXT and SET
MENU +/– on the front panel.
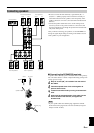
“LRG SML NONE
1A CENTER SP
1
HALL 1
2
HALL 2
3
CHURCH
4
5678
JAZZ CLUB
0
+
10
+
100
ROCK
CONCERT
ENTER–
TAINMENT
CONCERT
VIDEO 1
CONCERT
VIDEO 2
9101112
TV
THEATER
MOVIE
THEATER 1
MOVIE
THEATER 2
/DTS
SUR.