Front and Rear of Unit
8
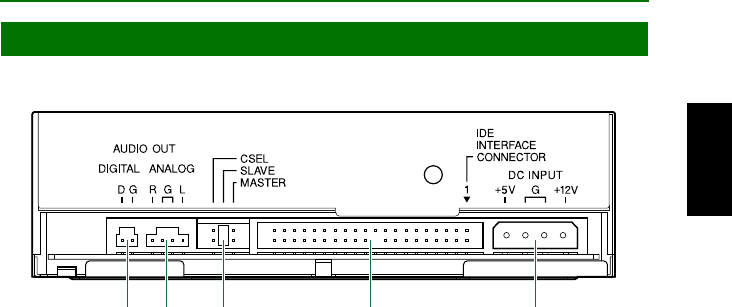
The CRW2200E drive’s rear panel features the following:
➀
➀➀
➀ DIGITAL AUDIO OUT connector
If your sound card has a SPDIF (digital audio) input connector, you can connect the
DIGITAL AUDIO OUT connector of the unit to the SPDIF connector using a digital audio
cable (sold separately).(
→
P. 22)
➁
➁➁
➁ ANALOG AUDIO OUT connector
Connect one end of the 4-pin audio cable to this and the other end to your computer’s
sound card or built-in audio. (
→
P. 21)
➂
➂➂
➂ Jumper switch
Plug a plastic shunt into this jumper switch to select the connection, either IDE master or
slave. The
CRW2200E
drive’s factory setting is SLAVE. (
→
P. 17)
➃
➃➃
➃ IDE INTERFACE CONNECTOR
Insert the connector of the IDE cable here. Make sure you align the red line of the ribbon cable
with pin 1 of the drive’s connector, marked “IDE INTERFACE CONNECTOR 1.” (
→
P. 20)
➄
➄➄
➄ DC INPUT connector
Insert the power connector from your computer’s power supply in this socket to feed power
to the drive. (
→
P. 23)
Rear Panel
➁➀ ➂ ➃ ➄


