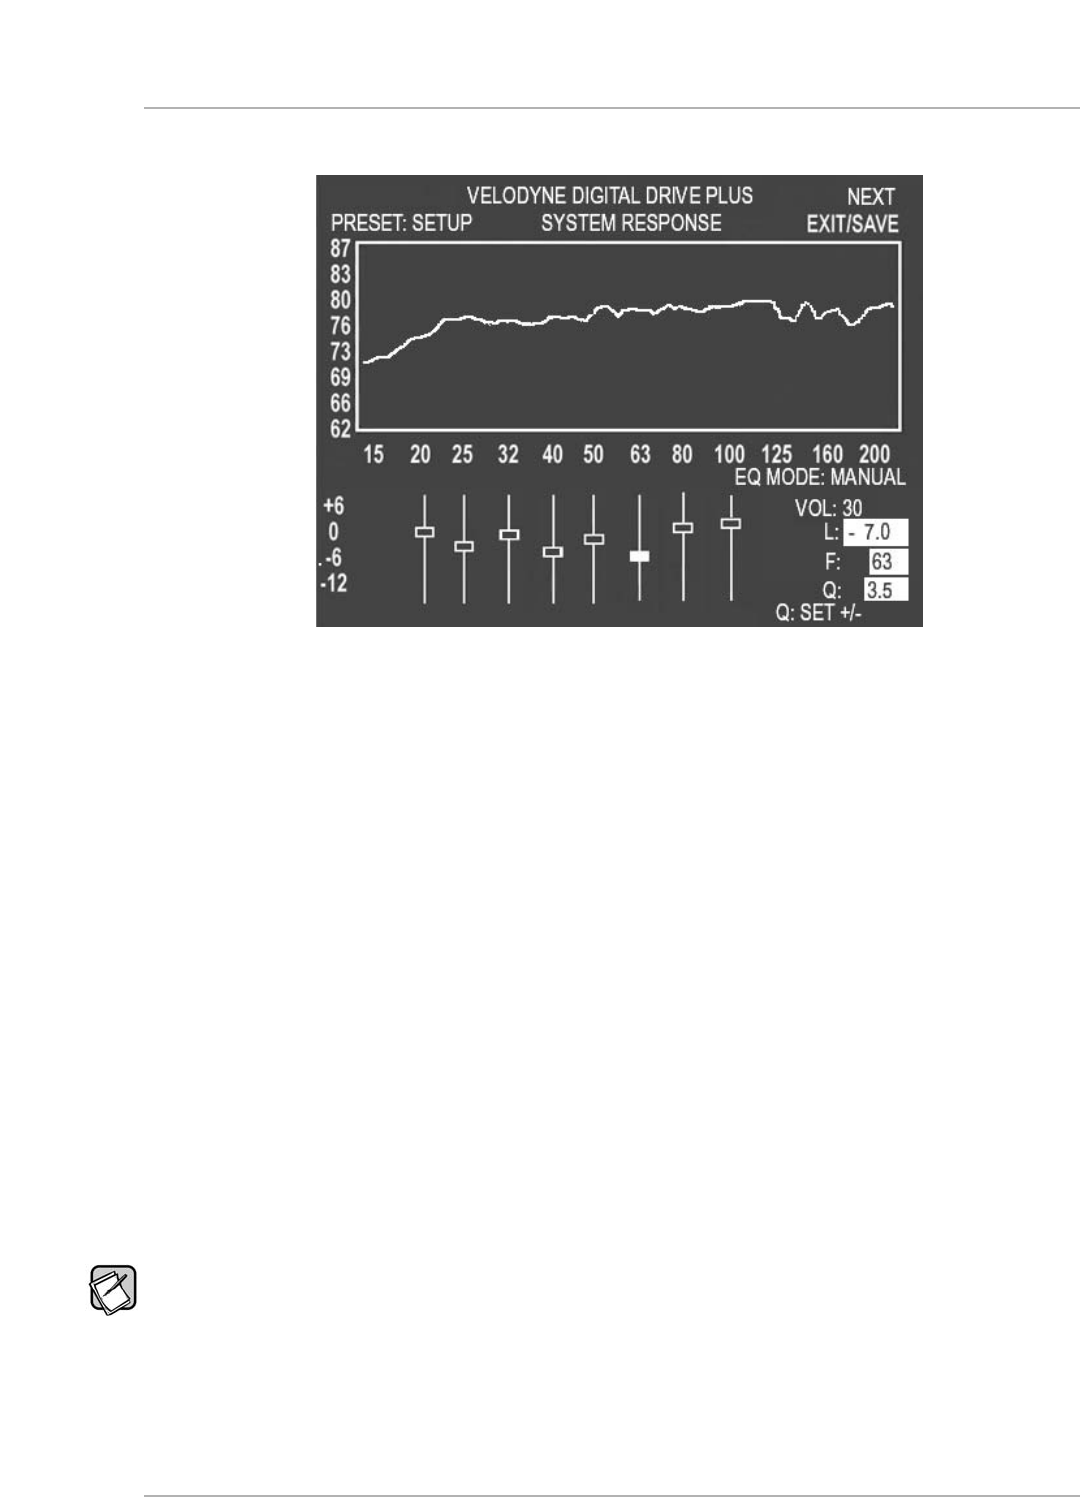
A selected EQ that has been moved with its level changed and Q adjusted is shown in Figure 14:
Figure 14: System Response Screen Modified 63 Hz EQ
5. To unselect the EQ, press SELECT again.
6. Use and to position the cursor on another EQ, if desired, and repeat Step 3, until the room is equalized.
Note: Don’t put more than one EQ at one frequency. EQs can be close, but not stacked. If you find you need to stack the EQs at one
frequency in order to get enough output, you are probably working with a room mode. In this case, it is best to move the location of the
subwoofer or listening position instead.
Running Self-EQ Optimization – Your First EQ
The easiest EQ optimization to perform is the Self-EQ. With Self-EQ the subwoofer generates its own sweep tone. To perform
Self-EQ optimization:
1) Remove the microphone, mic cable and stand from the accessory kit. Carefully snap the microphone into the stand and attach
the larger end of the cable to it. See the
Digital Drive
PLUS
User
’s Manual
for more information.
2) Place the microphone at the main listening position.
3) Attach the small end of the mic cable to the jack on the left side of the subwoofer front control panel.
4) Connect your subwoofer to your TV video input as described above in the
Make Video Connection between TV and
Subwoofer
section.
5) Make sure the subwoofer is on and your audio system is not playing any signal.
6) Press
3 – 2 – 1 on the remote to start Self-EQ; the System Response screen will display as well. The subwoofer
’
s front
display status message shows
SE.
Once the Self-EQ process starts, you can press
RESET on the remote to stop Self-EQ. If you exit back to the Introductory screen,
you can’t see the Self-EQ frequency response curve again.
7) On the
System Response screen, SELF option shows in the EQ MODE area.
[ 31 ]
D
igital Drive
P
LUS
U
ser Interface Manual
TV SCREEN USER INTERFACE FOR OPTIMIZATION
▲
▲


