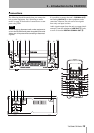
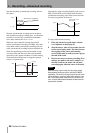
5 – After recording—Erasing
28 TASCAM CD-RW4U
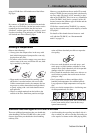
Erasing
Unfinalizing (described above) is a special case of
erasing a disc. It is also possible to erase a track or
tracks, starting with the last-recorded track, a whole
disc, or to “refresh” a disc.
NOTE
Erase procedures are possible only on a CD-RW disc.
Even if a CD-RW disc has been finalized, selecting an
erase procedure will automatically unfinalize it prior to era-
sure. The disc may then have to be re-finalized. Remember
that it is not possible to perform any erase procedures on a
CD-R disc.
Erasing tracks
It is possible to erase the last recorded track, the last
two recorded tracks, the last three recorded tracks,
etc. It is not, however, possible to erase tracks in the
“middle” of the disc.
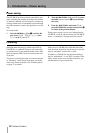
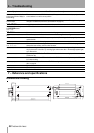
1 With the disc loaded, and the unit in stop
mode, press the
ERASE key (D).
2 If the display does not show
ERASE XX-
XX?
, where XX is the number of the last
track recorded on the disc, turn the
MULTI
DIAL
control B or use the SKIP keys I
until it is displayed.
3 Turn the
MULTI DIAL control or use the SKIP
keys to change the number of the first track
to be erased. The highest value that this num-
ber can take is the last track recorded (e.g. if
17 tracks have been recorded on the disc,
17-17 means that the last track only, 17,
will be erased). The lowest value that this
number can take is
2 (if this number was 1,
the whole disc would be erased, as described
below).
If you do not want to proceed with the erase
operation, press any other key (such as the
STOP key).
NOTE
If only one track has been recorded on the disc, only the
“erase disc” option (“Erasing a whole disc” on page 28) is
available.
4 When the range of tracks to be erased has
been selected, press the
MULTI DIAL control
or press the
ENTER key 8.
If the erase operation has been selected, the
word
ERASE flashes on the display, and
the timer starts counting down. The process
will typically take around 20 seconds).
At the end of the countdown period, the word
Complete appears briefly on the dis-
play, and the display returns to the track/
time display.
If the
PLAY/PAUSE key is pressed while the erase
process is taking place, playback starts as soon as the
erase process ends. If the
OPEN/CLOSE key is
pressed while the erase process is taking place, the
tray opens as soon as the erase process ends. Pressing
any other key during the erase process has no effect.
Erasing a whole disc
When you want to erase a whole disc (all the tracks
on a disc), follow the procedure below:
1 With the disc loaded, and the unit in stop
mode, press the
ERASE key (D).
2 Turn the
MULTI DIAL control B or use the
SKIP
keys I until the display shows
ERASE DISC?.
If you do not want to proceed with the erase
operation, press any other key (such as the
STOP key).
3 To erase the contents of the disc, press the
MULTI DIAL control or press the ENTER key
8.
If the
PLAY/PAUSE key is pressed while the erase
process is taking place, playback starts as soon as the
erase process ends (but of course, there will be noth-
ing to play!). If the
OPEN/CLOSE key is pressed
while the erase process is taking place, the tray opens
as soon as the erase process ends. Pressing any other
key during the erase process has no effect.