


14
K615S-21 13-15
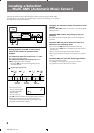
Calibrating the Bias Current and Recording
Level
Although the ATS (Automatic Tape Selection) system in
your unit sets the appropriate equalization characteristics
and bias current for each tape type, you may be able to
obtain even better results by doing the bias current and
recording level calibration function described below.
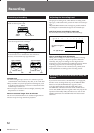
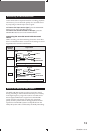
Bias calibration
Choosing the proper bias current for a tape ensures
minimum distortion and flat frequency response. Lowering
the bias current boosts high-frequency response, but also
results in higher distortion. Raising the bias, on the other
hand, reduces distortion, but also dampens high-frequency
response. You thus obtain proper bias when the bias current
and high-frequency response are well balanced.
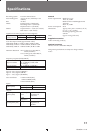
Adjusts the recording
level within a range
of about ±3 dB
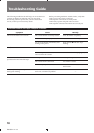
Adjusts the bias
current within a
range of about ±20 %
Frequency in Hz
Bias reduced (−)
Bias increased (+)
Bias
reduced
(high-
frequency
response
boosted)
Bias
increased
(high-
frequency
response
suppressed)
•By changing the bias, you can tailor the response to your
liking, for example by slightly emphasizing the upper or
lower end.
•The frequency response of metal tape is much less affected
by changes in the bias current than other tape types, and in
some cases is uneffected. The adjustment range of this deck
(about ±20 %) may therefore not be wide enough to allow
adjustment for all tapes.
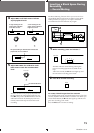
Recording level calibration
Even when the recording level is adjusted correctly, a tape
with low sensitivity will result in a low playback level. The
REC LEVEL calibration control allows you to compensate for
sensitivity differences among tapes to equalize both
recording and playback levels. This is especially important
when using the Dolby NR system, since the system is most
effective when recording and playback levels are the same.
Output
level in dB
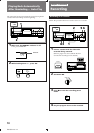
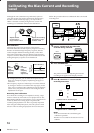
Follow the procedure below to calibrate the bias current and
recording level.
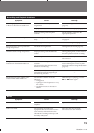
1 Insert a cassette with the side to be
recorded facing outward.
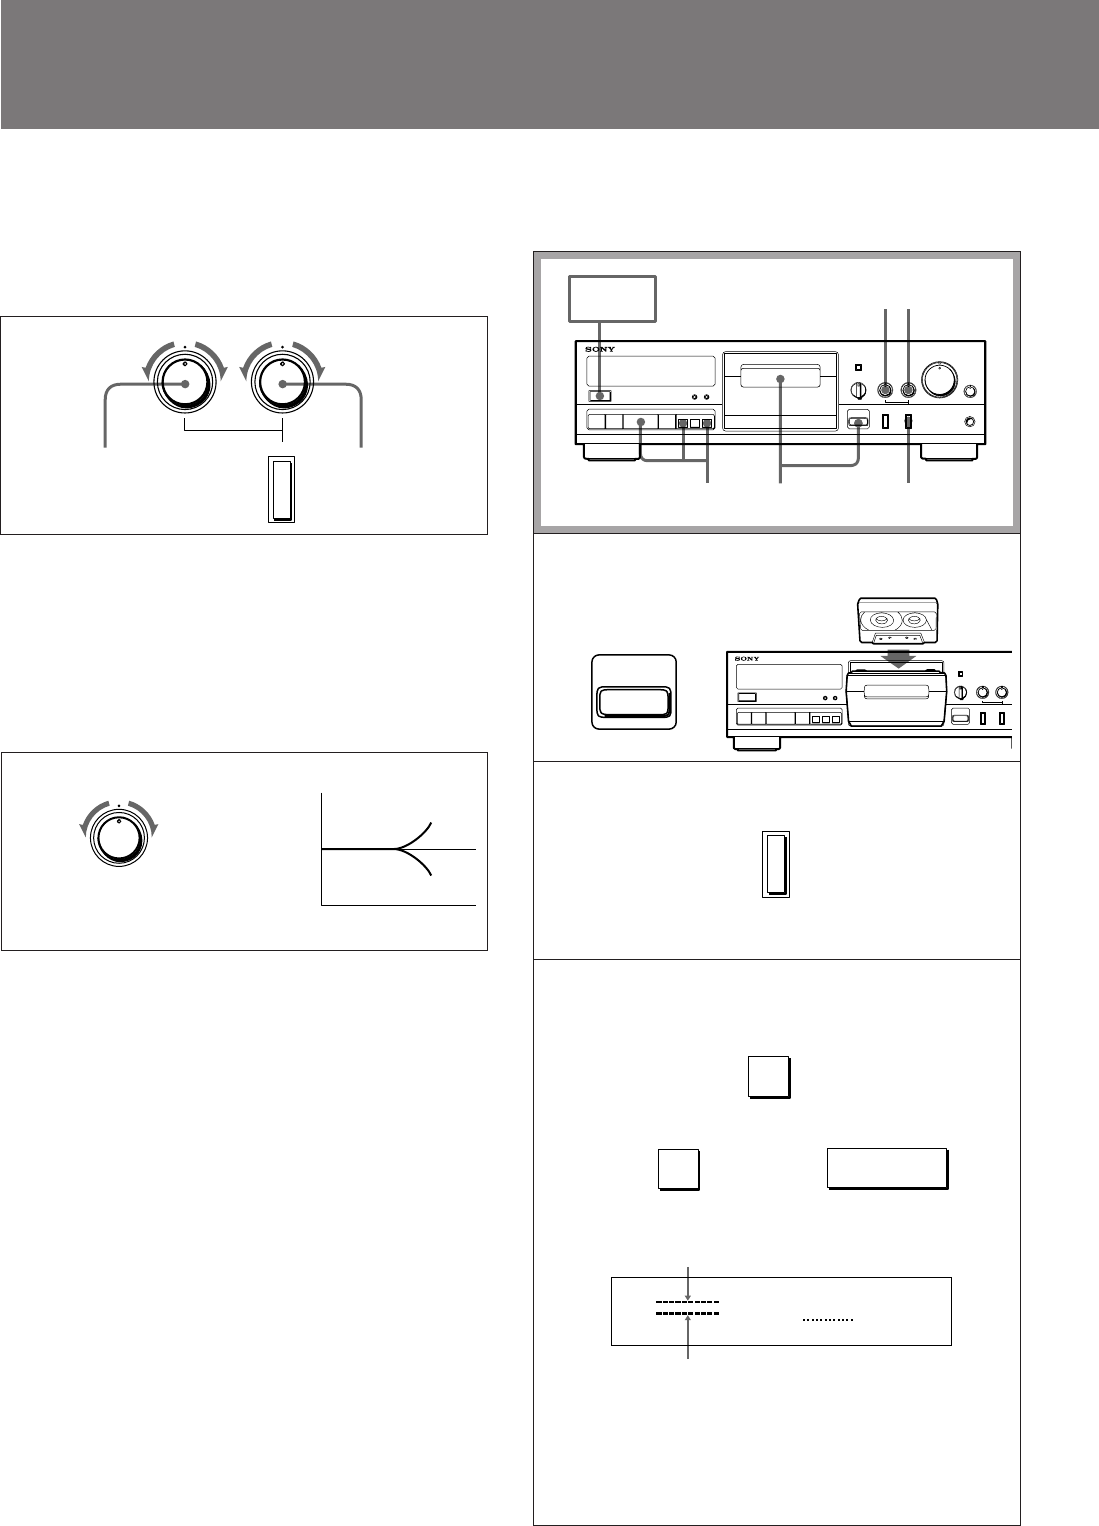
2 Press CALIBRATION.
3 Press r , then P or · to turn on the
recording test tones.
The peak level meters for adjusting the bias and
recording level appear in the display window.
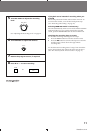
Notes
•You cannot monitor the sound during the
calibration operation.
•It takes 2 to 3 seconds for the test tone level to
stabilize.
√
or
Playback level for a 400-Hz signal
Playback level for an 8-kHz signal
√
BIAS
–
+
CALIBRATION
REC LEVEL
–
+
BIAS
–
+
1
3 2
54
POWER
ON
→
BALANCE
LR
•
CALIBRATION
COUNTER
RESET MEMORY
PAUSE
P
REC MUTE
R
REC
rp0
·
)
0 AMS )
MPX FILTER
ON OFFØø
REC LEVEL
0
1
2
3
4
5
6
7
8
9
10
•
•
•
•
•
•
•
•
•
•
OFF
DOLBY NR
B
C
•
•
•
MONITOR
•
S
POWER
REC LEVEL
–+
•
BIAS
–+
•
HEADPHONES
§
EJECT
§
EJECT
CALIBRATION
COUNTER
RESET MEMORY
PAUSE
P
REC MUTE
R
REC
rp0
·
)
0 AMS )
MPX FILTER
ON OFFØø
2
•
•
OFF
DOLBY NR
B
C
•
•
•
MONITOR
•
S
POWER
REC LEVEL
– +
•
BIAS
– +
•
§
EJECT
CALIBRATION
REC
r
PAUSE
P
·
TYPE
L
H
REC CAL
9
9