


31
US
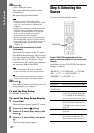
Getting Started
12 Press X/x to select the setting for the
Control for HDMI function.
Select [On] to use the [Control for HDMI]
function (page 63) when connecting Sony
components that are compatible with the
Control for HDMI function.
If you do not use the [Control for HDMI]
function, select [Off].
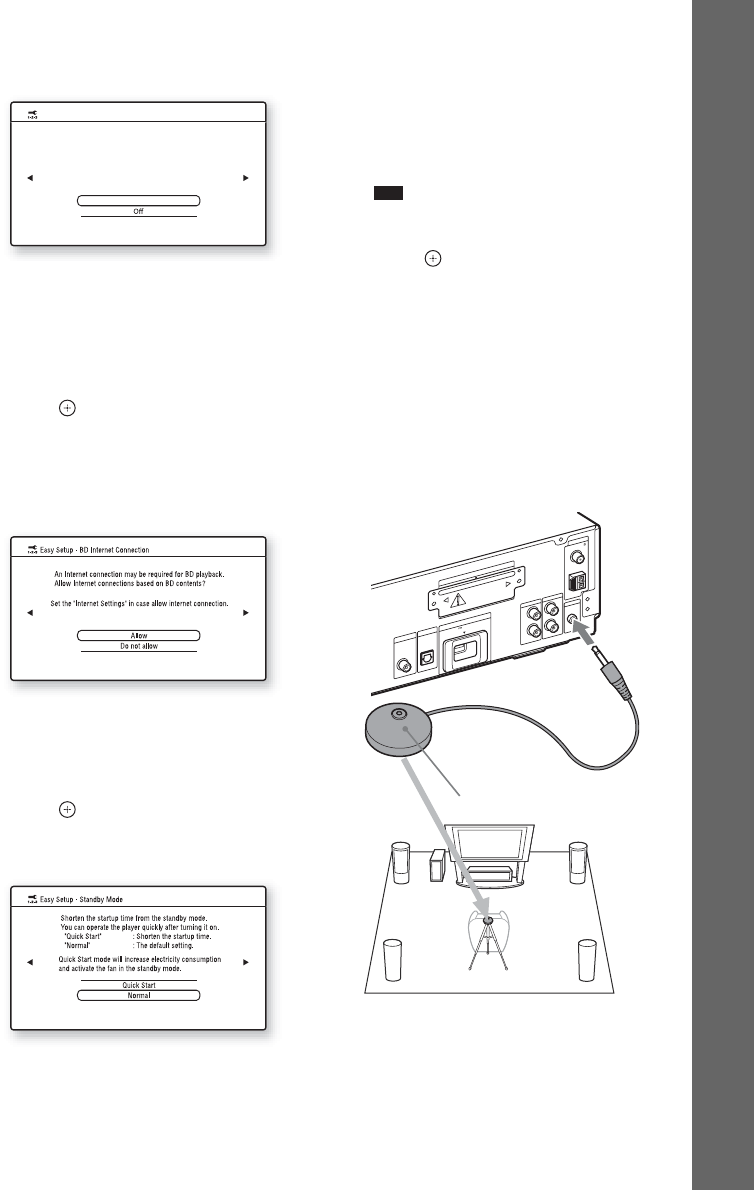
13 Press or c.
The Setup Display for [BD Internet
Connection] appears.
14 Press X/x to select the setting for the
BD Internet connections.
Select [Allow] to allow Internet
connections.
If you do not allow the connections, select
[Do not allow].
15 Press or c.
The Setup Display for [Standby Mode]
appears.
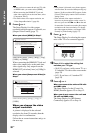
16Press X/x to select the standby mode.
You can operate the player quickly after
turning on this function.
Select [Quick Start] if you want to shorten
the startup time from the standby mode. The
default setting is [Normal].
Note
• Quick Start mode will increase electricity
consumption in the standby mode.
17Press or c.
The Setup Display for [Auto Calibration]
appears.
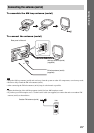
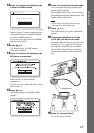
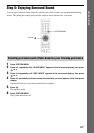
18Connect the calibration mic to the
A.CAL MIC jack on the rear panel.
Set up the calibration mic at ear level using
a tripod, etc. (not supplied). The front of
each speaker should face the calibration
mic, and there should be no obstruction
between the speakers and the calibration
mic.
19Press X/x to select [Start].
To cancel, select [Cancel].
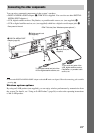
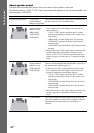
On
You can operate this unit in conjunction with a TV connected by HDMI.
Check your TV settings when using this function.
Easy Setup - Control for HDMI
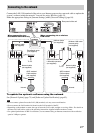
E
Z
W
-T
1
0
0
A
N
T
E
N
N
A
A
U
D
I
O
D
IG
IT
A
L
IN
A
U
D
IO
IN
A
U
D
IO
I
N
A
. C
A
L
M
IC
E
C
M
-
A
C
2
F
M
A
M
C
O
A
X
IA
L
7
5
C
O
A
X
IA
L
O
P
T
IC
A
L
R
L
R
L
EX
T
T
V
T
V
D
IG
IT
A
L
IN
S
A
T
/C
A
B
L
E
DC5V
5
0
0
m
A
M
A
X
Calibration mic