Product Guide
6
SUB Settings
The SUB’s settings are determined during the initial setup process. If you wish to make changes, follow the steps below to
adjust how the SUB works with the associated Sonos component or stereo pair.
Changing SUB Settings
Using a handheld Sonos controller
1.
Select Settings -> Room Settings.
2.
Select the room that is associated with the SONOS SUB. It appears as Room (+SUB) on the Room Settings menu.
3.
Select Advanced Audio -> SUB Settings.
4.
Choose one of the following options:
• SUB: Choose On or Off to turn the sound from the SUB on and off.
• SUB Level Adjustment: Use the slider to increase or decrease the volume of the SUB. (You can use this setting to match
the subwoofer level to the level of your main speakers.)
• Placement Adjustment (phase): Select On or Off.
• Speaker Size Adjustment (Crossover): This setting only appears when the SUB is associated with a CONNECT:AMP
(ZonePlayer 120) or ZonePlayer 100. You may wish to choose a different setting from the list if:
• the main speakers sound distorted at high volumes—moving to a smaller speaker size setting can help.
• your attention is drawn to the SUB's location while listening to music—moving to a larger speaker size setting can
help.
Using the Sonos Controller for Mac or PC
1.
Select Manage -> Settings (PC) or Sonos -> Preferences (Mac).
2.
Select Room Settings.
3.
Select the room that is associated with the SONOS SUB. It appears as Room (+SUB) on the Room Settings menu.
4.
Select the SUB tab.
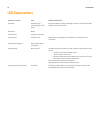
1 Compact 110 Hz
2 100 Hz
3 90 Hz
4 Bookshelf / Ceiling 80 Hz
5 70 Hz
6 Floor 60 Hz
7 50 Hz


