


22
If the quality of reception is poor, try varying the reception
frequency slightly, as follows:
8) Scroll through the menu to “Fine Tune”, which is in the
Installation sub-menu, then move the slider one way or the
other until the picture and sound are free of interference.
9) If the channel you are tuning broadcasts in two languages
(indicated by “Dual I” or “Dual II” on the screen), you can
select which of the two languages you wish to listen to by
selecting “Dual I” (for the first language) or “Dual II” (for the
second language) from the “Dual Language” option.
10)
Finally, to save all the settings made in manual mode, scroll
through the menu to “Store” and then press button [7]: the
message “Store” is displayed for a few seconds to confirm
that the settings have been saved.
Note
1) To store other channels, repeat the entire procedure descri-
bed above.
2) Since some of the options in the Installation sub-menu are
used only rarely, it is good policy to minimise the number
of menu options displayed by scrolling to “Extended menu”
and selecting “Off”. This limits the Installation sub-menu to
just the four most important options, making regular use far
quicker and easier. If you want to restore the sub-menu to its
extended form, repeat the procedure as described above,
but set the “Extended menu” option to “On”.
Personalising the channels table
When you have finished tuning the channels, you can persona-
lise the table by moving channels to different programme num
-
bers (according to preference), exclude channels from zapping,
delete them if reception is poor, or prevent selected channels
from unauthorised viewing (by children, for example).
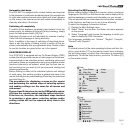
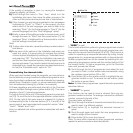
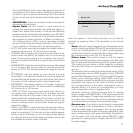
All these operations are performed internally of the Overview
menu in the Main Settings menu (yellow button [4]). This menu
displays a list of 10 stored programmes.
To move to the list of the next 10 stored programmes, press but-
ton [23]. To scroll the list in the opposite direction, press button
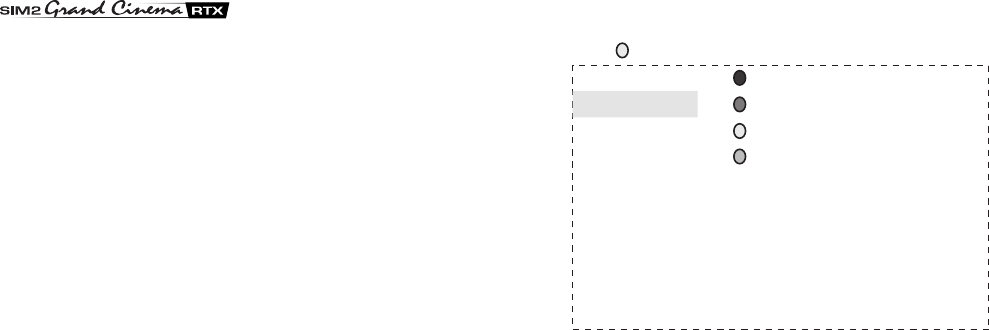
[24]. On the right of this same menu is a legend of 4 colours,
corresponding to the 4 coloured buttons [3, 4, 5 and 6] of the
remote control, each associated with a specific function:“Hide”,
”Insert”, “Delete” and “Lock”.
Here is a detailed look at the operations associated with each
function.
• “HIDE” (in red)
This function allows the system to ignore programmes marked
in red when searching sequentially through programme num
-
bers with the remote control buttons [22 or 25]. This function is
useful for speeding up sequential searches by hiding ‘empty’
programmes (i.e. programme numbers with no channel stored).
Hidden programmes can still be viewed by selecting the cor
-
responding programme number with the number buttons [2] of
the remote control. To hide a programme, go to the Overview
menu and proceed as follows:
1) Scroll through the list of programmes and select the one
you want to ‘hide’, in other words make inaccessible, using
the up/down arrow buttons [22 or 25].
2) Press button [6] on the remote control to highlight the pro-
gramme number in red. To remove the red marker, press
the button a second time.
Note: To hide other programmes, repeat the entire procedure
described above.
• “INSERT” (in green)
This function can be used to move a channel from one pro
-
gramme number to another. To reassign a channel to a different
number, proceed internally of the
Overview menu as follows:
1) Scroll through the table of channels and select the one you
want to insert in a different position.
2) Press button [5] to highlight the selected channel in
green.
3) Scroll through again and select the new programme you
want to assign to the channel.
4) Press button [5] to move the channel.
Note: To move other channels to other programme numbers,
repeat the entire procedure described above.
Main Set.
0 Hide
1 O K Insert
2 Delete
3 Lock
4 TV Exit
5
6
7
8
9