


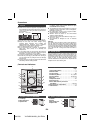

04/1/28 XL-DAB10N 20H_001 EN.fm
E-6
9
8
7
6
5
4
3
2
1
9
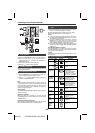
General control (continued)
When the FUNCTION button on main unit is pressed, the
current function will change to different mode. Press the
FUNCTION button repeatedly to select desired function.
Note:
The backup function will protect the memorised function
mode for a few hours should there be a power failure or the
AC power lead becomes disconnected.
When the EQUALIZER button is pressed, the current
mode setting will be displayed. To change to a different
mode, press the EQUALIZER button repeatedly until the
desired sound mode appears.
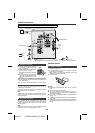
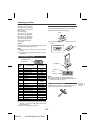
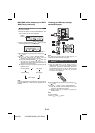
Setting the clock (Remote control
only)
In this example, the clock is set for the 24-hour (00:00)
display.
To confirm the time display:
[When the unit is in the stand-by mode]
Press the CLOCK/TIMER button. The time display will
appear for about 5 seconds.
[When the power is on]
Press the CLOCK/TIMER button. The time display will
appear for about 5 seconds.
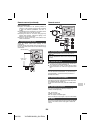
Note:
The “00:00” will appear blinking when the AC power supply
is restored after a power failure or unplugging the unit.
Readjust the clock as follows.
To readjust the clock:
Perform “Setting the clock” from step 1.
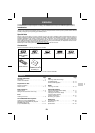
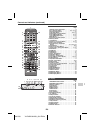
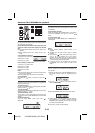
■ Function (on main unit only)
■ Equaliser
TUNERCD
USB
DAB
AUX IN
iPod
POPS
VOCAL
FLAT
ROCK
CLASSIC
JAZZ
For rock music.
For pop music.
No equalization.
For classical music.
For jazz.
Vocals are enhanced.
No equalisation.
For rock music.
For classical music.
For pop music.
For jazz.
Vocals are enhanced.
1 Press the ON/STAND-BY button to turn to stand-by
mode.
2 Press and hold the CLOCK/TIMER button until “00:00”
appear.
3 Within 10 seconds, press the or button to
adjust the hour and then press the CLOCK/TIMER
button. Press the or button once to advance
the time by 1 hour. Hold it down to advance
continuously.
4 Press the or button to adjust the minutes and
then press the CLOCK/TIMER button. Press the or
button once to advance the time by 1 minute. Hold
it down to advance continuously.