25
Connection and Setup
Selecting the priority video output when connecting HDMI and Component video
When you connect both an HDMI cable and a component cable to this system, you need to select the priority
video output in “Settings” – “Audio Video Settings” – “Video Out Select”. (See page 68.)
NOTE
When you connect the system to a SHARP TV with an HDMI cable only and the TV is turned on, the video output switches to
HDMI automatically. (The above setting is unnecessary.)
When you connect the system to a TV with an HDMI cable, “HDMI Video Out” is set to “Auto”. If you don’t get a stable image,
select the desired resolution*.
When you set “HDMI Video Out” to a setting other than “Auto”, you can only select resolutions* that are compatible with the
connected TV.
Refer to “HDMI Video Out” on page 68 regarding the resolutions of the HDMI video output.
•
•
*
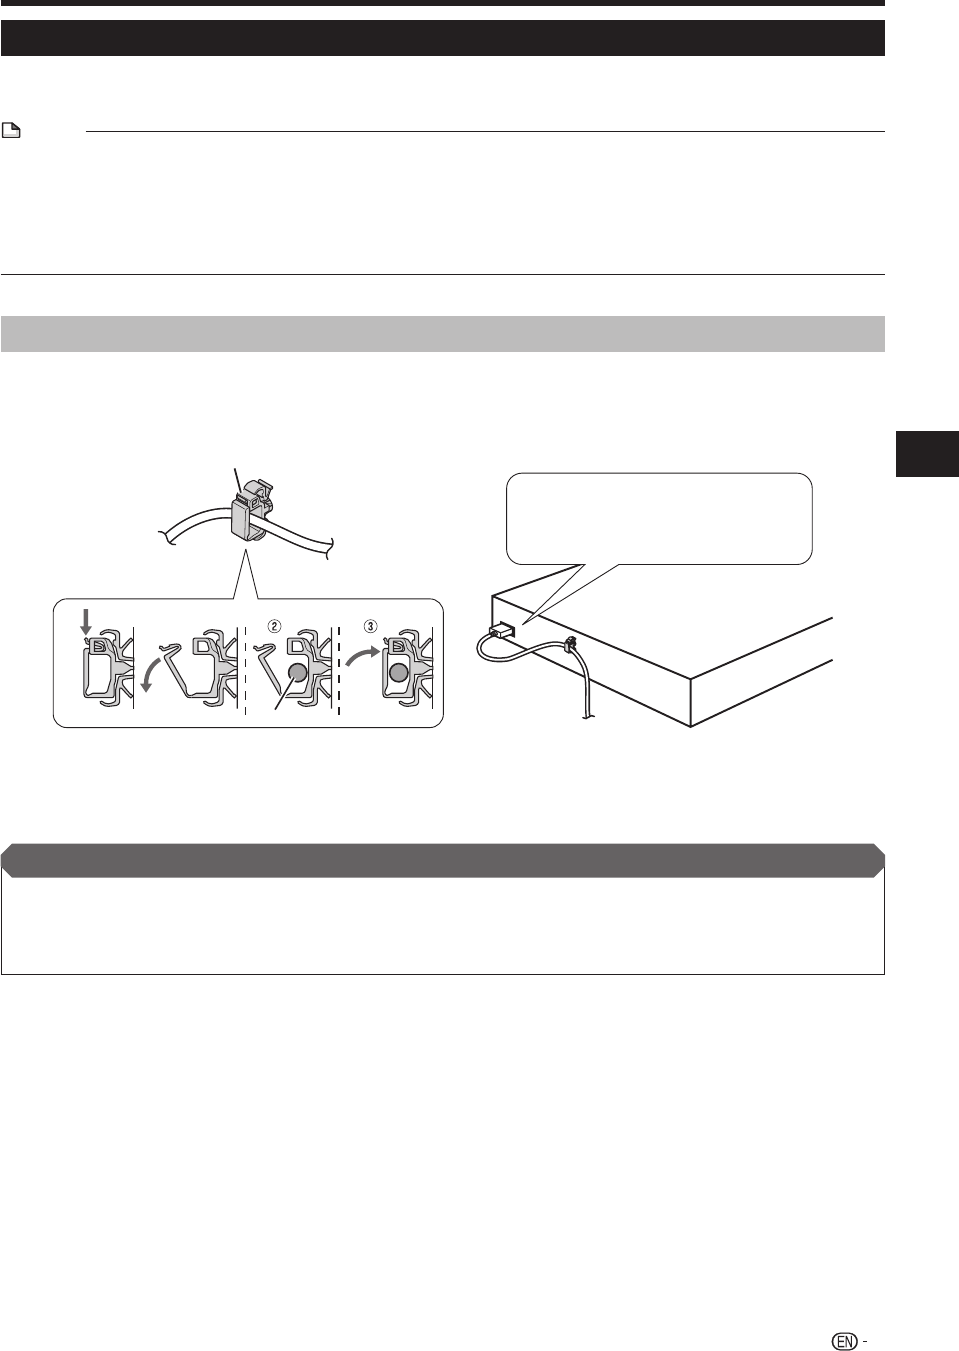
HDMI cable holder on the rear of the main unit
Do not pull the HDMI cable when connected to the terminal, as this can damage the terminal or cause a poor
connection. The system comes with a dedicated cable holder so that the HDMI cable does not place a direct load
on the terminal. When connecting the HDMI cable, be sure to pass the cable through the cable holder and secure
it.
HDMI CABLE HOLDER
HDMI CABLE
Connect the HDMI cable to the
rear of the main unit while providing
some slack.
1 Press down on the tab and pull it towards you.
2 Pass the HDMI cable (commercially available) through the cable holder.
3 Press in the tab until it clicks into position.
If necessary, perform the Audio Video Settings. (Pages 68-69)
Refer to AQUOS LINK control function. (Pages 43-44 and 69)
Prepare the desired disc or content and start playback (pages 45-54), then enjoy multi-channel mode sound (page 64) or
preset sound mode sound (page 65).
•
•
•
After connecting
TV Connections
