17
CX1H_UK17-25.fm00/12/17
Basic Operation
Setting the Clock
Setting the Clock
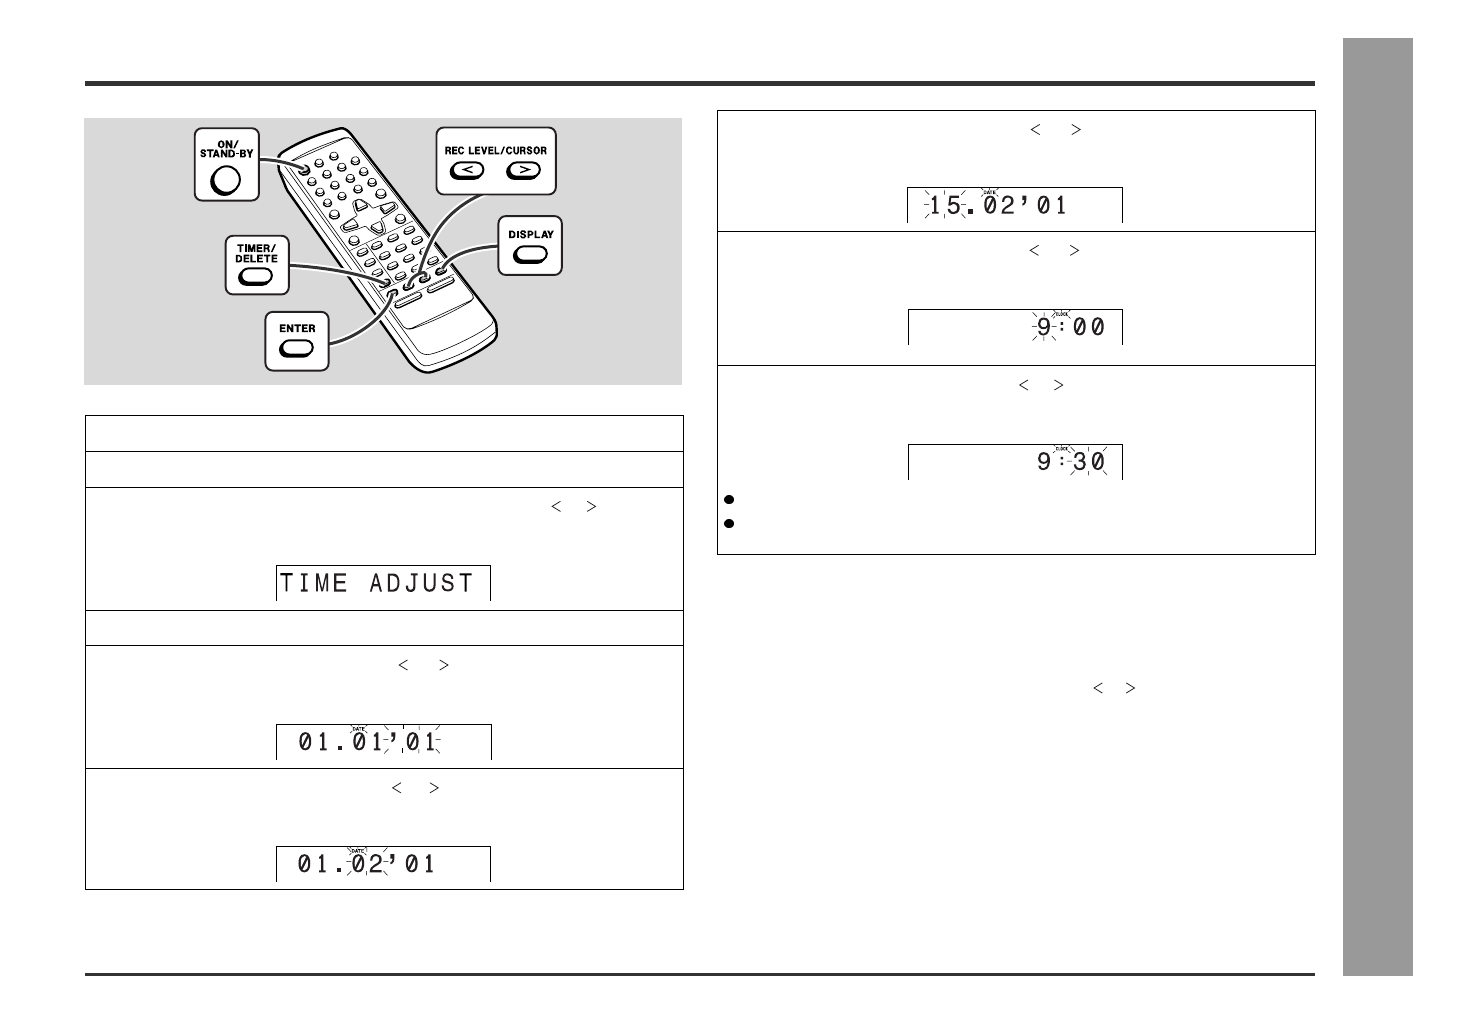
In this example, the clock is set for 9:30 15. 02 '01 .
To confirm the time display:
[When the unit is in the stand-by mode]
Press the DISPLAY button on the remote control.
The time display will appear for about 5 seconds.
[When the power is on]
Press the TIMER/DELETE button.
Within 10 seconds, press the REC LEVEL/CURSOR or button.
The time display will appear for about 10 seconds.
Note:
The clock setting will be cleared when the unit is unplugged or the power failure
occurs.
To reset the clock:
Perform "Setting the Clock" from the beginning.
1
Press the ON/STAND-BY button to turn the power on.
2
Press the TIMER/DELETE button.
3
Within 10 seconds, press the REC LEVEL/CURSOR or button to
select the "TIME ADJUST".
4
Within 10 seconds, press the ENTER button.
5
Press the REC LEVEL/CURSOR or button to adjust the year,
and then press the ENTER button.
6
Press the REC LEVEL/CURSOR or button to adjust the month,
and then press the ENTER button.
7
Press the REC LEVEL/CURSOR or button to adjust the date,
and then press the ENTER button.
8
Press the REC LEVEL/CURSOR or button to adjust the hour,
and then press the ENTER button.
9
Press the REC LEVEL/CURSOR or button to adjust the minutes,
and then press the ENTER button.
The hour will not advance even if minutes advance from "59" to "00".
The clock starts from "0" second. (Seconds are not displayed.) The time display
will disappear after a few seconds.
Web-site:
www.sharp.co.uk/support
Help Line:
08705 274277 (office hours)


