13
Front Panel Operation
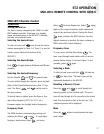
Turning the unit on
To turn the unit on, push the On/Off button up on the
front panel. Pushing the On/Off button down turns the
tuner off.
Selecting the desired tuner
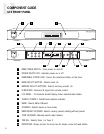
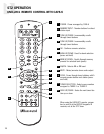
From the front panel, use the TNR SEL button to tog-
gle between Tuner 1 and Tuner 2. A backlight shows
behind the selected label TUNER 1 (green) or TUNER
2 (amber) to indicate the active tuner. In addition, the
LCD panel is backlit green for Tuner 1 and amber for
Tuner 2. Each time a tuner is selected the display will
refresh with the current station or preset, and all sub-
sequent memory preset entries will be associated
with that selected tuner.
Selecting the desired band
Push the BAND button to switch between AM and FM
reception.
Selecting the desired frequency
Press and release the Tune Up and Tune Down but-
tons for manual tuning.
Selecting Stereo or Mono Output
Press and release the ST/MONO button to toggle
between stereo and mono mode. STEREO or MONO
appears briefly on the screen when selecting mode.
Selecting Distant or Local Reception
Press and hold the ST/MONO button to toggle
between distant and local mode. DISTANT or LOCAL
appears briefly on the screen when selecting mode.
Normal operation is in Distant mode. In cities, anten-
nas can pick up multipath signals when they bounce
off buildings and get doubled. The Local mode limits
the noise associated with these reflected signals.
Bank/Memory Presets
Each tuner has six banks of preset memory settings,
and each bank holds six presets for a total of 36 pos-
sible presets for each tuner (72 total presets).
Presets are associated with the tuner that is selected
at the time the preset is saved.
Memory Preset programming
From the front panel, perform these steps:
1. Use the bank select button to choose from one of
six banks (1-6).
2. Select the desired band (AM or FM) using the
BAND button.
3. Tune to the desired station.
4. Select ST (stereo) or MONO mode.
5. Push the desired memory preset (M1 through M6)
button for more than 2 seconds. When the memory
preset is saved, the appropriate preset number (M1
through M6) and SAVED appears on the LCD. The
selected station setting reappears and the sound
resumes after the button is released.
Recalling a Memory Preset
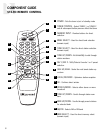
To recall a memory preset, use the BANK button to
select the desired bank, then press the desired pre-
set button (M1 to M6). In addition to direct selection,
the memory presets can be accessed by using the
MEM UP and MEM DOWN buttons to scroll through all
presets for the bank selected.
During normal operation, the preset name will appear
in place of the freq/band when adjusting MEM or TUN
and when a preset name has been created for the
selected frequency.
Backup and Restore
Once all of the tuner settings are completed, it may
be advisable to create a backup of the programmed
settings for future use. The backup will then be avail-
able in case tuner settings need to be restored. The
backup utility is available through the Document
Center at www.russound.com
. Also required are a
DB9 male-to-female cable and laptop or desktop PC.
ST2 OPERATION
FRONT PANEL CONTROLS
ST2 Tuner DB9
Connection RS-232
Pinout
Pin 2 - Transmit
Pin 3 - Receive
Pin 5 - Ground
RS-232
INTERFACE
235


