


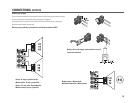
INSTALLATION: RACK MOUNTING AND MOUNTING DIMENSIONS
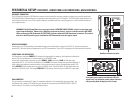
Before installing into equipment rack: ensure that all side-access DIP
switches and crossover SIPs are setup as desired. They will be
impossible (or extremely difficult) to change after the amplifier is
installed in the rack. The side cover plate should be installed to keep
dust and foreign material out of the chassis.
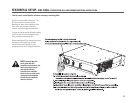
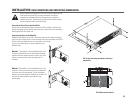
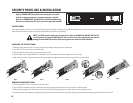
Securing the Front Ears to the Rack Rails
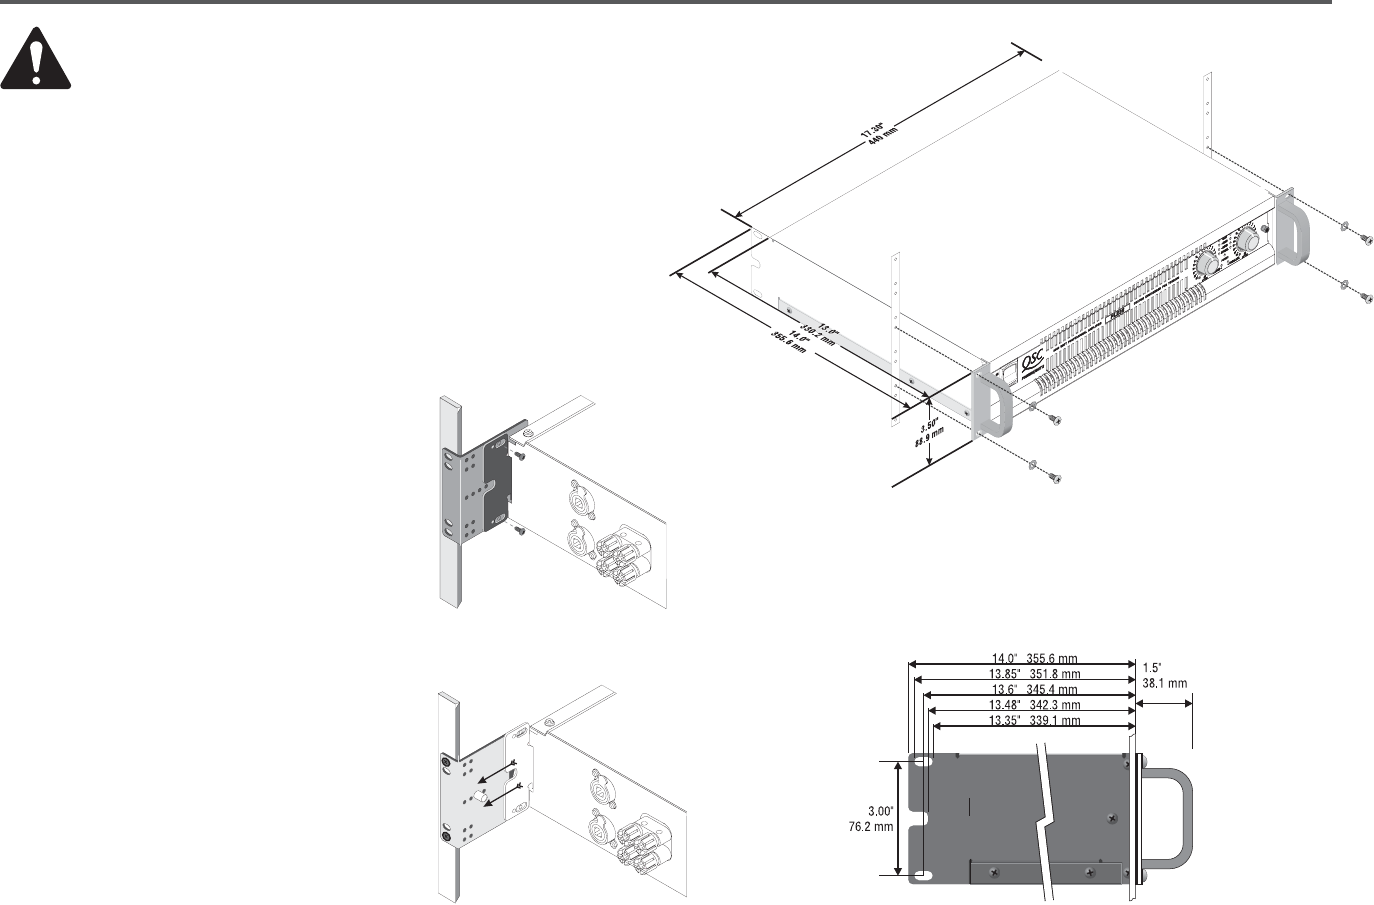
Use four screws and washers when mounting the PL2A amplifier to the front rails.
Support the weight of the amplifier while securing it to the rails to avoid bending or
distorting the front rack mount ears.
Supporting the Rear of the Amplifier
Supporting the amplifier at the rear is important, especially for mobile and touring
use. Rear rack mounting ear kits are an accessory item and are available from QSC’s
Technical Services Department or from your dealer or distributor.
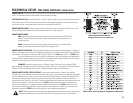
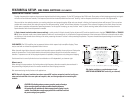
The rear rack mounting ear kit may be installed in two
different ways.
Method 1- The amplifier is first installed from the front
of the rack and then the ears are secured directly to the
amplifier with two machine screws as shown, left. Then
the ears are secured to the rails using ordinary rail
hardware.
Method 2- The amplifier is first installed from the front
of the rack. Then, the accessory rear ears are positioned
on the rear rack rails and secured. The pin installation
position can now be selected. Install the pin so that it fits
well into the slot provided on the amplifier's rear
mounting tab.
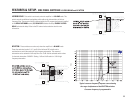
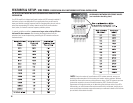
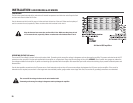
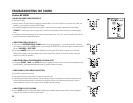
PL2 A rack mounting installation and major
dimensions
PL2 A dimensional details
19