


Using other functions
11
69
En
Setting the Video options
There are a number of additional picture settings you can
make using the Video Parameter menu. The defaults, if
not stated, are listed in bold.
Important
• Note that if a setting doesn’t appear in the Video
Parameter menu, it is unavailable due to the current
source, setting and status of the receiver.
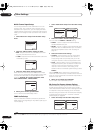
1 Press
V PARAMETER
(
VIDEO PARAMETER
).
2 Use
/
to select the setting you want to adjust.
Depending on the current status/mode of the receiver,
certain options may not be able to be selected. Check the
table below for notes on this.
3 Use
/
to set it as necessary.
See the table below for the options available for each
setting.
1
4 Press
RETURN
to confirm and exit the menu.
LFE ATT
(LFE
Attenuate)
Some Dolby Digital and DTS audio
sources include ultra-low bass
tones. Set the LFE attenuator as
necessary to prevent the ultra-low
bass tones from distorting the
sound from the speakers.
The LFE is not limited when set to
0 dB, which is the recommended
value. When set to –5 dB, –10 dB,
–15 dB or –20 dB, the LFE is limited
by the respective degree. When OFF
is selected, no sound is output from
the LFE channel.
0dB
–5dB/ –10dB/
–15dB/ –20dB/
OFF
SACD
GAIN
e
Brings out detail in SACDs by
maximizing the dynamic range
(during digital processing).
0 to 6 (dB)
Default:
0
(dB)
HDMI
(HDMI
Audio)
Specifies the routing of the HDMI
audio signal out of this receiver
(
amp
) or
through
to a TV or plasma
display. When THROUGH is
selected, no sound is output from
this receiver.
AMP
THROUGH
A. DELAY
(Auto delay)
This feature automatically corrects
the audio-to-video delay between
components connected with an
HDMI cable. The audio delay time is
set depending on the operational
status of the display connected with
an HDMI cable. The video delay time
is automatically adjusted according
to the audio delay time.
f
OFF
ON
C. WIDTH
g
(Center
Width)
(Applicable
only when
using a center
speaker)
Provides a better blend of the front
speakers by spreading the center
channel between the front right and
left speakers, making it sound wider
(higher settings) or narrower (lower
settings).
0 to 7
Default:
3
DIMENSION
g
Adjusts the depth of the surround
sound balance from front to back,
making the sound more distant
(minus settings), or more forward
(positive settings).
–3 to +3
Default:
0
PANORAMA
g
Extends the front stereo image to
include the surround speakers for a
‘wraparound’ effect.
OFF
ON
C. IMAGE
h
(Center
Image)
(Applicable
only when
using a center
speaker)
Adjusts the center image to create a
wider stereo effect with vocals.
Adjust the effect from
0
(all center
channel sent to front right and left
speakers) to
10
(center channel sent
to the center speaker only).
0 to 10
Default:
3
EFFECT
Sets the effect level for the currently
selected Advanced Surround mode
(each mode can be set separately).
10 to 90
Setting
What it does Option(s)
a.When
MCACC
OFF
is selected, all MCACC preset memories become
deactivated.
b.When
EQ OFF
is selected, the MCACC indicator does not light even
when a MCACC preset memory is selected.
c.The adjustment can be made only when
TONE
is set to
ON
.
d.The initially set
AUTO
is only available for Dolby TrueHD signals. Select
MAX
or
MID
for signals other than Dolby TrueHD.
e.You shouldn’t have any problems using this with most SACD discs, but
if the sound distorts, it is best to switch the gain setting back to
0
dB.
f. This feature is only available when the connected display supports the
automatic audio/video synchronizing capability (‘lip-sync’) for HDMI or
HDMI Control. If you find the automatically set delay time unsuitable, set
A. DELAY
to
OFF
and adjust the delay time manually. For more details
about the lip-sync feature of your display, contact the manufacturer
directly.
g.Only when listening to 2-channel sources in Dolby Pro Logic IIx Music/
Dolby Pro Logic II Music mode.
h.Only when listening to 2-channel sources in Neo:6 Music mode.
Note
1 Brightness, Contrast, Hue, Chroma, Resolution and Aspect can be set for each input source.
Setting
What it does Option(s)
V. CONV
(Digital Video
Conversion)
Converts video signals for output
from the
MONITOR OUT
jacks for
all video types.
ON
OFF
BRIGHT
(Brightness)
Adjusts the overall brightness. –10 to +10
Default:
0
CONTRAST
Adjusts the contrast between light
and dark.
–10 to +10
Default:
0
HUE
Adjusts the red/green balance. –10 to +10
Default:
0
CHROMA
Adjusts saturation from dull to
bright.
–10 to +10
Default:
0
VSX_LX60LX70.book 69 ページ 2007年7月18日 水曜日 午前10時19分