


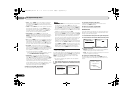
Control with HDMI function
07
42
En
07
Chapter 7:
Control with HDMI
function
Synchronized operations below with a Control with HDMI-
compatible Pioneer TV or Blu-ray Disc player or with a
component of another make that supports the Control with
HDMI functions are possible when the component is
connected to the receiver using an HDMI cable.
• Synchronized amp mode
The receiver’s volume can be set and the sound can be
muted using the TV’s remote control.
• Power synchronization with TV
• Automatic switching of inputs
The receiver’s input switches over automatically when the
TV’s input is changed or a Control with HDMI-compatible
component is played.
Important
• With Pioneer devices, the Control with HDMI functions
are referred to as “KURO LINK”.
• You cannot use this function with components that do not
support Control with HDMI.
• We only guarantee this receiver will work with Pioneer
made Control with HDMI-compatible components and
components of other makes that support the Control
with HDMI function. However, we do not guarantee that
all synchronized operations will work with components of
other makes that support the Control with HDMI
function.
• Use a High Speed HDMI
®
cable when you want to use the
Control with HDMI function. The Control with HDMI
function may not work properly if a different type of HDMI
cable is used.
• For details about concrete operations, settings, etc., refer
to also the operating instructions for each component.
Making Control with HDMI connections
You can use synchronized operation for a connected TV and
up to four other components.
• Be sure to connect the TV’s audio cable to the audio input
of this unit. When the TV and receiver are connected by
HDMI connections, if the TV supports the HDMI Audio
Return Channel function, the sound of the TV is input to
the receiver via the HDMI terminal, so there is no need to
connect an audio cable. In this case, set ARC at HDMI
Setup to ON (see HDMI Setup below).
For details, see Connecting using HDMI on page 15.
Important
• When connecting this system or changing connections,
be sure to switch the power off and disconnect the power
cord from the wall socket.
After completing all connections, connect the power
cords to the wall socket.
• After this receiver is connected to an AC outlet, a 2
second to 10 second HDMI initialization process begins.
You cannot carry out any operations during initialization.
The HDMI indicator on the display unit blinks during
initialization, and you can turn this receiver on once it has
stopped blinking.
• To get the most out of this function, we recommend that
you connect your HDMI component not to a TV but rather
directly to the HDMI terminal on this receiver.
• While the receiver is equipped with four HDMI inputs, the
Control with HDMI function can only be used with up to
three DVD or Blu-ray Disc players or up to three DVD or
Blu-ray Disc recorders.
HDMI Setup
You must adjust the settings of this receiver as well as the
connected Control with HDMI-compatible components in
order to make use of the Control with HDMI function. For
more information see the operating instructions for each
component.
1
Switch on the receiver and your TV.
Press RECEIVER to switch on.
2
Switch the TV input so that it connects to the receiver.
3
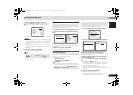
Press , then press SETUP.
The System Setup menu appears on your TV. Use ///
and ENTER on the remote control to navigate through the
screens and select menu items. Press RETURN to confirm
and exit the current menu.
•Press SETUP at any time to exit the System Setup menu.
4
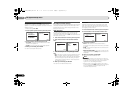
Select ‘HDMI Setup’ from the System Setup menu.
5
Select the ‘Control’ setting you want.
Choose whether to set this unit’s Control with HDMI
function ON or OFF. You will need to set it to ON to use the
Control with HDMI function.
When using a component that does not support the Control
with HDMI function, set this to OFF.
• ON – Enables the Control with HDMI function. When this
unit’s power is turned off and you have a supported
source begin playback while using the Control with
HDMI function, the audio and video outputs from the
HDMI connection are output from the TV.
• OFF – The Control with HDMI is disabled. Synchronized
operations cannot be used. When this unit’s power is
turned off, audio and video of sources connected via
HDMI are not output.
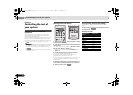
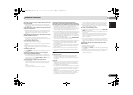
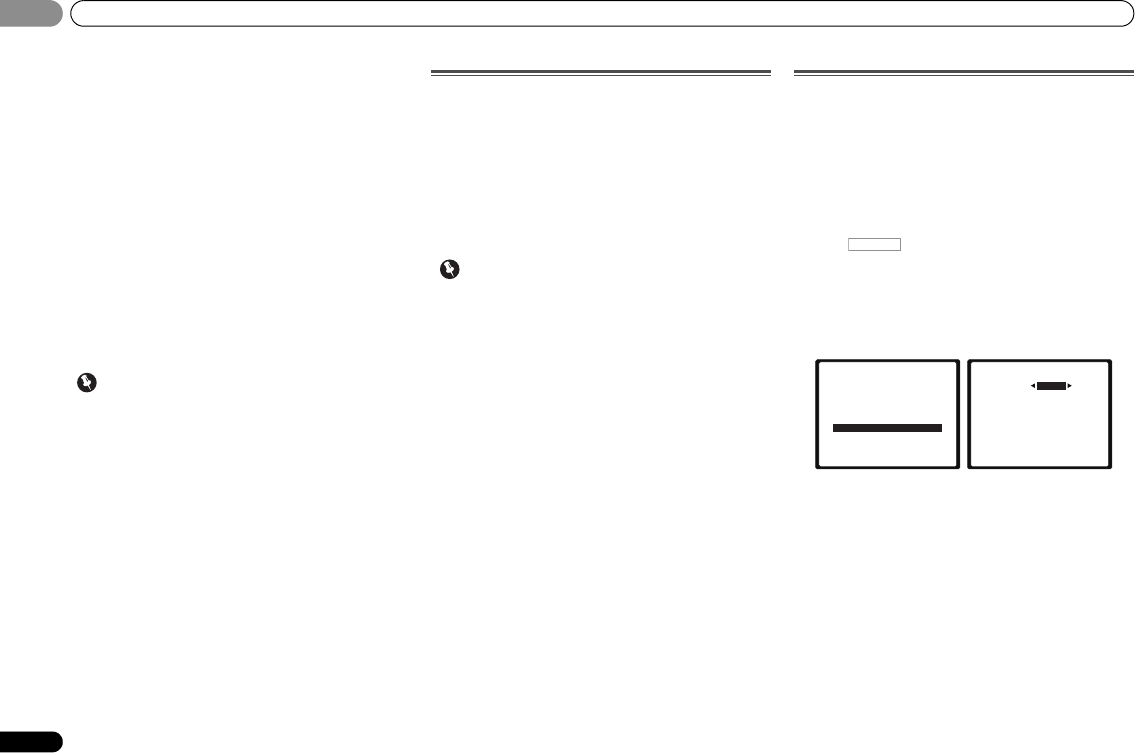
RECEIVER
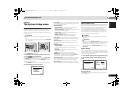
System Setup
1.Auto MCACC
2.Manual SP Setup
3.Input Assign
4.Speaker System
5.Video Parameter
6.HDMI Setup
7.Auto Power Down
8.FL Demo Mode
Return
6.HDMI Setup
Return
Control ON
ARC [ OFF ]
VSX-921_UCSMXCN_En.book 42 ページ 2011年1月6日 木曜日 午後4時34分