6
2 Connecting Up
Connecting the CD-tuner to
the amplifier
Connect the CD-tuner to the amplifier as described below. If
you also have the optional cassette deck, MD recorder or CD-
Recorder, see their accompanying instructions before
following the instructions on this page. This will make
connecting up several components easier.
• Important: When connecting or disconnecting the
system cable, make sure that the power is switched off and
the unit unplugged from the wall outlet.
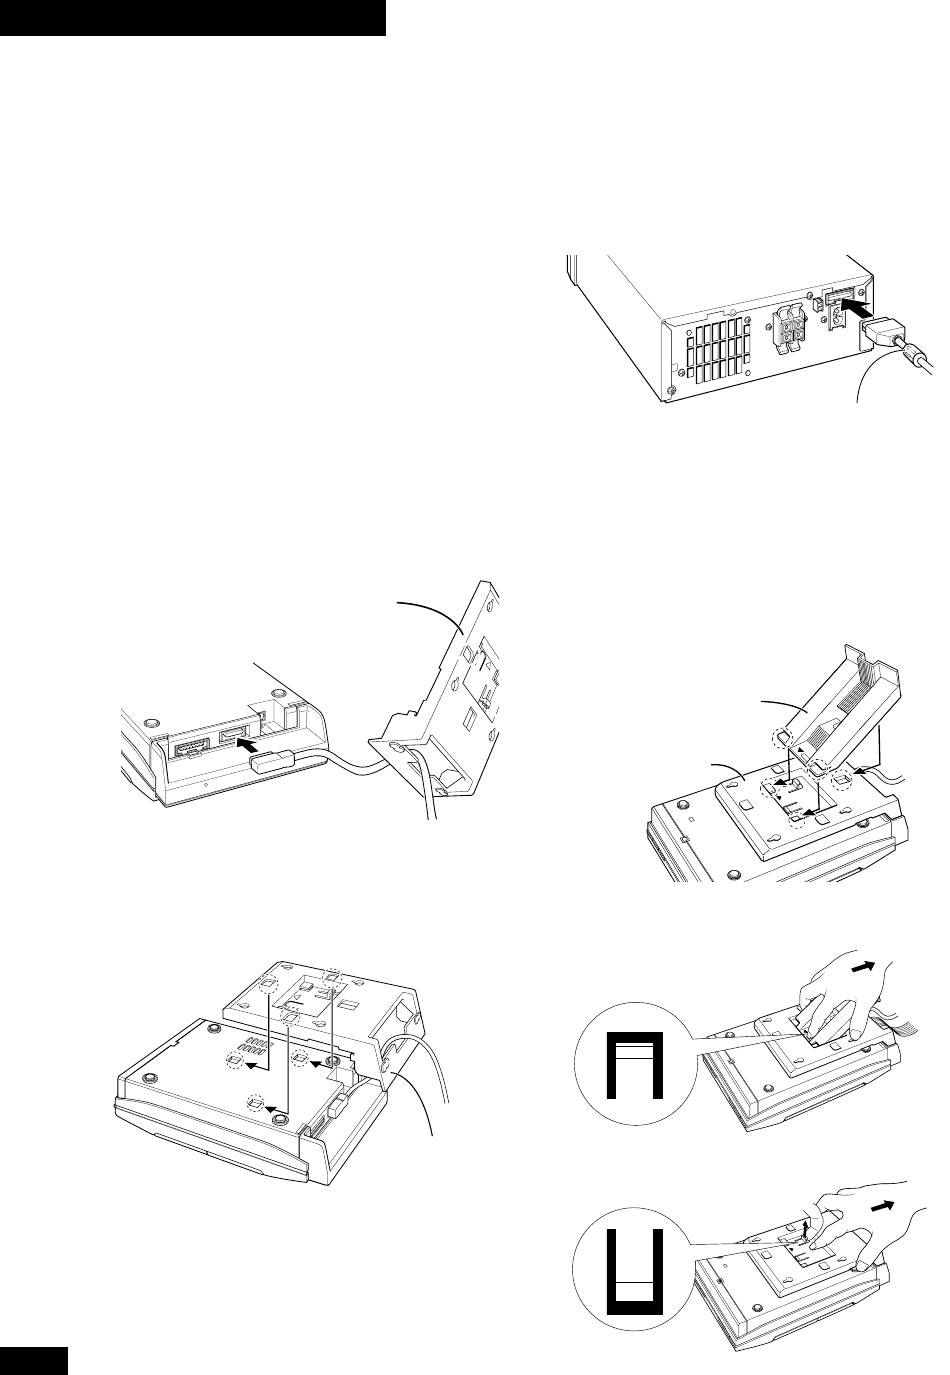
1 Pass the system cable through Stand A, as
shown, and connect the L-shaped end of the
system cable to the socket on the underside of
the CD-tuner.
Line up the plug and socket before inserting. Make sure the
plug clicks home.
• If you plan to wall-mount the CD-tuner, connect using the
other end of the system cable.
2 Slot Stand A on to the rear side of the
CD-tuner.
Line up the three tabs on Stand A with the holes on the
CD-tuner, then slot it into place.
• If you have the optional cassette deck, MD recorder or
CD-Recorder, connect these before attaching Stand A. (The
ribbon cable can pass under the Stand A to keep it tidy.)
3 Connect the other end of the system cable to
the socket on the rear panel of the power
amplifier.
Line up the plug and socket before inserting. Make sure the
plug clicks home.
• If you plan to wall-mount the CD-tuner, connect the
L-shaped end of the system cable to the amplifier.
4 If you plan to use the CD-tuner on a table-top
or shelf, attach Stand B.
Line up the tab on Stand B with the center hole on Stand A
and slot it into place. Stand B will slide under the two tabs on
the back of Stand A.
If you plan to wall-mount the unit, see Wall-mounting your
system on page 9.
• To remove Stand B, push the center tab, as indicated, and
slide off.
• To remove Stand A, pull the tab, as indicated, and slide off.
Ferrite core (Sound tuning part)
PUSH
PULL
Stand A
Stand A
Stand B
Stand A


