Hookups - Optional 15
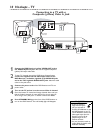
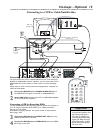
Connecting to a VCR or Cable/Satellite Box
AUDIO IN
AUDIO OU
DIGITAL OUT
R
FR SR
CENTER
LINE OUT
WOOPER
LINE OUT
AUX
COMPONENT
VIDEO OUT
P-SCAN
OFF ON
OPTICAL
COAXIAL
S-VIDEO
OUT
VIDEO
OUT
PrCr
PbCb Y
CLASS 1
SOC
AM/FM
ANTENNA
+ +
-
-
SPEAKER
4
Back of TV
(example only)
ANT IN
TO TV
Back of VCR , Cable, or Satellite box
(example only)
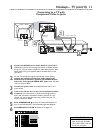
Connecting a VCR or Cable/Satellite Box
You must connect the VCR or cable/satellite box to the TV to view VCR
playback or cable/satellite channels. However, you can connect the VCR or
cable/satellite box to the receiver in order to hear surround sound play-
back.
Always refer to owner’s manual of the other equipment for complete con-
nection and use details.
1
Connect the DVD Receiver’s AUDIO IN AUX L/R jacks to
the AUDIO OUT L/R jacks on the VCR or cable/satellite box.
2
Select AUX mode to listen to the VCR or cable/satellite playback
on the surround sound speakers.
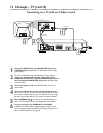
Connecting a VCR for Recording DVDs
To view DVD playback while recording, you must connect the Receiver to
your TV using a Component (Pr/Cr Pb/Cb Y) or S-Video connection.
See page 11-12 for details.
Some DVDs are copy-protected. You cannot record or dub protected
Discs using a VCR.
3
Connect the DVD Receiver’s AUDIO OUT L/R jacks to the
AUDIO IN L/R jacks on the VCR.
4
Connect the DVD Receiver’s VIDEO OUT jack to the VIDEO
IN L/R jack on the VCR.
• The receiver only uses all of the
surround sound speakers when
the incoming audio (from a
VCR, cable, or satellite) is in
surround sound format (Dolby
Digital, DTS, Dolby Pro Logic).
If the audio signal is in stereo
format, some of the speakers
will not be active.
Helpful Hints
2
3
1
4


