


Hookups - Optional 15
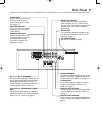
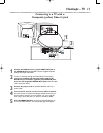
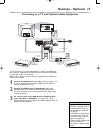
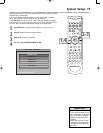
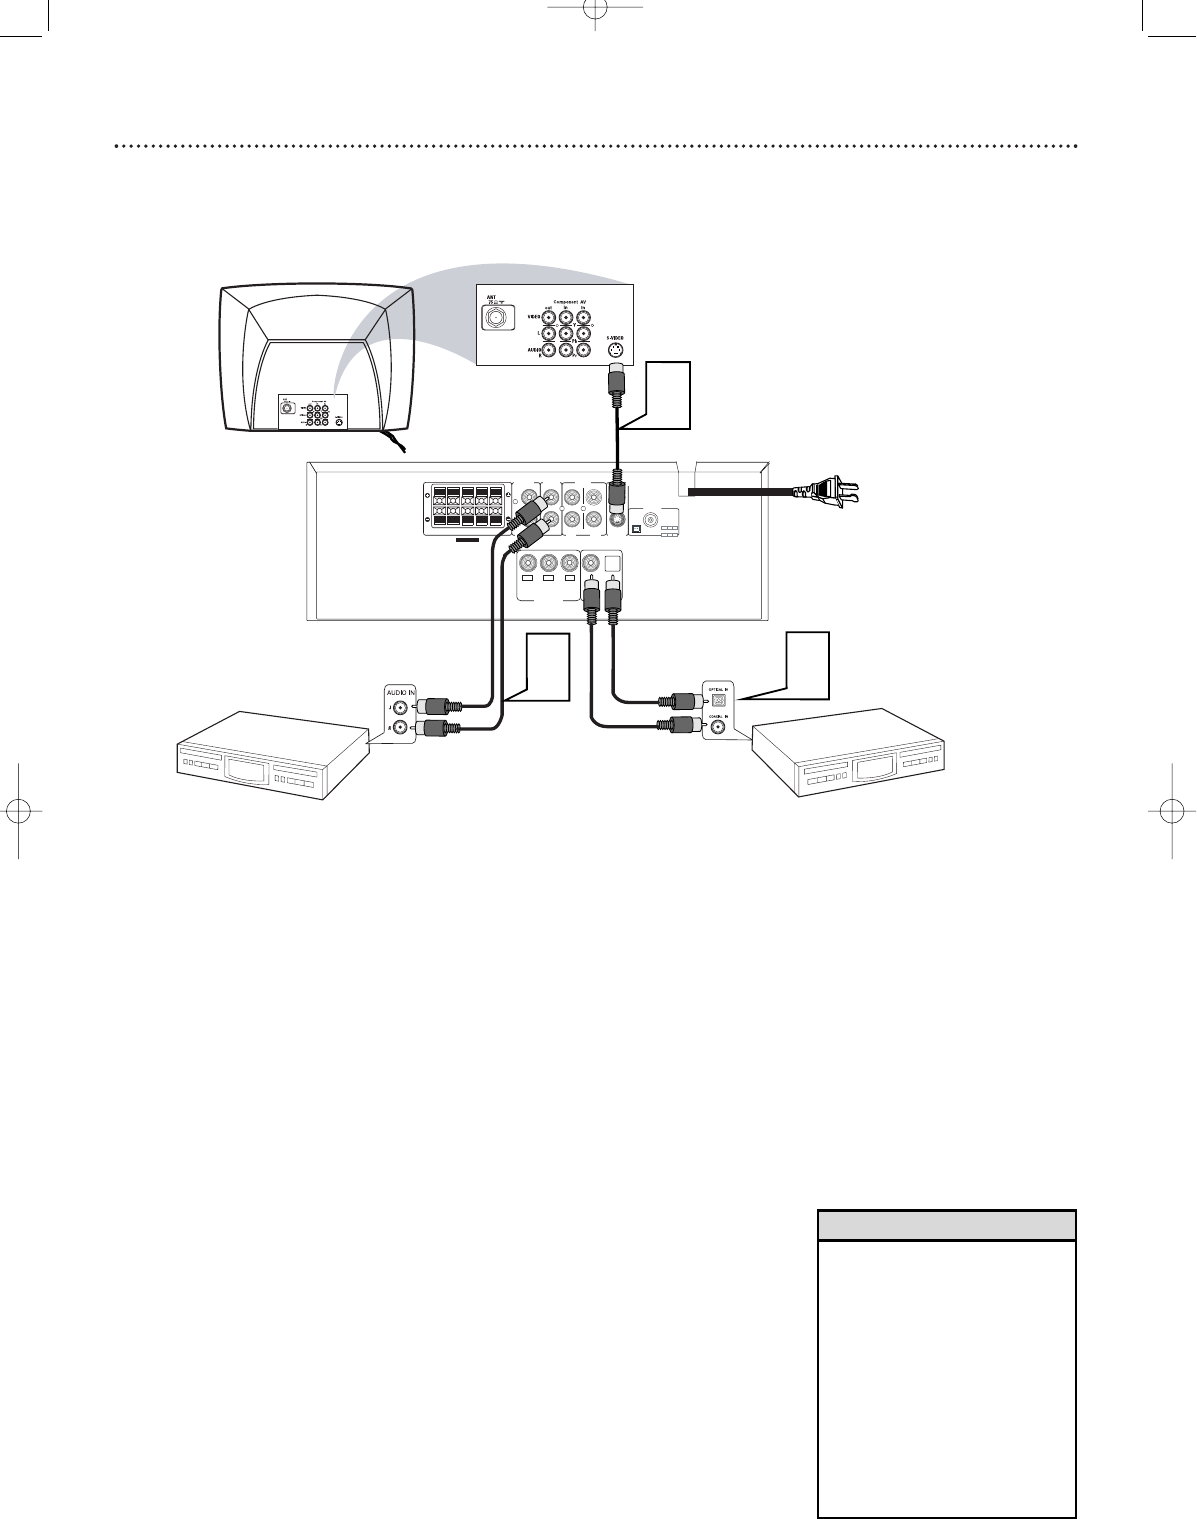
Connecting to a TV and Optional Audio Equipment
FR
FL C SR SL
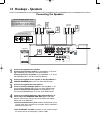
SPEAKERS (8‰)
CENTER
LINE OUT
AUDIO
OUT
AUDIO
IN
VIDEO
OUT
WOOFER
LINE OUT
TV AUX
S- VIDEO
OUT
Pr/Cr
Pb/Cb
Y
COMPONENT
VIDEO OUT
COAXIAL
OPTICAL
DIGITAL
OUT
AM
FM
(75‰)
AM/FM
ANTENA
L
R
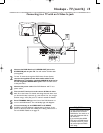
Back of TV
(example only)
Rear of DVD Receiver
CD/Tape Recorder
(for analog recording
example only)
Red & White
Audio Cable
CD Recorder
(for digital recording
example only)
Coaxial Cable
Optical Cable
S-Video Cable
You must connect a TV to the DVD Receiver in order to view DVD play-
back. However, additional Home Cinema System connections are possible
for recording or other sound features.
Always refer to owner’s manual of the other equipment for complete con-
nection and use details.
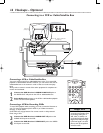
1
Connect the DVD Receiver to a TV (as shown on pages 11-13
or in your separate Quick-Use Guide). Make only one video con-
nection, whichever fits your TV.
2
Connect the DVD Receiver’s AUDIO OUT jacks to the
AUDIO IN jacks on an external audio accessory (CD Recorder,
etc.) This will allow you to make analog Stereo (two channel, right
and left) recordings.
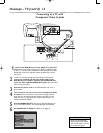
3
Or, connect either of the DVD Receiver’s DIGITAL OUT
jacks - OPTICAL or COAXIAL - to a Stereo that is DTS
(Digital Theater System) compatible, has a Dolby Digital decoder, or
has CD recording capability.
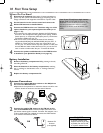
• If you used the DIGITAL OUT -
OPTICAL or COAXIAL jacks, set
DIGITAL OUTPUT to ALL on
the DVD Receiver. Details are
on page 24.
• Some DVDs are copy-protected.
You cannot record or dub pro-
tected Discs using a VCR or a
digital recording device.
• Digital recording is possible only
on a CD or Video CD.
• MP3 audio is a digital recording
option.
Helpful Hints
1
2
3
mrd250book 2/14/03 10:49 AM Page 15