


RQT8572
6
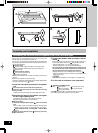
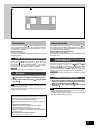
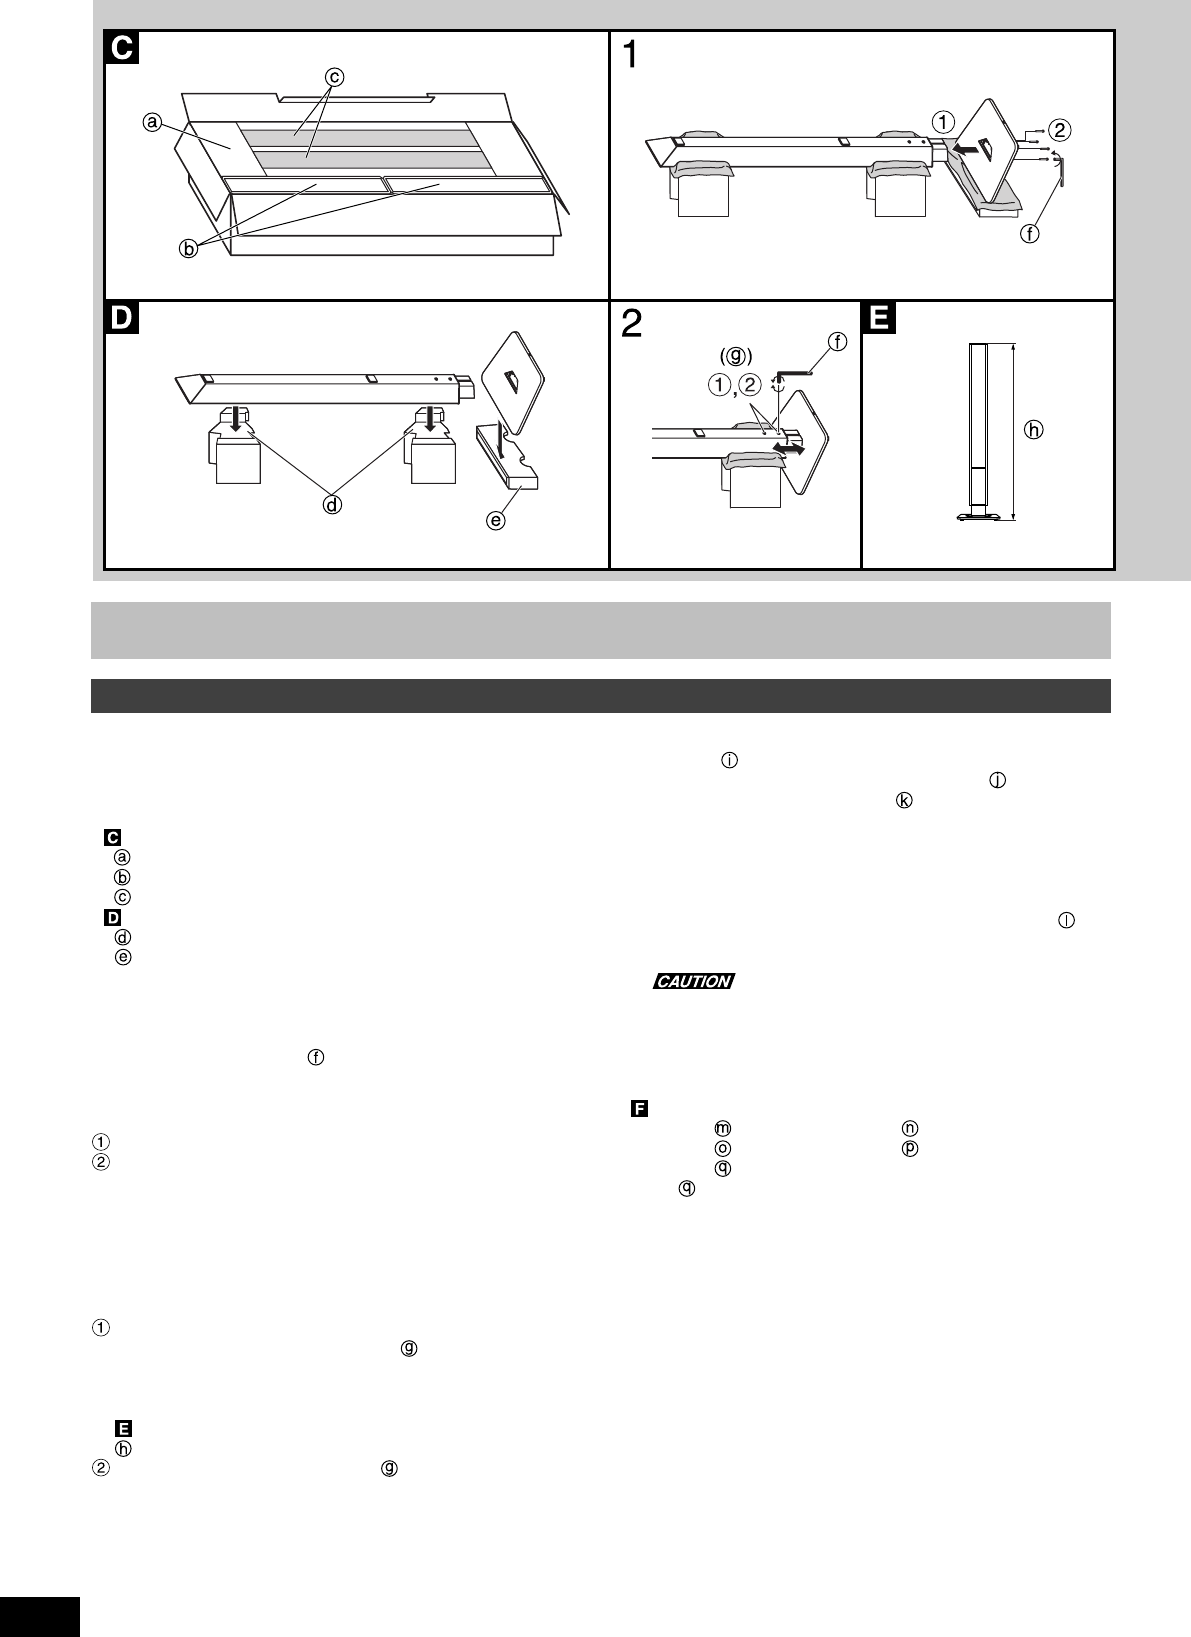
•Do not apply an unreasonable force to the net at the front of the
speaker unit. You cannot remove the front net.
•You can carry out assembly work stably by placing the cushions in
the packing case beneath the speaker. Place the speaker with the
net side face downward.
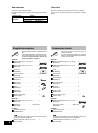
Cushions used
Two left cushions (upper and lower) for the speaker units
One stand base cushion (left or right or top and bottom)
Speaker units
Method of setting cushions
Left cushions for speaker unit
Cushion for stand base
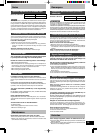
Be sure to spread a cloth, for example, on the floor to protect it from
damage.
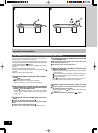
•After each task, tighten the screws securely.
Tighten the stand base mounting bolts and the height adjusting bolts
using the hexagonal wrench provided.
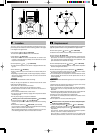
1.Install the stand base (provided) on the speaker
unit.
Fit the stand base onto the stand of the speaker unit.
Install the stand base using the four stand base mounting
bolts (provided).
•Tighten the screws alternately, and finally tighten them hard.
2.Determine the height of the speaker, and tighten
the two height adjusting bolts.
The height of each speaker is set to MIN at the factory.
Adjust the height as shown in the figure above.
Adjust the height.
Loosen the two height adjusting bolts , and move the stand
base.
•
You can obtain a better sound effect by adjusting the height of the
speaker to suit the height of the plasma television, for example.
Height adjustment range: 1,183 mm (MIN) - 1,428 mm (MAX)
Height
Tighten the height adjusting bolts alternately, and finally
tighten them hard.
Assembly and Installation
Assembling the front and surround speakers (SB-FS100) as stand types
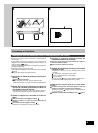
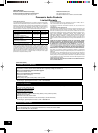
3.Connect the speaker cable (provided) to the ter-
minals .
Be sure to connect only positive (copper) wire to positive (+)
terminal and negative (silver) wire to negative (–) terminal.
•Speaker cable (short, 4 m): For the front speaker
Speaker cable (long, 10 m): For the surround speaker
Turn the thumb nut in the loosening direction until the hole in
the terminal becomes visible, then insert the conductor from
the top of the terminal and re-tighten the thumb nut.
•Slightly bend the tip of the conductor before inserting it.
•Tighten the thumb nut when the conductor is protruding from the
hole in the terminal.
Never short-circuit positive (+) and negative (–) speaker wires.
4.Fix the cable to the bottom of the stand base.
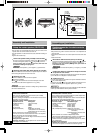
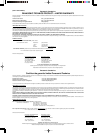
Attaching a stabilizing wire
Example Nylon clamp Screw for nylon clamp
Wire (not included) Ring (not included)
Screw (not included)
Screw the wood screw into a thick and hard part of the wall.
The surface must be able to support over 45 kg (99 lb.).