


16
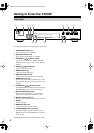
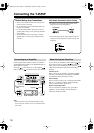
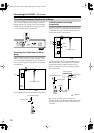
Connecting the T-4555P
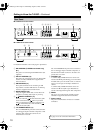
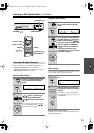
Use the supplied audio cable to connect the T-4555P’s
AUDIO OUTPUT L/R jacks to the TUNER IN jacks on
your amplifier, as shown.
To use the system functions, use the supplied
cable to make an connection (see the next column).
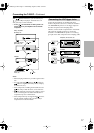
Note:
• If the T-4555P is used with another Onkyo compo-
nent, such as the A-9555, refer to its instruction man-
ual as well.
If you connect the T-4555P to another Onkyo -capa-
ble component with the supplied cable and audio
cable, you can use the following system functions.
cables are special cables solely for use with Onkyo
products.
Auto Power On
When you turn on the T-4555P, your Onkyo amplifier
will turn on automatically. (The amplifier’s POWER
switch must be set to ON for this to work.)
Direct Change
When you select a radio preset or change the band (AM,
FM, etc.), your Onkyo amplifier will automatically
select the T-4555P as the input source.
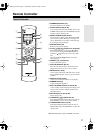
Remote Control Operation
You can control the T-4555P by using your Onkyo
amplifier’s remote controller. See the amplifier’s
instruction manual for details.
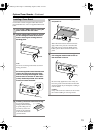
Before Making Any Connections
• Refer to the instructions that came with the com-
ponent you are connecting.
• Do not plug in the power cord until all other con-
nections are complete.
• Do not bind audio cables with power cords and
speaker cables. Doing so may adversely affect the
sound quality.
•To prevent interference, keep power cords and
speaker cables as far away as possible from the
antennas.
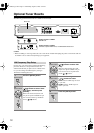
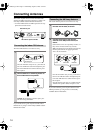
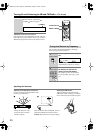
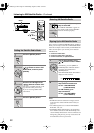
RCA Audio Connection Color Coding
• Red plugs are used for the right channel, white
plugs are used for the left channel.
• Push each plug in all the way to make a good con-
nection (loose connections can cause noise or mal-
functions).
Left (white)
Right (red)
L
R
Wrong!
Right!
Connecting to an Amplifier
T-4555P
L
R
TUNER
Supplied cable
Supplied audio
cable
Amplifier
About the System Functions
T-4555P_En.book Page 16 Wednesday, August 9, 2006 3:42 PM