


11
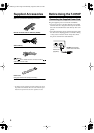
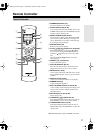
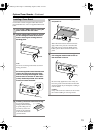
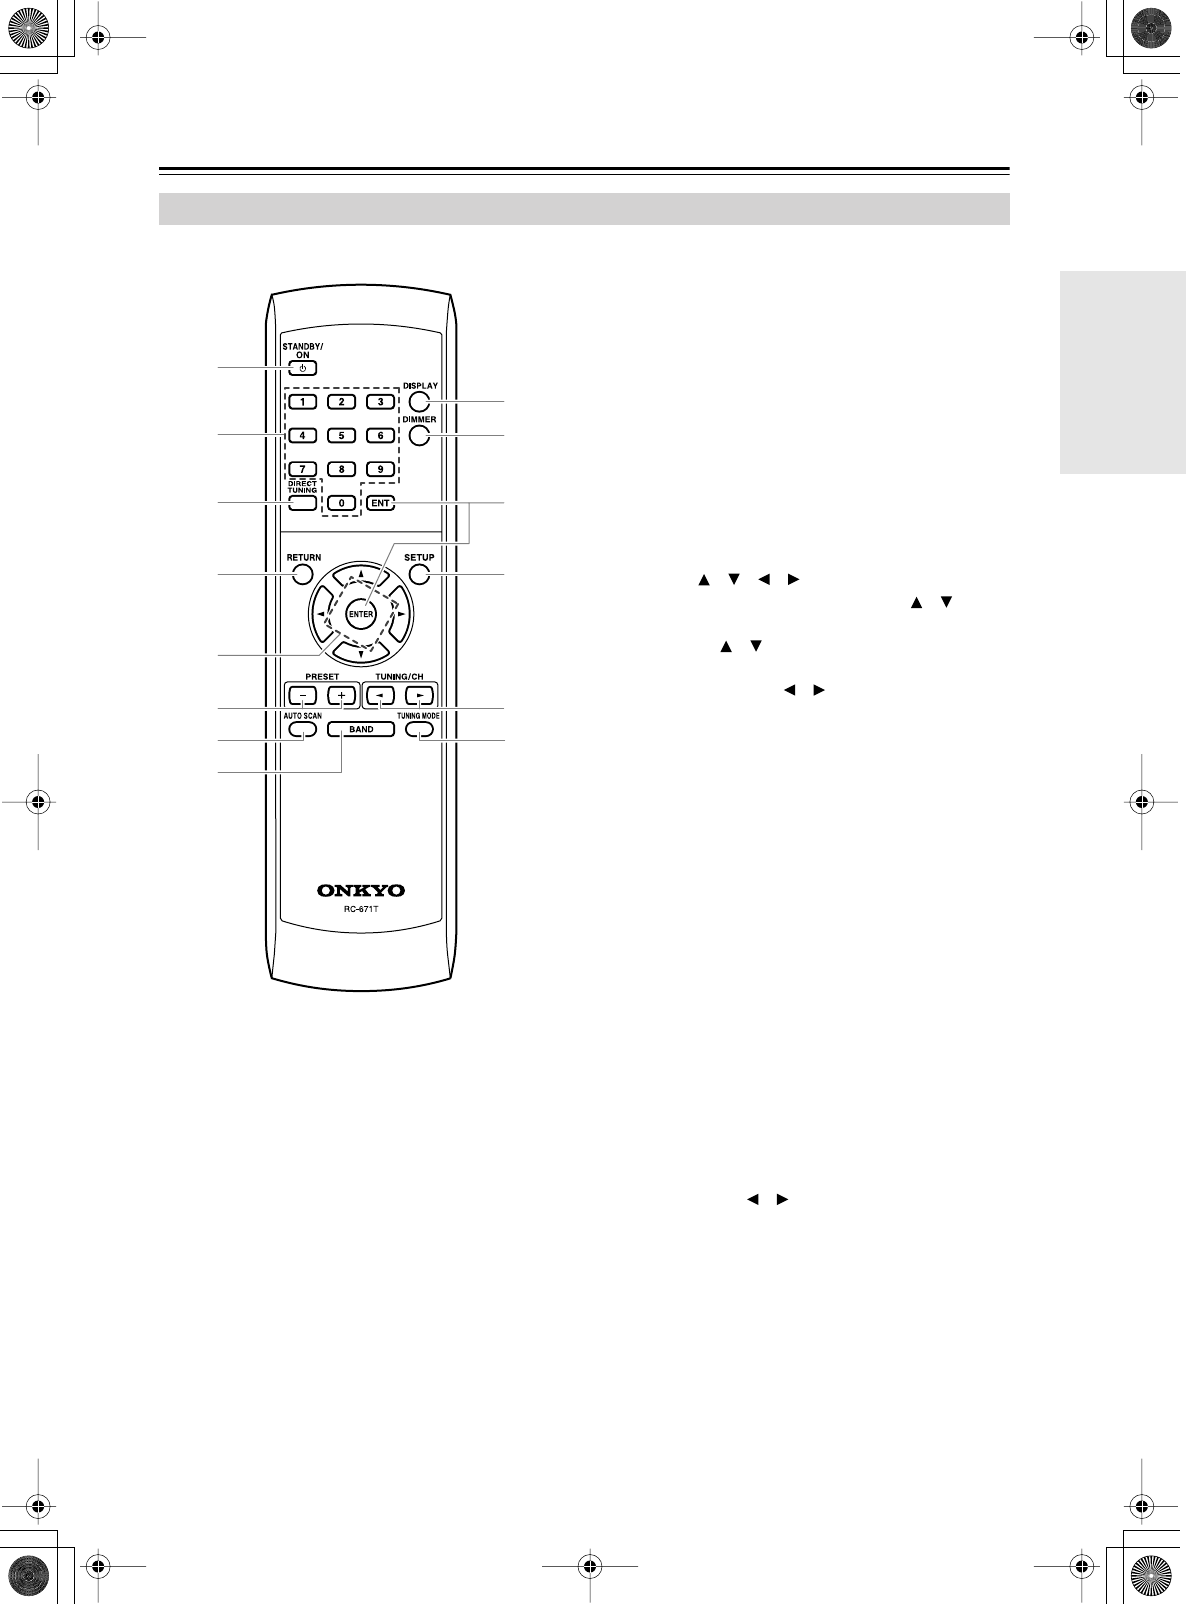
Remote Controller
A
STANDBY/ON button (19)
Sets the T-4555P to On or Standby.
B
Number buttons (20, 23, 28)
Used to select radio presets by number, and to enter
AM/FM station frequencies and XM Radio channel
numbers in Direct Tuning mode.
C
DIRECT TUNING button (20, 23)
Selects the Direct Tuning mode. With AM and FM,
you can select a station directly by entering its fre-
quency. With XM, you can select a station directly
by entering its channel number.
D
RETURN button (28)
Returns to the previous display.
E
Arrow [ ]/[ ]/[ ]/[ ] buttons (12, 22–25, 28)
With AM and FM, the Up and Down [ ]/[ ] but-
tons are used for tuning. With XM Radio, the Up
and Down [ ]/[ ] buttons are used to select chan-
nels.
The Left and Right [ ]/[ ] buttons are used to
select category.
F
PRESET [+]/[–] buttons (27)
Used to select radio presets.
G
AUTO SCAN button (26, 27)
Starts the Auto Scan function, which selects and
outputs each radio preset in turn for 5 seconds.
H
BAND button (19, 22)
Used to select radio bands, AM, FM, and so on. The
bands available depends on the type of tuner board
installed.
I
DISPLAY button (24, 26)
Used to view various information on the display.
J
DIMMER button (9)
Adjusts the display brightness.
K
ENT and ENTER buttons (12, 22–25, 28)
Used to confirm various functions and settings. Also
used to select secondary multicast channels with
HD Radio stations.
L
SETUP button (12, 22, 24, 28)
Selects Setup mode.
M
TUNING/CH [ ]/[ ] buttons (19, 23)
With AM and FM, these buttons are used for tuning.
With XM Radio, they’re used to select stations.
N
TUNING MODE button (19, 23)
With AM and FM, this button selects the Auto or
Manual tuning mode. With XM Radio, it selects the
search modes.
*XM Radio/HD Radio requires C-HDXM tuner board.
Remote Controller
1
2
3
4
9
J
L
6
7
8
5
K
M
N
T-4555P_En.book Page 11 Wednesday, August 9, 2006 3:42 PM