


11
Connecting the DX-7555—Continued
With (Remote Interactive) you can control the
DX-7555 together with your other -compatible
Onkyo AV components. With some Onkyo AV receivers
you can use one remote controller to control all your
Onkyo components and use the following special
functions:
■ Auto Power On
If your DX-7555 is connected to an -compatible
Onkyo hi-fi amp or AV receiver, when you turn on the
DX-7555, the AV receiver will turn on and select the
DX-7555 as the input source.
■ Direct Change
If your DX-7555 is connected to an -compatible
Onkyo hi-fi amp or AV receiver, when you start playback
on the DX-7555, the AV receiver will select the
DX-7555 as the input source.
■ Dimmer
When you dim the display brightness on an -compat-
ible Onkyo AV component, the displays on all other AV
components connected via are dimmed as well.
To use the functions, you need to connect one of the
DX-7555’s connectors to an connector on
another AV component in your system by using the sup-
plied cable.
See the manuals supplied with your other -compati-
ble AV components for more information.
Notes:
• Use only cables for connections.
• To use you must make an analog RCA/phono
connection between your DX-7555 and Onkyo AV
receiver even if they are connected digitally.
• The DX-7555 has two connectors. You can con-
nect either one to your Onkyo hi-fi amp or AV
receiver. The other connector is for connecting addi-
tional -compatible components.
• Connect the DX-7555’s connector to only Onkyo
AV components. Connecting to other manufacturer’s
AV components may cause them to malfunction.
• Some Onkyo -compatible AV components may
not support the special functions described here.
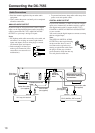
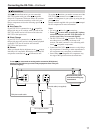
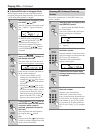
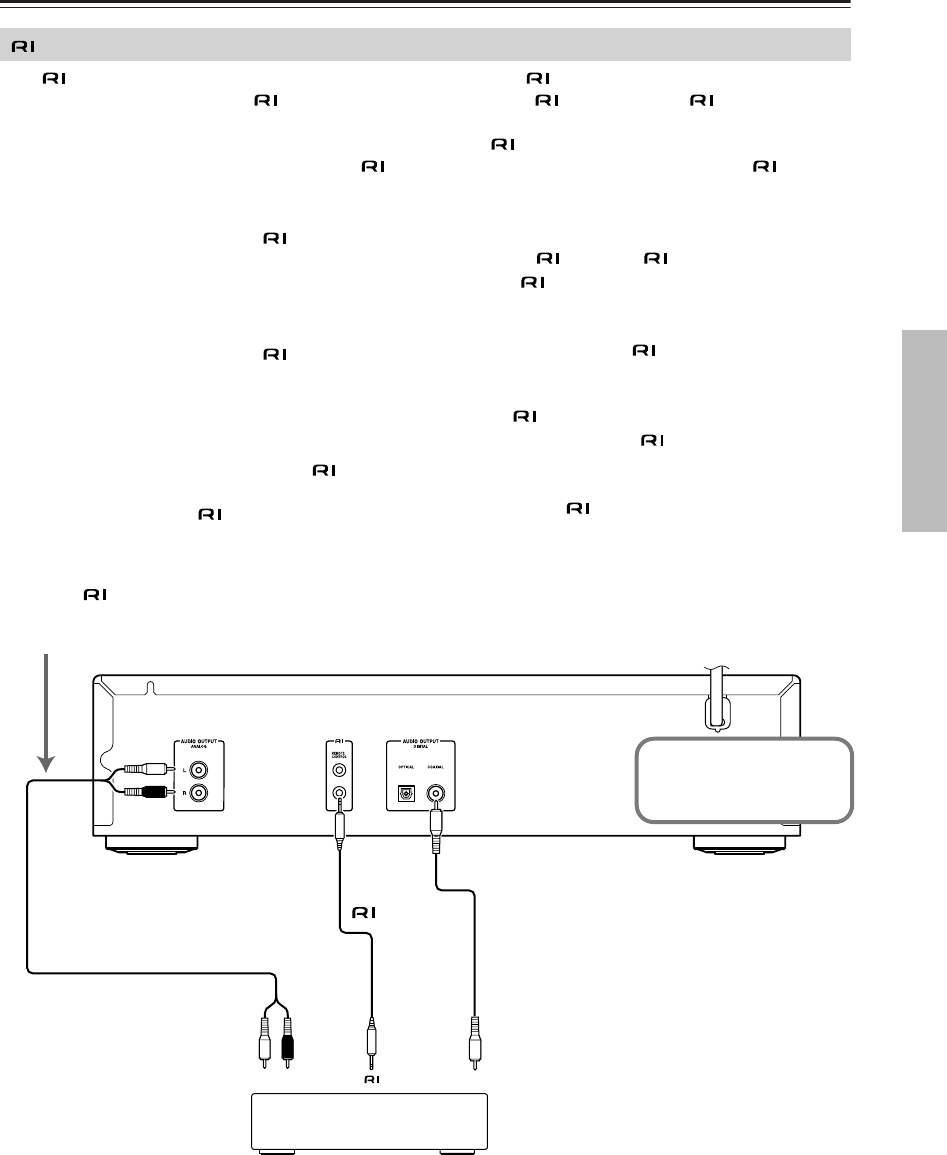
Connections
RCA/phono audio cable
cable
Hi-fi amp, AV receiver
CD
RL
To use you must make an analog audio connection (RCA/phono)
between the DX-7555 and your other Onkyo equipment even if they are
connected digitally.
Disconnect the power
cord before making any
connections!
Coaxial IN
Coaxial cable (not supplied)