


NILES AUDIO CORPORATION – 1-800-BUY-HIFI – 305-238-437318
The Niles ZR-4 MultiZone Receiver Kit is simple to configure.
Configuration is accomplished using the front panel buttons and
LCD display. No computer is necessary.
NOTE: THE MASTER UNIT, THE SLAVE UNIT (IF APPLICABLE), ALL SOURCE
COMPONENTS, KEYPADS AND SPEAKERS MUST BE CONNECTED PRIOR TO
PERFORMING ANY OF THESE OPERATIONS.
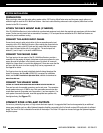
MAIN POWER
The ZR-4 MultiZone Receiver has a mechanical latching main
power switch on its front panel. The ZR-4 MultiZone Receiver and
its accessories will not work until it has been engaged. Press in the
main power switch to the on position. It will glow white to indicate
that it is in standby and ready to operate.
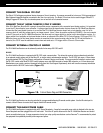
CONFIGURATION MODE
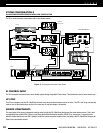
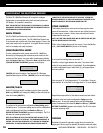
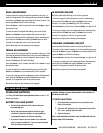
To enter configuration mode, power down the ZR-4 MultiZone
Receiver(s) by disengaging the mechanical power switch for five
seconds and then power it up again while simultaneously holding
down the
Band and Set keys. Release the Band and Set Keys when
[ RELEASE BUTTONS TO CONTINUE ] appears on the display.
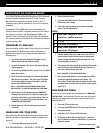
[ MASTER ] will be on the display. If you have two ZR-4 Receivers,
repeat the above step on the Slave.
[ MASTER ] will be on both displays.
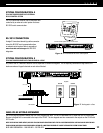
MASTER/SLAVE
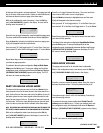
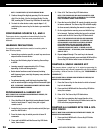
On the ZR-4 that you wish to configure to be the Slave, press the
Band key. [ MASTER ] will change to [ SLAVE ] on that unit while the
other will remain
[ MASTER ].
To continue to the next system configuration Zone Linking, press
the
Set key once. To save your settings and to exit the configuration
mode, simultaneously hold down the Band and Set keys.
[
RELEASE BUTTONS TO CONTINUE ]
appears on the display. The ZR-4
will return to normal operating mode.
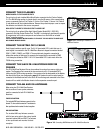
NOTE: ALL EXTERNAL IR OR RS-232C CONTROL MUST BE MADE TO THE
MASTER ONLY AND NOT TO THE SLAVE. THE COMMANDS NECESSARY TO
CONTROL THE SLAVE WILL BE RELAYED TO IT THROUGH THE EXPANSION
CONNECTION. ALL MICROFLASHERS FOR SOURCE CONTROL MUST BE
CONNECTED TO THE MASTER AND NOT TO THE SLAVE. IR FROM THE
KEYPADS CONNECTED TO THE SLAVE CHASSIS WILL BE ROUTED TO THE
MASTER CHASSIS VIA THE EXPANSION CONNECTION PORT.
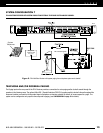
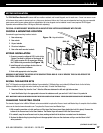
ZONE LINKING
This feature allows two or more zones to always play the same
source at the same time. Linked zones will turn-off and turn-on to
the same source in unison. Volume, bass and treble will remain
independent for each zone.
NOTE: ONLY ONE ZONE LINKING GROUP MAY BE CREATED PER UNIT (ONE
FOR THE MASTER, ONE FOR THE SLAVE).
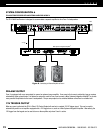
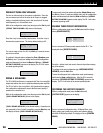
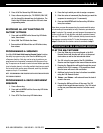
While in the configuration mode (see above). Press the Set Key
until
[ 1234 LINKING MASTER ] shows in the display.
A cursor will be blinking under the number “1.”
Press the
+ key to toggle between the zones. The cursor blinks
under the zone number when it is highlighted. Press the
Band key
to make a highlighted zone a linked zone.
[ L ] will appear below
that zone number.
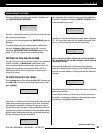
Once you reach “4” it will toggle back to “1” on the Slave. Once you
have reached “4” on the Slave it will toggle back to “1” on the Master.
Repeat these steps until all of the desired zones have been linked.
To continue to the next system configuration Paging, press the
Set key once. To save your settings and to exit the configuration
mode, simultaneously hold down the Band and Set keys.
[ RELEASE
BUTTONS TO CONTINUE ]
appears on the display. The ZR-4 will return
to normal operating mode.
PAGING
By default, all zones will respond to a page when it is input to the
paging port. When a signal is detected, the selected zones will switch
L I N K I N G
MASTER
123 4
CONFIGURING THE MULTIZONE RECEIVER
MASTER
MASTER
SLAVE
RELEASE BUTTONS
TO CONTINUE
1234
L
L I N K I N G
MASTER
1234
L L
L I N K I N G
MASTER
RELEASE BUTTONS
TO CONTINUE