


By briefly tapping the or you can engage manual tuning
respectively up or down the frequency band for precise tuning to
a specific frequency. With each successive tap of the keys, the
tuner will take 0.05 MHz steps on FM so you can accurately tune
into the desired frequency. For AM the tuning steps can be 9 kHz
or 10 kHz, depending on the version of your T770. This tuning
mode can also be useful when trying to receive a radio station
which is too weak for the auto search mode. When tuned
accurately to a station, “ TUNED ” will light up in the display.
With stations carrying RDS information, the station’s RDS name is
displayed, Program Service (PS; normally the station’s calling
letters, BBC R3, for instance). Refer to the separate chapter
“Storing, recalling and naming Presets” for more information.
NOTE: The 120V versions (North America) do not have RDS
(Radio Data System).
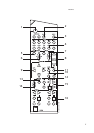
16. FM MUTE/MODE
This button combines two functions; it switches the tuner from
Stereo to Mono and disengages the muting circuitry at the same time.
The muting circuit will mute the tuner in between radio stations
when searching or tuning. This way the tuning noise is avoided.
Very weak radio station signals however may be suppressed by the
muting circuit. If such a very weak station is in stereo it will have
a high level of background hiss. Switching to Mono Mode and
disengaging the muting circuit by depressing the FM MUTE/MODE
button will allow the station to be heard and will cancel most or
all of this background noise.
In normal operation the mute circuit is engaged, the display
indicates “FM MUTE”. Press the FM Mute/Mode button to disengage
the muting circuit and switch from stereo to mono reception. “FM
MUTE” will extinguish in the display. Also, “STEREO” will
extinguish if a stereo broadcast was received. Press the FM
Mute/Mode switch again to return to Auto Stereo FM operation.
SURROUND FUNCTIONS
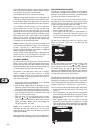
17. EXT. 5.1CH
Selects the multi-channel output signal from the DVD player or
external decoder source (such as DTS, MPEG, etc.) connected to
the EXT. 5.1 CH input as the active input.
NOTES: The Speakers B (No. 3), Digital Audio Selector (No. 18) and
Surround mode (No. 19) buttons do not have any effect in this mode.
No audio signal is available from the Tape 1, Tape 2, Video 1 and
Video 2 outputs when the EXT. 5.1 CH input has been selected.
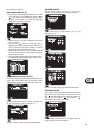
18. DIGITAL AUDIO SELECTOR
With the Digital Audio selector button you can assign which one of
the Input Selectors will be linked to either the Digital Audio 1,
Digital Audio 2 or Digital Audio 3 inputs. When a Digital Audio
input is linked to one of the Input selectors, whenever a digital
source is sensed at the Digital Audio input, the Digital Audio input
will be used instead of the corresponding analogue audio input.
To assign a Digital Audio input to a specific Input Selector button:
• Press the desired input button (except AM, FM, Tape 2 Monitor
and EXT. 5.1 CH.)
• Press the Digital Audio Selector button. The "DIGITAL AUDIO"
box will light up in the display with the first available digital input.
• Press the Digital Audio Selector button again to until the
desired digital input lights up (either 1,2 or 3). Digital Input 1
is the optical input; Digital Audio input 2 and Digital Audio
input 3 are the coaxial inputs.
The next time this input is selected, the chosen Digital Audio input
will automatically be selected as well.
NOTES: It is not possible to select a digital input if Digital Audio
input 1, Digital Audio input 2 and Digital Audio input 3 have
already been assigned. You must first de-select the desired Digital
Audio input from the Input Selector button it has been assigned to.
TO DE-SELECT A DIGITAL AUDIO INPUT
• Select the input to which the Digital Audio Input is assigned
(the display indicates which Digital Audio Input is assigned to
the selected input).
• Press the Digital Audio Selector until the “Digital Audio”
extinguishes in the display.
The Digital Audio input has now been de-selected from the chosen input.
When no digital source is available (not connected or source is
switched off) the associated Digital Audio input number will blink.
Once a digital signal is available and the input has “locked on” to
the digital signal it will remain lit.
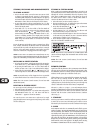
19. SURROUND MODE
With the Surround Mode and buttons the available
surround sound modes can be selected. The selected Surround
mode is permanently indicated in the display area and is also
shown for 3 seconds in the large alphanumeric section of the
display. The Surround Mode buttons scroll through the available
surround sound modes:
Surround Mode Off Dolby Pro Logic EARS
Surround mode Off, etc.
With Dolby Digital surround sources Dolby Pro Logic and EARS
are not available: Surround Mode Off Dolby Digital. If Dolby
Pro Logic or EARS is selected the T770 will automatically switch
to Dolby Digital.
Dolby Digital has six independent channels available in total: Left,
Center, Right, Surround left, Surround Right and an “Effects
Channel” (Subwoofer). Dolby Digital is only available as a
Surround Mode if the source is Dolby Digital and a Digital Audio
input is used.
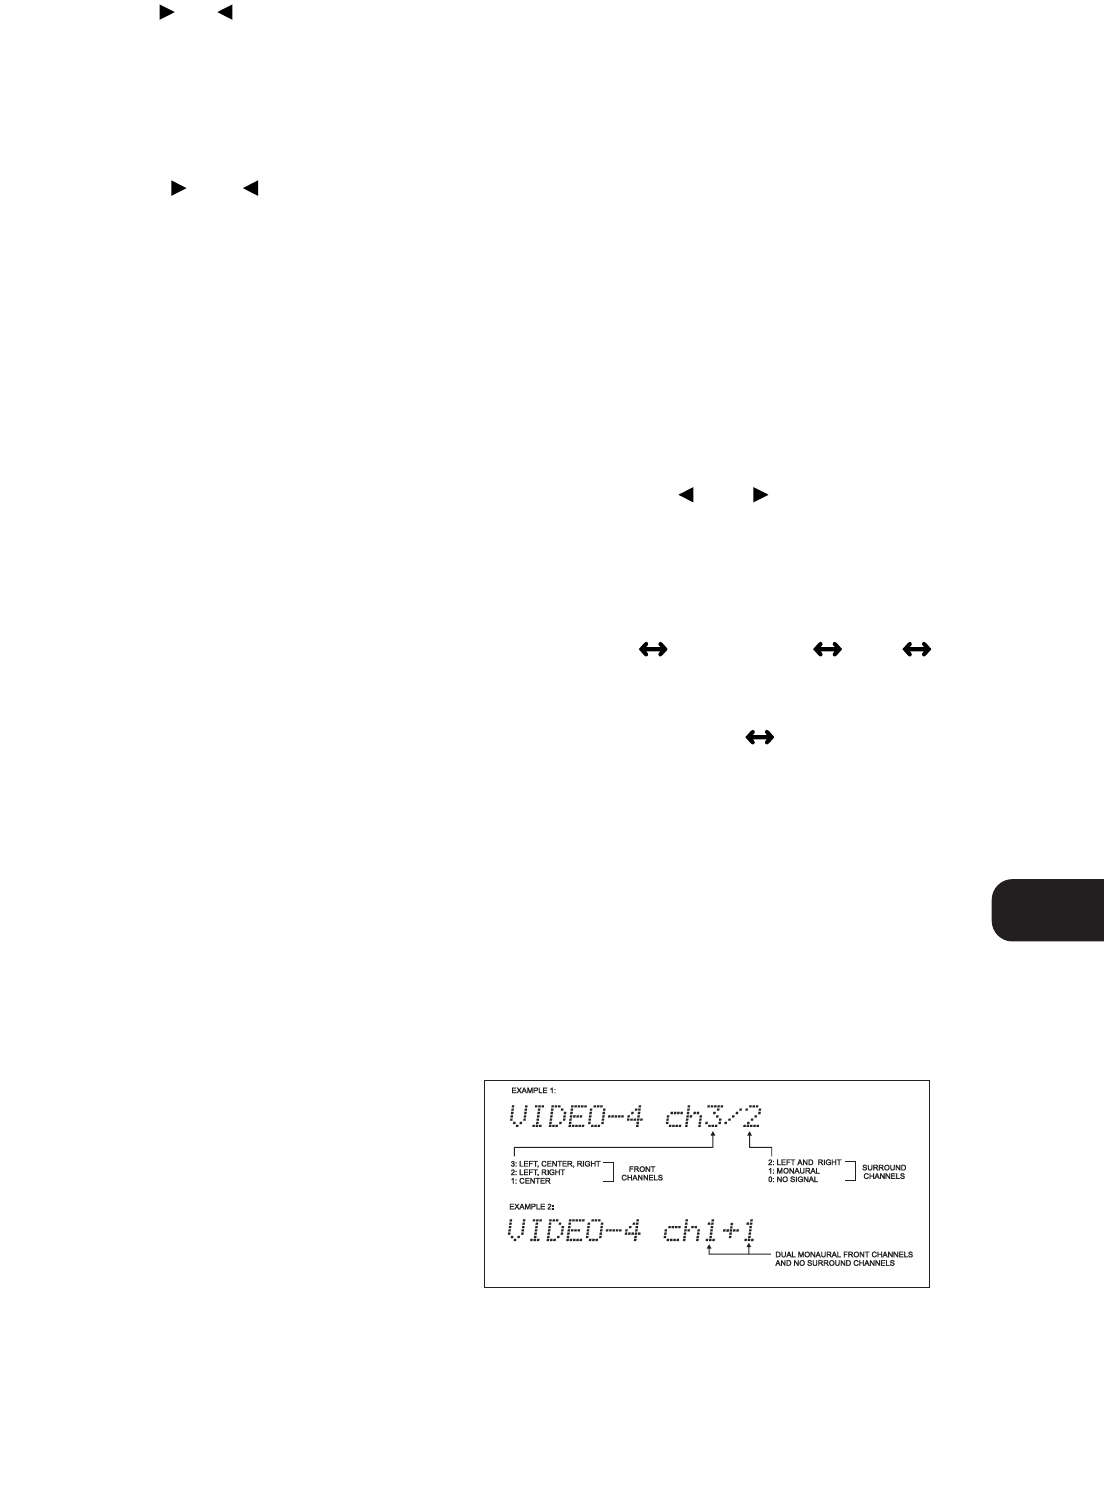
The Dolby Digital signal conforms to Dolby’s AC-3 standard, which
allows for several channel configurations. The channel
configuration is shown the display together with the input
selected. For example, with regular Dolby Digital sources the
display will show “ch3/2”, indicating that there are 3 front
channels and 2 surround channels available.
Dolby Pro Logic decodes the center and surround sound signals
embedded in stereo movie sound tracks from e.g. video, Laser
Disc or TV. To decode correctly, the source must be a Dolby
Surround or Dolby Stereo soundtrack.
GB
13