


NA
D
5
GB
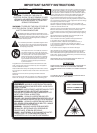
BEFORE TRANSPORTING THE UNIT.
CAUTION:
Be sure to remove all discs from the player before
moving it, even if you only plan to move it across the
room. If discs shift out of position in the carousel tray,
they could jam when the tray turns or the drawer is
opened.
A NOTE ON INSTALLATION
Install the Compact Disc player on a level, vibration-
free surface. (Severe vibration, or operation in a tilted
position, may cause the player to mis-track). The player
may be stacked with other stereo components, as long
as there is adequate ventilation around it.
If the player is placed in close proximity to a radio
tuner (AM or FM), VCR, or television set, the operation
of its digital circuits could produce static that would
interfere with reception of weak broadcast signals. If
this occurs, move the CD player away from other
devices or switch it off when listening to broadcasts.
PLAYING COMPACT DISCS - A SIMPLE
APPROACH
Numbers in brackets refer to the front panel drawing
unless stated otherwise.
1. Connect a stereo cable from the L (left) and R
(right) Line Output sockets (2 in back panel drawing) to
the corresponding CD inputs on your amplifier.
2. Plug in the AC power cord (1 in back panel draw-
ing).
3. Press the POWER button (1) to turn on the player.
4. Press the OPEN button (8) to open the disc draw-
er.
5. Place your first CD, label side up, in the carousel
tray’s left-front circular recess (marked ‘DIRECT
PLAY’). Be certain that the disc is centred within the
recess.
6. Place your second CD in the right-front recess.
7. Press the NEXT button (3) twice to move tray loca-
tions #3 and # 4 to the front loading positions. Place
your third and fourth CDs in those recesses.
8. Press NEXT (3) to bring tray location # 5 to the
front, and insert your fifth CD.
9. Press NEXT (3) as necessary until the display indi-
cates Disc # 1.
10. Press the PLAY button (7). The drawer closes
automatically, the tray revolves to place Disc # 1 in
playing position, and the first disc begins to play.
11. When the first disc ends, the remaining discs will
automatically play in sequence.
12. At anytime you may press the SKIP > or < but-
tons (5) to select different tracks on the current disc, or
press NEXT (3) to select a different CD.
13. To hear a particular track, use the remote control
to enter the corresponding Disc Select and Track
Select buttons.
REAR PANEL CONNECTIONS
The numbers refer to the back panel drawing.
1. AC LINE CORD.
Connect this power cord to an AC mains wall outlet
or to an AC convenience outlet at the rear of your
amplifier.
2. LINE OUTPUT.
Connect a cable from these sockets to your amplifier.
Plug one end of a stereo audio cable into the Left
(upper) and Right (lower) output sockets. Connect the
other end of the cable to your stereo amplifier’s match-
ing Left and Right CD inputs, or to any other “line-level”
input sockets on (such as the AUXiliary inputs).
NOTE: Do NOT connect this cable to the amplifier’s
PHONO input sockets.
3. NAD LINK IN/OUT.
The NAD Link OUT connector (the upper socket)
allows remote-control commands to be relayed from
this player to other products equipped with a NAD-Link
(or compatible) input. To use this option, connect a
cable from the NAD Link OUT socket to the NAD Link
IN socket on another product.
The NAD Link IN connector (the lower socket) allows
this player to be operated by external control signals
from a multi-room controller or remote relay system.
Connect a cable from the controller to the NAD Link IN
socket. Using both IN and OUT connections, remote
control commands can be “daisy-chained” from one
product to the next.
FRONT PANEL CONTROLS
Numbers of each section or in brackets refer to the
front panel drawing unless stated otherwise.
1. POWER.
Press this button to switch on the power to the disc
player. Press again and release to switch the power off.
When the power is switched on, the carousel tray auto-
matically revolves to place disc # 1 in the play position.
2. DISC 1 to 5
Press the appropriate Disc number button to immedi-
ately access the desired disc. When one of the DISC 1
to 5 buttons is pressed with the CD drawer open, the
player will close the CD drawer and start to play the
selected disc.
3. NEXT.
Turns the carousel tray to select the next-higher disc
number. After # 5 it returns to # 1. If NEXT is pressed
with the CD drawer open whilst playing a CD, the CD
drawer will close first.
4. DISPLAY.
The display provides information about the disc
selection, playback status, about the stored program,
and about the laser’s location on the disc being played.
NAD 523 COMPACT DISC CHANGER