


1818
1818
18
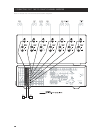
Adjusting the relative balance of your system's loudspeakers ensures that surround-sound recordings,
whether music or film, will present the balance of effects, music, and dialog that the artists intended.
Additionally, if your system incorporates a subwoofer it establishes a correct relationship between the
volume of the subwoofer and the other speakers, and thus of low-frequencies (bass) to other sonic
elements.
USING AN SPL METERUSING AN SPL METER
USING AN SPL METERUSING AN SPL METER
USING AN SPL METER
It is quite practical to perform the T 163 Level setup routines "by ear," and careful work will produce
acceptably accurate results. However, the use of an inexpensive sound-pressure level (SPL) meter, such as
Radio Shack part number 33-2050, makes this task easier, more accurate and more repeatable. Ownership
of such a meter could prove a valuable audio tool; your NAD audio specialist may be able to help you with
temporary use of a meter.
The SPL meter should be placed at the primary listening position, at approximately the height of the seated
listener's head. A tripod is helpful, but with a little duct tape almost anything — a pole lamp, music-stand,
or ladder-backed chair, for example — can do as well. Just be sure that no large acoustically reflective
surfaces obstruct or are near the microphone element. Orient the meter with its microphone (usually at one
end) pointing straight up toward the ceiling (not forward toward the speakers) and ensure that its "C"
weighting scale is selected. Set the meter to display 75 dB SPL. (On Radio Shack meters this necessitates
either setting the meter to its 80 dB range and taking your readings at the -5 point, or selecting the 70 dB
range and reading at the +5 point.)
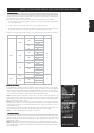
SETTING CHANNEL BALANCESETTING CHANNEL BALANCE
SETTING CHANNEL BALANCESETTING CHANNEL BALANCE
SETTING CHANNEL BALANCE
Press the HTR 2 remote’s [Test] key, activating the T 163’s channel-balancing test signal and displaying the
<Channel Levels> menu on the OSD. You will hear a "surf" sound that cycles through your speakers,
beginning with the left-front. (If you do not hear the test signal, check your speaker connections (above),
and your <Speaker settings> OSD menu settings, (above.)
As the test signal cycles around the speakers, the OSD (and the VFL front panel display) will highlight the
currently playing channel. Now use the remote's [
/] keys to adjust the loudness of the noise output
from the currently playing channel to the required level (it’s usually simplest to begin with the left-front). The
"level offset" reading on the right will change by 1 dB increments; ±12 dB adjustment is available.
NOTE: If you are balancing levels "by ear", choose one speaker—usually the center—as a reference and
adjust each of the others in turn to "sound as loud" as the reference. Be sure that you remain in the primary
listening position while balancing all channels.
Using the remote's [
/] and [/] keys adjust each speaker to produce the same SPL meter reading
(or subjective loudness). Note that:
• All speakers must be in their final locations before level-setting.
• Your subwoofer (if any) should be set with its integral crossover defeated, or if undefeatable, set to its
highest-possible frequency if you are using the T 163's SUBWOOFER output. Final subwoofer-level
adjustment “by-ear,” using music and film sound material, is frequently useful.
• Due to the effects of room acoustics, matched-pair speakers (front; surround; back) will not always
calibrate to exactly the same level offset readings.
Your system's speaker distance settings are a subtle but important refinement of your setup. Informing the
T 163 of the loudspeaker-to-listener dimensions of each speaker automatically imposes the correct delays,
optimizing imaging, intelligibility, and surround-sound ambience. Enter your dimensions with precision within
about 1 foot (30 cm).
SETTING SPEAKER DISTSETTING SPEAKER DIST
SETTING SPEAKER DISTSETTING SPEAKER DIST
SETTING SPEAKER DIST
ANCEANCE
ANCEANCE
ANCE
From the OSD’s main <Setup> menu, select the <Speaker Distance> item using the remote's [/] and
[Enter] keys. Using the [
/] keys, set <Front> and <Center:> to the distance measuring from your
principal listening position to the front surface of the front and center loudspeakers. Using the same remote
keys, set <Surround> to the distance of the nearest surround-channel speaker.
NOTE: Distance can be displayed as feet or meters selectable by the <DISTANCE> item in the Speaker
Distance menu.
The T 163 allows for setting of special listening and system options. These are usually one-time options
settings and once set do not need to be changed.
Main/Zone DSP Decoding
From the OSD’s main <Setup> menu, select the DSP decoding options. There are two options, 5.1 and 7.1
decoding. With 7.1 decoding, the Zone output will be switched off.
Dolby Digital Surround EX Decoding
Select either Auto or On. If On is selected, the Surround EX decoding will be forced on thus Dolby Digital
5.1 will become 6.1 matrix.
DTS-ES Matrix
Select either Auto or On. If On is selected, the ES Matrix will be forced on thus DTS 5.1 will become 6.1
matrix.
BACKGROUND to “ON” or “OFF”
When “ON” is selected, on-screen menus will appear against a black background, obscuring the current
video program (if any), when “OFF” is selected menus will appear in white text superimposed upon the
current video program (if any).
TEMP OSD
TEMP OSD. When “ON” is selected, the temporary OSD such as volume, and speaker levels are displayed.
When “OFF” no temporary OSD will be displayed.
ABOUT THE ON-SCREEN DISPLAYS (OSD) AND FRONT-PANEL READOUT
SPEAKER DISTANCE
ADVANCED OPTIONS
CHANNEL-BALANCE (TEST) SETUPCHANNEL-BALANCE (TEST) SETUP
CHANNEL-BALANCE (TEST) SETUPCHANNEL-BALANCE (TEST) SETUP
CHANNEL-BALANCE (TEST) SETUP